Deploying a Space
In Part I you have learned about XAP’s capabilities as a data store. In this part of the tutorial we will show you how you can deploy an In Memory Data Grid (IMDG) that provides scalability and failover. GigaSpaces XAP can be used as a scalable application platform on which you can host your C# application, similar to JEE and web containers. However, GigaSpaces XAP’s IMDG can also be embedded within another C# application which is not hosted within the XAP platform. In this part of the tutorial we will show you how to start a data grid and how you can interact with it.
Getting started
To start an XAP data grid, run the following command:
GS_HOME\bin\gs-agent.exe
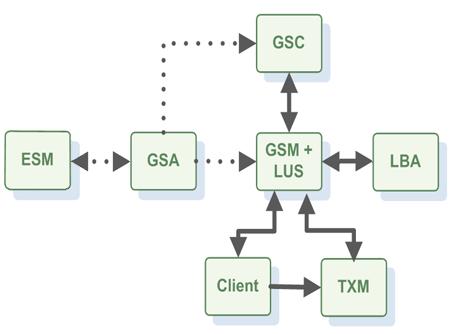
This will start all the infrastructure required to run the data grid. The following components are started:
Grid Service Manager (GSM) The Grid Service Manager is the component which manages the deployment and life cycle of the processing unit.
Grid Service Container (GSC) The Grid Service Container provides an isolated runtime for one (or more) processing unit instance and exposes its state to the GSM.
The Lookup Service (LUS) The Lookup Service provides a mechanism for services to discover each other. Each service can query the lookup service for other services, and register itself in the lookup service so other services may find it. For example, the GSM queries the LUS to find active GSCs.
Grid Service Agent (GSA) The GSA is a process manager that can spawn and manage service grid processes (Operating System level processes) such as the Grid Service Manager, The Grid Service Container, and The Lookup Service. Using the agent, you can bootstrap the entire data grid very easily, and start and stop additional GSCs, GSMs and lookup services at will. Usually, a single GSA is run per machine.
When you execute the gs-agent command above without any arguments, 1 GSA, 1 GSM, 1 LUS and 2 GSC’s will be started. The gs-agent command takes several different parameters as arguments.
Learn moreConnecting to a Data Grid
In order to create a data grid, you need to first deploy it onto the GigaSpaces infrastructure. It’s easy to write some code that connects to an existing data grid, or deploy a new one if the data grid does not exist. In the GigaSpace lingo, a data grid is called a Space, and a data grid node is called a Space Instance. The space is hosted within a Processing Unit (PU), which is the GigaSpaces unit of deployment.
There are several ways you can deploy a new Data Grid; by command line, with C# code embedded in your application and the admin UI. The following snippets shows how to deploy a data grid.
We want to deploy a data grid that has two primary partitions and one backup for each primary partition. Here is the gs command that you would execute to achieve this:
GS_HOME\bin\Gs-cli deploy-space -cluster schema=partitioned-sync2backup total_members=2,1 xapTutorialSpace
This command will start a space called xapTutorialSpace with two primary partitions and a backup for failover for each primary.
You can also deploy the space via C# code. Here is an example:
using System;

using GigaSpaces.Core.Admin.ServiceGrid;
using GigaSpaces.Core.Admin.ServiceGrid.Manager;
using GigaSpaces.Core.Admin.ServiceGrid.ProcessingUnit;
using GigaSpaces.Core.Admin.ServiceGrid.Space;
using GigaSpaces.Core.Exceptions;

public class IMDGService {

    String spaceName = "xapTutorialSpace";

    public void startDataGrid() {
        try {
            // create an admin instance to interact with the cluster
            IServiceGridAdmin admin = new ServiceGridAdminBuilder().CreateAdmin();

            // locate a grid service manager and deploy a partioned data grid
            // with 2 primaries and one backup for each primary
            IGridServiceManager mgr = admin.GridServiceManagers.WaitForAtLeastOne();

            IProcessingUnit pu = mgr.Deploy(new SpaceDeployment(spaceName).Partitioned(2, 1));

        } catch (Exception e) {
            // already deployed, do nothing
            Console.WriteLine(e.StackTrace);
        }
    }
}
Lets take our online payment system. We are expecting thousands or even millions of payments to be processed over time and we want to store them in the IMDG. For this scenario we would like to partition our space into multiple partitions with each having a backup partition and the primary partitions are hosted on different machines then the backup partitions.
Here is how you would configure your IMDG: Lets assume we have 4 machines available. On all machines we will start a GSA. The default gs-agent script will give us a total number of 8 GSC’s. We want to deploy 4 partitions each having a backup and there should only be one instance per machine.
GS_HOME\bin\Gs-cli deploy-space  -cluster schema=partitioned-sync2backup total_members=4,1
       -max-instances-per-machine 1 xapTutorialSpace
When the application write Payment objects into this space, XAP will use the routing information provided [SpaceRouting] by the Payment class to route the object to the right partition.
Interacting with the data Grid
Now we are ready to interact with the data grid. All the examples we explored in the first part of the tutorial can be used to interact with the IMDG.
If you have started the IMDG within your application, you would acquire the space like this:
ISpaceProxy spaceProxy = pu.WaitForSpace().SpaceProxy;
Here is an example how you can connect to the grid from your application:
String url ="jini://*/*/xapTutorialSpace";
// Create the Space
ISpaceProxy spaceProxy = GigaSpacesFactory.FindSpace(url);
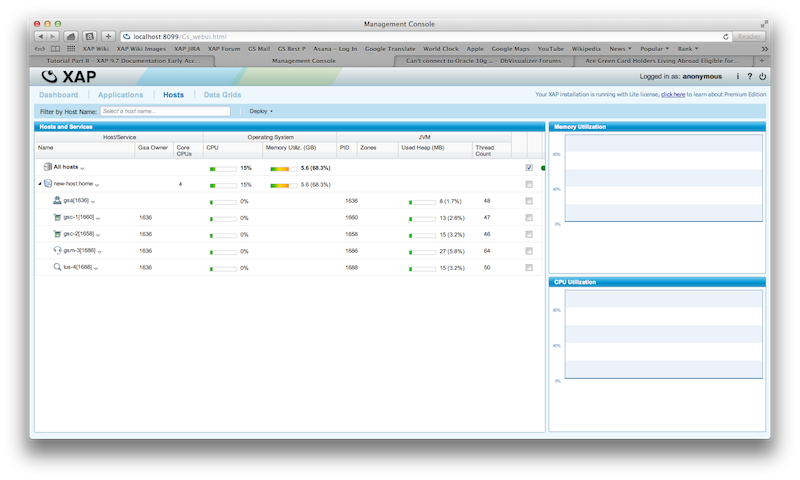
WEB Admin UI
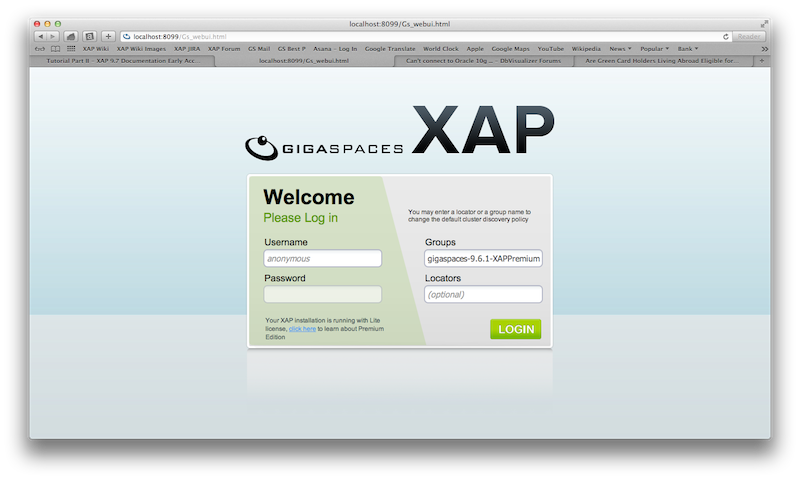
You can start XAP’s console and inspect the Data Grid components that have been started. In the XAP distribution you will find the command file to launch the console.
GS_HOME\bin\Gs-webui.exe
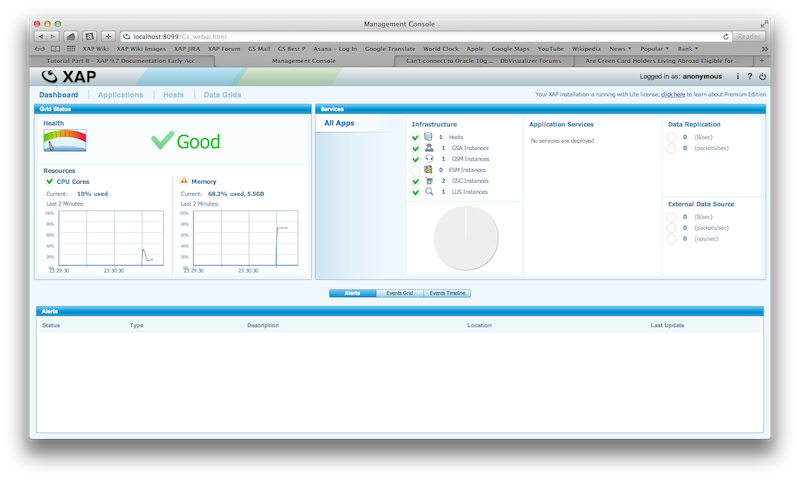
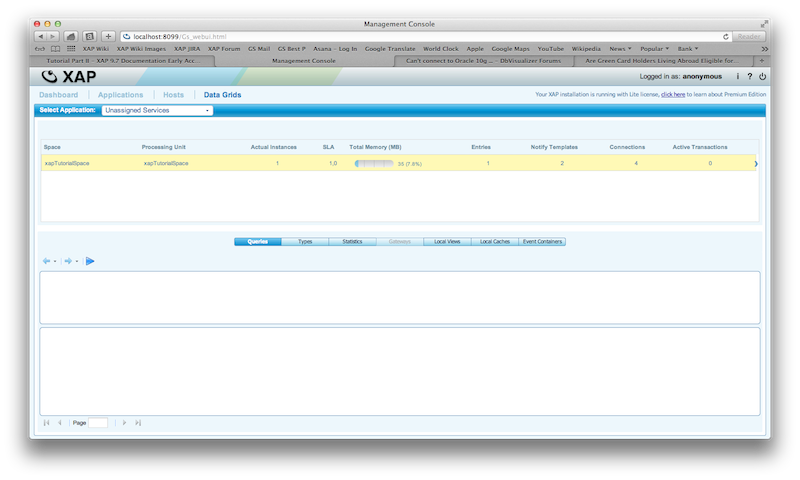
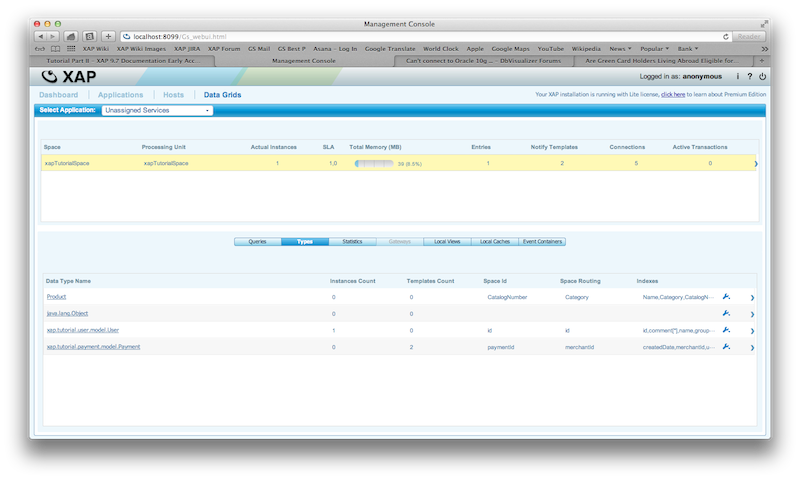
After you execute the above command, open a browser and go to http://your_host:8099 and the login screen for the admin application will open up. The following screen shots will demonstrate some of the UI features: (no username and password needed)
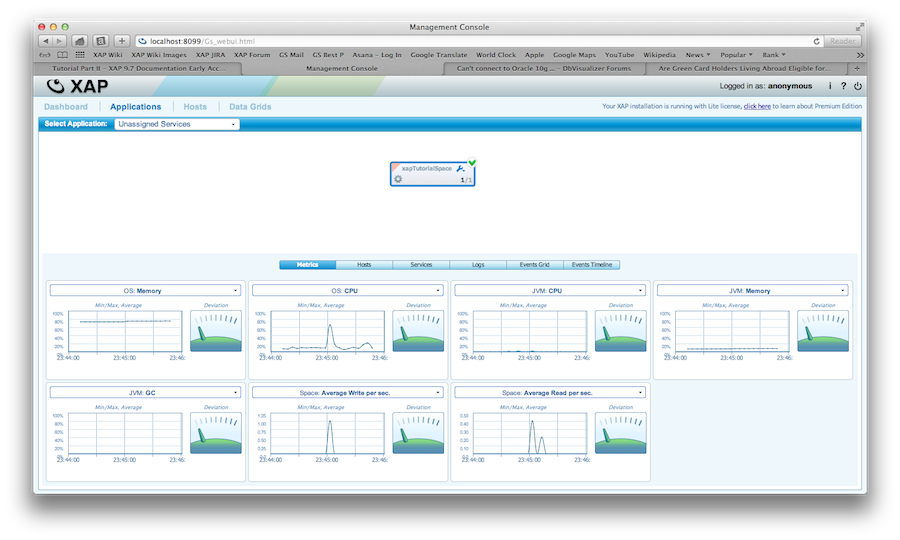

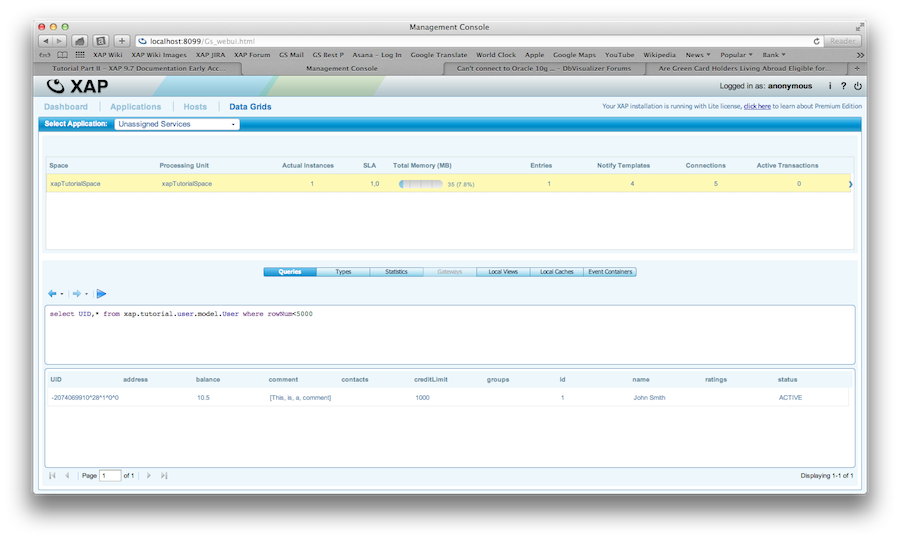
You can modify the query statement and query the space in realtime. Example : select UID,* from xap.tutorial.user.model.User where creditLimit > 100 and rowNum<5000
The Admin UI console has many more features which we will introduce you to throughout this tutorial.
Learn more