Puppet XAP Module
| Author | XAP Version | Last Updated | Reference | Download |
|---|---|---|---|---|
| Shay Hassidim | 9.6 | Feb 2014 |
Overview
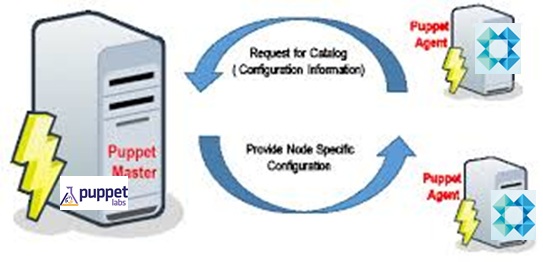
This pattern explains how to use Puppet to install and configure XAP. This XAP module for Puppet performs two main tasks:
Step 1: Install Gigaspaces XAP.
Step 2: Configure node with one or more XAP roles e.g. Management role, Container role and Web-ui role.
Preparing Development and Testing Environment
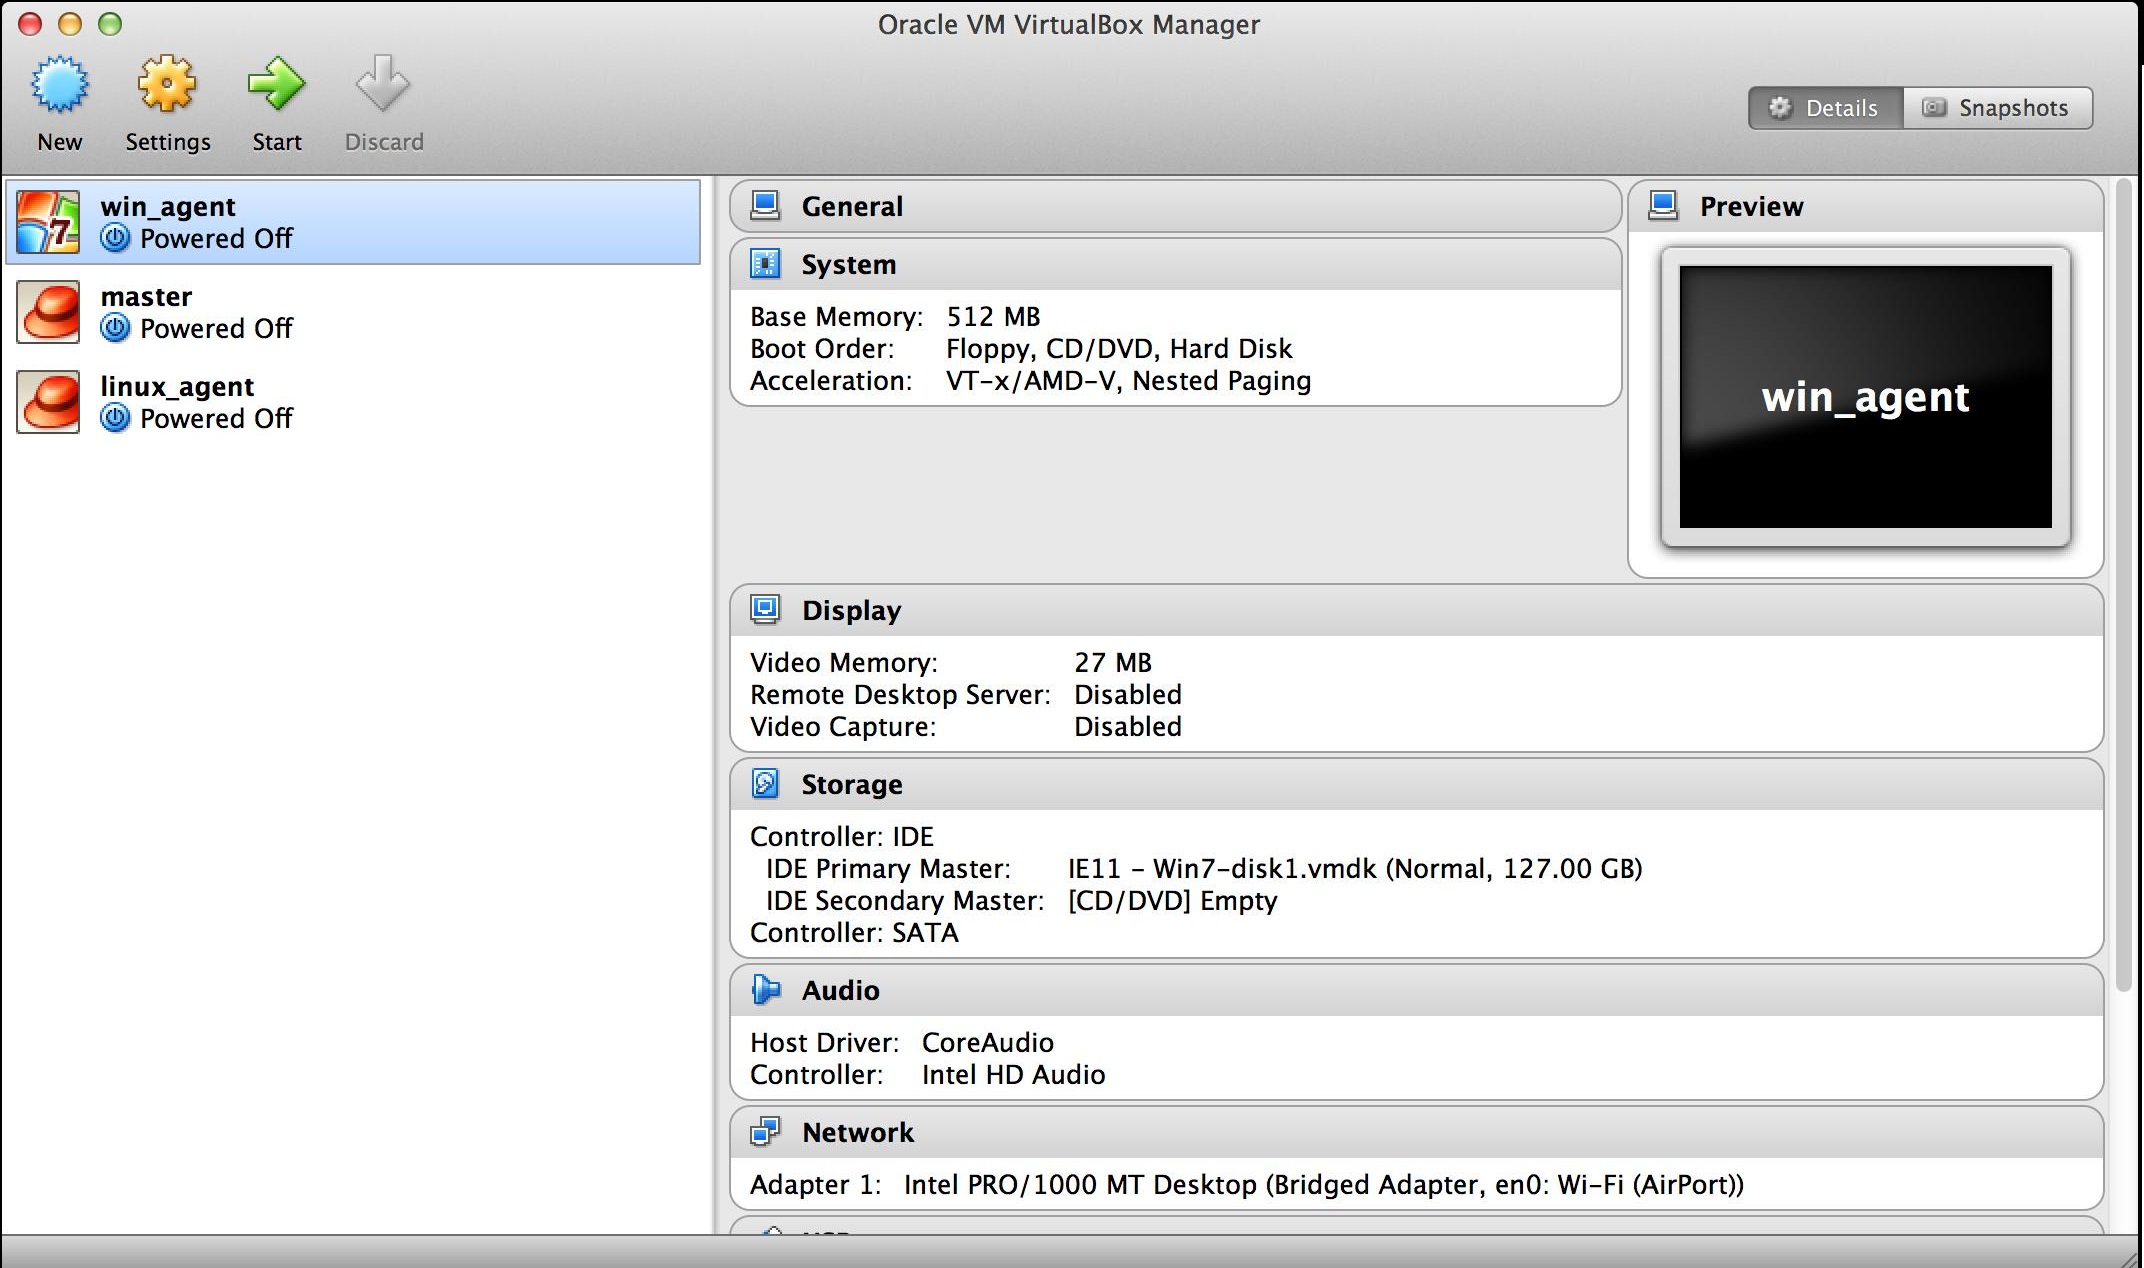
To simulate the IT network we have built 3 virtual machines with VirtuaBox.
Step 1: Download and install Virtual Box
Step 2: Download the learning puppet VM notify to download the OVF file. http://info.puppetlabs.com/download-learning-puppet-VM.html
After download is completed follow the instructions at Importing the VM into VirtualBox. When the import is complete successfully the puppet master is ready.
Step 3: To prepare puppet agent clone the puppet master and follow the instructions at Learning Puppet - Preparing an Agent VM.
Step 4: Create a new VM with windows 7 installation then download and puppet agent for windows and install it.
After completing the steps above your development and testing environment should consist of 3 virtual machines: - Centos Linux - puppet master - Centos Linux - puppet agent - Windows 7 - puppet agent for windows
Installing XAP module dependencies
XAP puppet module dependent on other puppet’s modules that should be installed:
- Connect to the master VM: ssh root@
Install all the required modules by running the following commands
- puppet module install biemond/jdk7
- puppet module install reidmv/windows_package
- puppet module install liamjbennett/windows_firewall
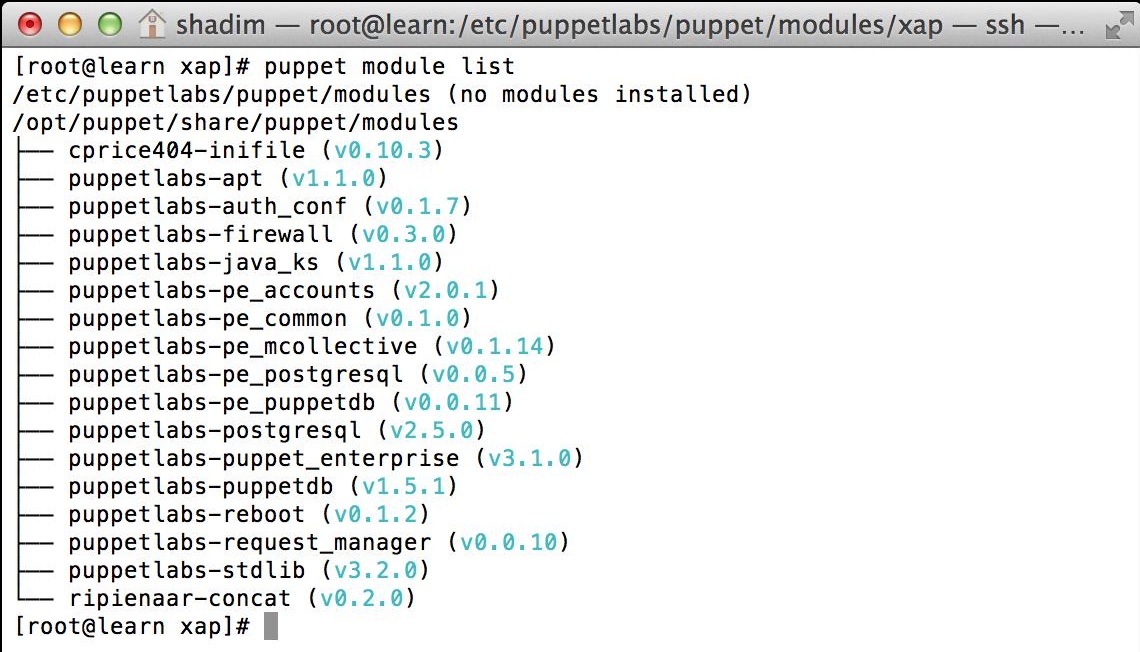
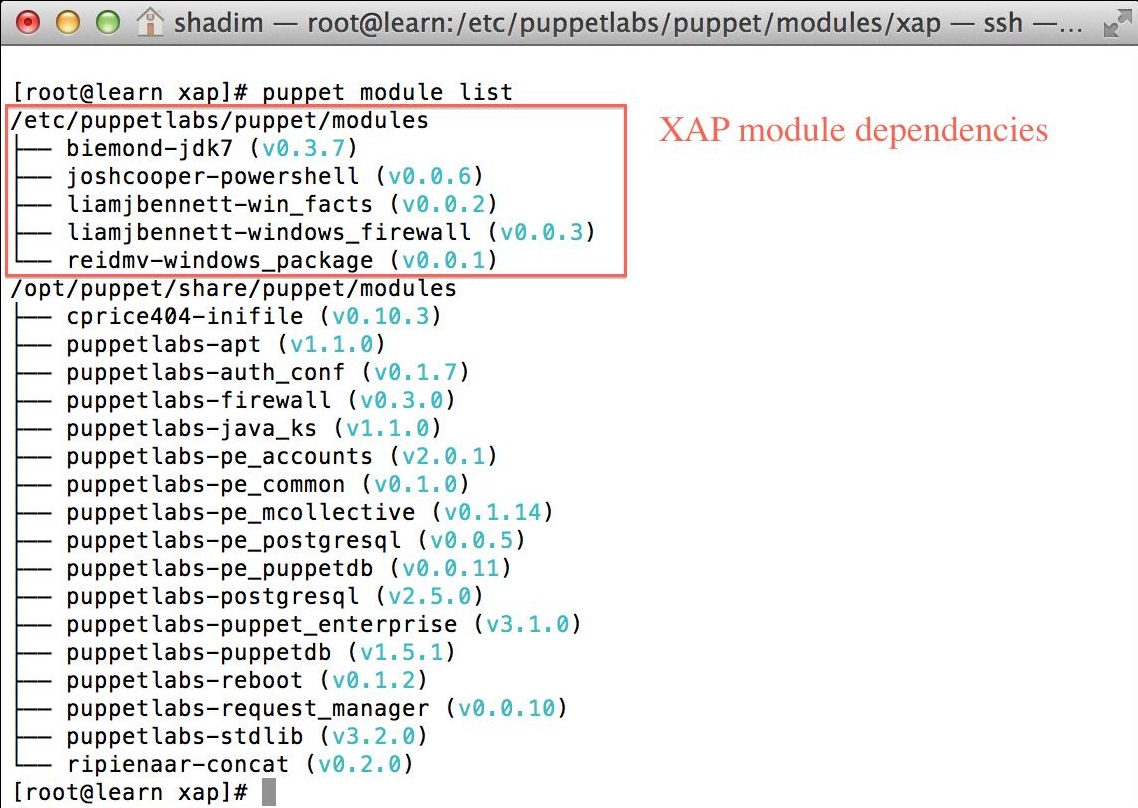
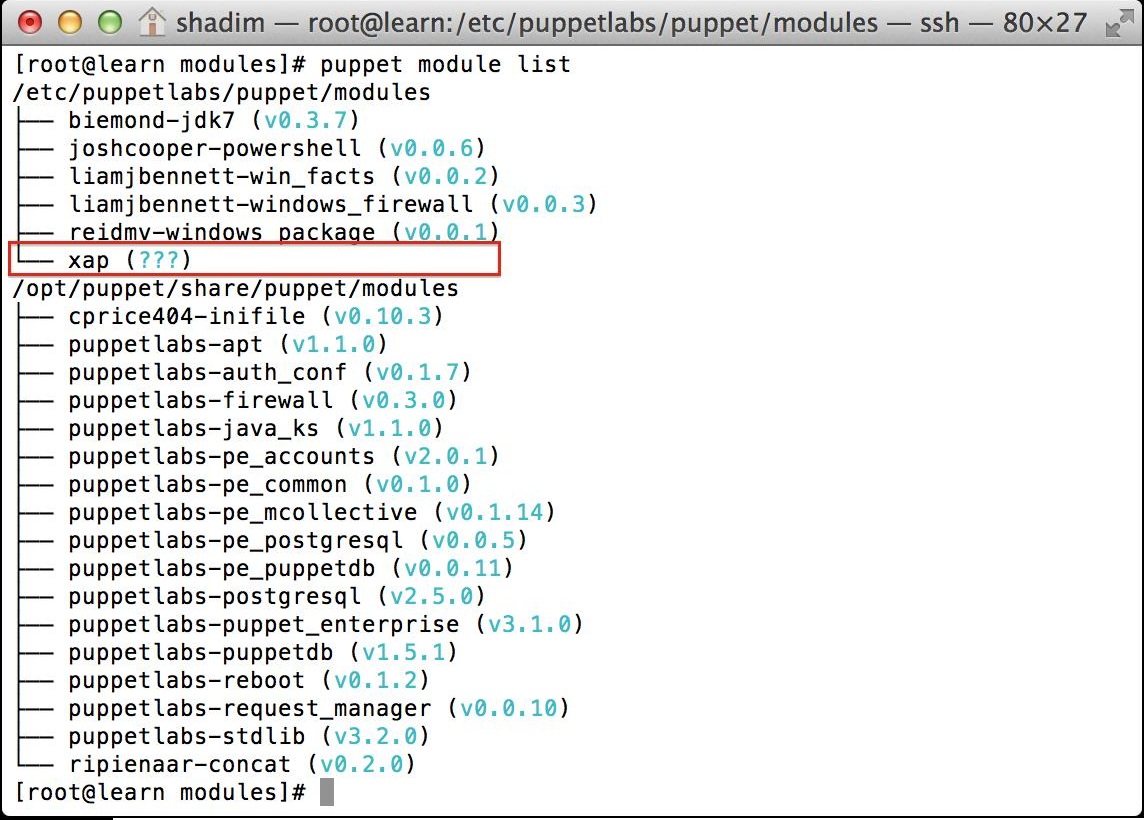
List the installed module again by running: puppet module list , and you expected to see the above module is installed.
Installing The XAP module
To install the XAP module copy XAP folder under the modules directory in your puppet labs installation.
- Navigate to your puppet labs configuration directory:
a. cd /etc/puppetlabs/puppet/modules/ and then Copy the xap directory under the modules directory
b. If you clone it from github:
cd /etc/puppetlabs/puppet/modules/
git clone https://github.com/Gigaspaces/xap-puppet.git
mv xap-puppet xap
- Run: puppet module list, to see the module:
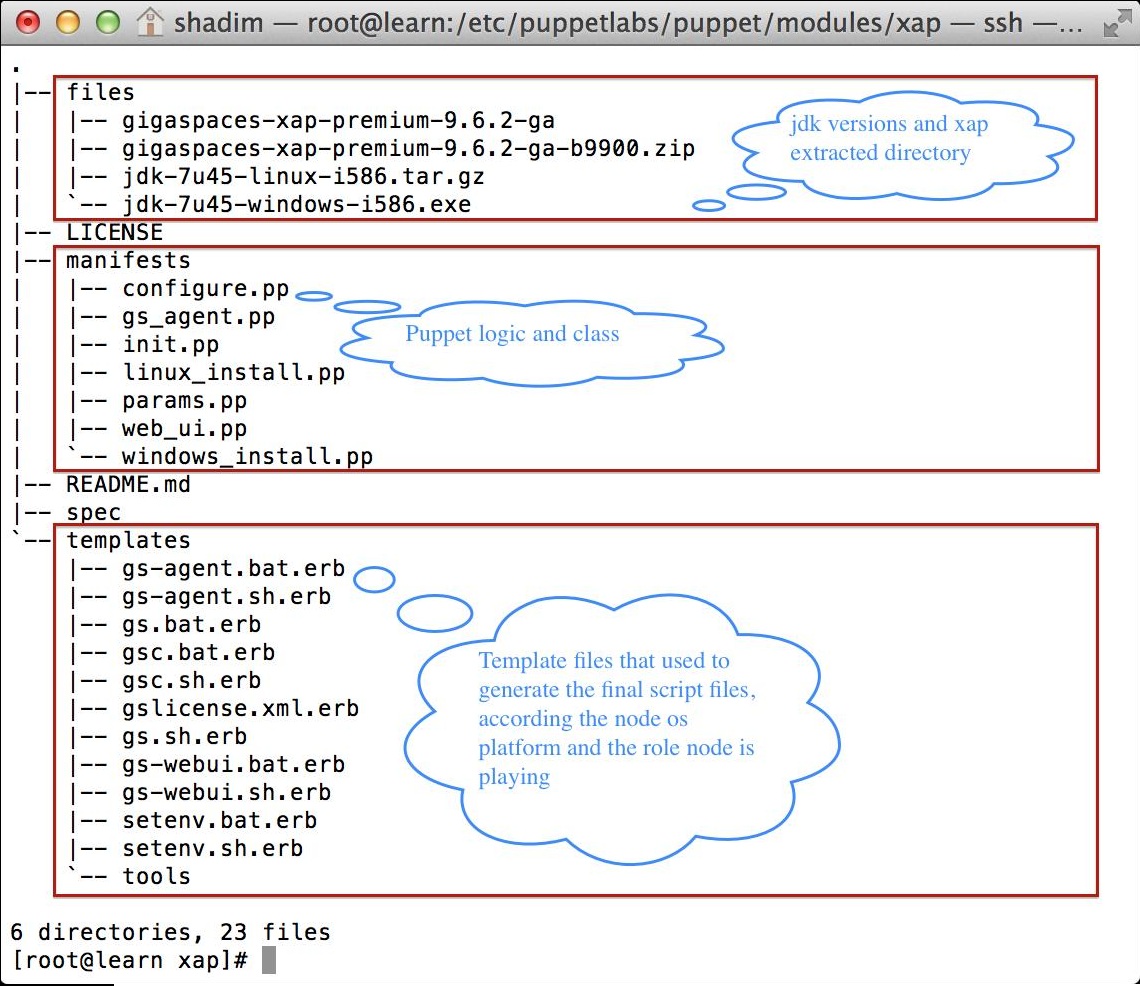
XAP Module Directory Layout
The directory layout and structure is a standard puppet module type: - files - include extracted XAP directory and all the JDK version according the nodes platform in your network - manifests - include all the logic and classed the module used - templates - include all the template files used to generate scripts at runtime when agent node request a configuration catalog
Module Classes and Roles
The init.pp is the entry point of any puppet module.
# base role to be extended
class xap{

  require xap::params
  # install JDK  regards OS
  case $kernel{
    'windows' : {
      xap::windows_install{'windows-xap-install':}
    }
    default : {
      xap::linux_install{'linux-xap-install':}
    }
  }

  #copy gigaspaces-xap dir to the target xap installation directoary
  file { "${xap::params::gigaspaces_xap_target}" :
    source  => "puppet:///modules/${module_name}/${xap::params::gigaspaces_xap_source}",
    recurse => true,
    ensure  => directory,
  } ~>
  #configure installation
  xap::configure{'configure xap environment':}


}
# manager role
class xap::manager  (
  $global_lus = 0,
  $lus        = 1,
  $global_gsm = 0,
  $gsm        = 1,
  $gsc        = 2,
) inherits xap {
  # run gs-agent
  xap::gs_agent{'xap_manager':
    name  => "manager_gsa_global_lus_${global_lus}_gsa_lus_${lus}_gsa_global_gsm_${global_gsm}_gsa_gsm_${gsm}_gsa_gsc_${gsc}",
    g_lus => $global_lus,
    l_lus => $lus,
    g_gsm => $global_gsm,
    l_gsm => $gsm,
    l_gsc => $gsc,
  }
}
# constainer role
class xap::container (
  $global_lus = 0,
  $lus        = 0,
  $global_gsm = 0,
  $gsm        = 0,
  $gsc        = 4,
)inherits xap {

  xap::gs_agent{'xap_container':
    name =>  "container_gsa_global_lus_${global_lus}_gsa_lus_${lus}_gsa_global_gsm_${global_gsm}_gsa_gsm_${gsm}_gsa_gsc_${gsc}",
    l_gsc  => $gsc,
  }
}
# web-ui role
class xap::webui inherits xap {

  xap::web_ui {"xap_webui":}
}
params.pp
The params.pp should include all the configuration. See example below:
class xap::params {

  $jdk_version = '7' # jdk version
  $jdk_update ='45'  # jdk update
  $jdk_home = "jdk1.${jdk_version}.0_${jdk_update}" # jdk home
  $jdk_arch = $hardwaremodel ? { # node 32bit or 64bit
    'i686'   => 'i586',
    default => 'x64',
  }

  $jdk_name="jdk-${jdk_version}u${jdk_update}-${kernel}-${jdk_arch}" # jdk file name

  $jdk_file = $kernel ? { # jdk file name with extension
    'windows' => "${jdk_name}.exe",
    default   => "${jdk_name}.tar.gz",
  }

  # XAP Installation parameters
  $gigaspaces_xap_source = 'gigaspaces-xap-premium-9.6.2-ga'

  $gigaspaces_xap_target = $kernel ? {
    'windows' => "c:/${gigaspaces_xap_source}",
    default   => "/opt/${gigaspaces_xap_source}",
  }

  # license configuration
  $license_target = "${gigaspaces_xap_target}/gslicense.xml"
  $license_key = 'Mar 21, 2114~usery$gigaspaces.com@cSdVRnXXXXXXXXXXX#EVALUATION^9.0XAPPremium%UNBOUND+UNLIMITED//WAN//EMT'

  #configure environment
  $extension = $kernel ? {
    'windows' => 'bat',
    default   => 'sh',
  }

  $config_dir = $kernel ? {
    'windows' => 'c:/gigaspaces',
    default   => '/opt/gigaspaces',
  }

  $gs_webui_war_file = "gs-webui-9.6.2-9900-RELEASE.war"

  #LOOKUPLOCATORS value
  $lookup_locators = '192.168.141.130'

  # LOOKUPGROUPS value
  $lookup_groups ="gigaspaces-9.6.2-XAPPremium-ga"

  # JAVA_VM_NAME value
  $java_vm_name = $kernel ? {
    default => 'ALL',
  }

  # JAVA_HOME value
  $java_home = $kernel ? {
    'windows' => "C:/Programs file/java/${jdk_home}",
    default => "/usr/java/${jdk_home}",
  }

  # configure firewall\
  $com_sun_jini_reggie_initialUnicastDiscoveryPort=4174
  $com_gs_transport_protocol_lrmi_bind_port_start=8000
  $com_gs_transport_protocol_lrmi_bind_port_end=8100
  $com_gigaspaces_system_registryPort=10098
  $com_gigaspaces_start_httpPort=9813
  $com_gs_webui_port=8099

  # configure System properties
  $com_gigaspaces_logger_RollingFileHandler_filename_pattern="${config_dir}/logs/"
  $com_gs_deploy="${config_dir}/deploy"
  $com_gs_work="${config_dir}/work"
  $com_gigaspaces_lib_platform_ext="${gigaspaces_xap_target}/lib/platform/ext"
  $com_gs_pu_common="${gigaspaces_xap_target}/lib/optional/pu-common"
  $com_gigaspaces_grid_gsa_config_directory="${gigaspaces_xap_target}/config/gsa"
  $java_util_logging_config_file="${gigaspaces_xap_target}/config/gs_logging.properties"
  $com_gs_transport_protocol_lrmi_bind_port="${com_gs_transport_protocol_lrmi_bind_port_start}-${com_gs_transport_protocol_lrmi_bind_port_end}"
$com_gs_transport_protocol_lrmi_max_conn_pool=1024
  $com_gs_transport_protocol_lrmi_max_threads=512
  #$com_sun_jini_reggie_initialUnicastDiscoveryPort=4174
  $com_gs_zones=''
  $com_gs_grid_secured=false

  # JAVA_OPTION
  $Xloggc = "${config_dir}/logs/gc.log"

  # GSC_JAVA_OPTIONS
  $Xms = '300m'
  $Xmx ='8g'
  $Xmn =''
  $XXCMSInitiatingOccupancyFraction = '60'
}
Site Configuration
There are three roles supported:
xap::manager role
xap::container role
xap::webui
To associate a node with a role edit the /etc/puppetlabs/puppet/manifests/site.pp and add for each node the target roles. Example:
## site.pp ##

# This file (/etc/puppetlabs/puppet/manifests/site.pp) is the main entry point
# used when an agent connects to a master and asks for an updated configuration.
#
# Global objects like filebuckets and resource defaults should go in this file,
# as should the default node definition. (The default node can be omitted
# if you use the console and don't define any other nodes in site.pp. See
# http://docs.puppetlabs.com/guides/language_guide.html#nodes for more on
# node definitions.)

## Active Configurations ##

# PRIMARY FILEBUCKET
# This configures puppet agent and puppet inspect to back up file contents when
# they run. The Puppet Enterprise console needs this to display file contents
# and differences.

# Define filebucket 'main':
filebucket { 'main':
  server => 'learn.localdomain',
  path   => false,
}

# Make filebucket 'main' the default backup location for all File resources:
File { backup => 'main' }

# DEFAULT NODE
# Node definitions in this file are merged with node data from the console. See
# http://docs.puppetlabs.com/guides/language_guide.html#nodes for more on
# node definitions.

# The default node definition matches any node lacking a more specific node
# definition. If there are no other nodes in this file, classes declared here
# will be included in every node's catalog, *in addition* to any classes
# specified in the console for that node.

node default {
  # This is where you can declare classes for all nodes.
  # Example:
  #   class { 'my_class': }
}
node 'agent1.localdomain' {
  include xap::manager
  include xap::webui
}

node 'win7-agent' {
  include xap::container
}