Hyperic integration
| Author | XAP Version | Last Updated | Reference | Download |
|---|---|---|---|---|
| Shay Hassidim | Feb 2014 |
Overview
Hyperic is a global monitoring system and this page describes a quick GigaSpaces integration that I made during a consulting session. The plugin uses the GigaSpaces Admin API to perform the monitoring of a global system. The plugin is offered as open source as part of OpenSpaces community.
Installation
As the GigaSpaces plugin uses the Administration and Monitoring API (a.k.a. Admin API) a single Hyperic agent will be used to monitor the whole cluster. Indeed GigaSpaces is a very dynamic platform and a classical Hyperic installation based on an agent monitoring the processes on his physical (or virtual) machine won’t work well, a given processing unit could be unavailable on a machine because the GSM decided to deploy it somewhere else.
In order to use the plugin on an hyperic agent you have to prepare this agent to be ‘GigaSpaces ready’.
- Copy the GigaSpaces required jar files (JSHOMEDIR/lib/required) to the following agent folder: agent-4.6/bundles/agent-4.6/pdk/lib/gs (you’ll have to create the gs folder).
- Upgrade the agent JVM to a 1.6 version
- Restart the agent
- Connect to the Hyperic server console with admin account and go to the plugin manager. Install the GigaSpaces plugin (hyperic-gs-plugin.jar)
Usage
Create a platform
In order to use the plugin you’ll have to configure a GigaSpaces platform. Indeed as a correct defined GigaSpaces cluster discovery relies on lookup groups and/or lookup locators the plugin won’t be able to auto-discover your infrastructure without these parameters.
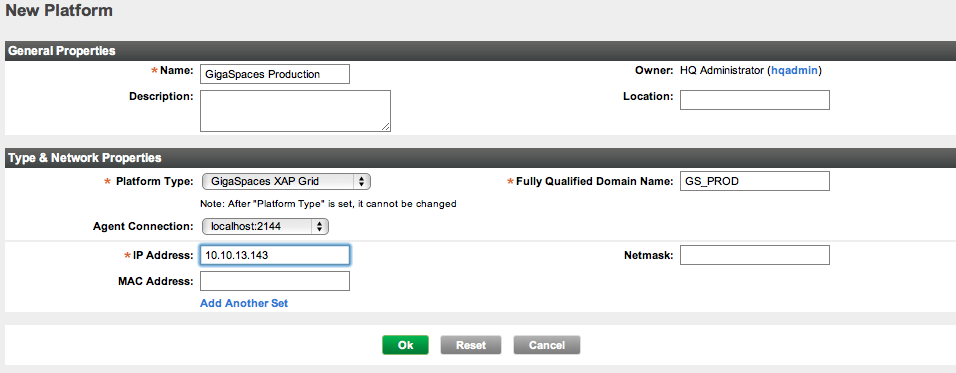
On the hyperic new platform page select
- The platform type to be GigaSpaces XAP Grid.
- In Agent Connection select the agent that you prepared for GigaSpaces monitoring (Cf. Installation).
- IP Address is not used by the plugin, Hyperic requires a valid one however so you can put any address (the one of the hyperic server if you like).
Configure the platform
Once the platform is created you should be able to configure it:
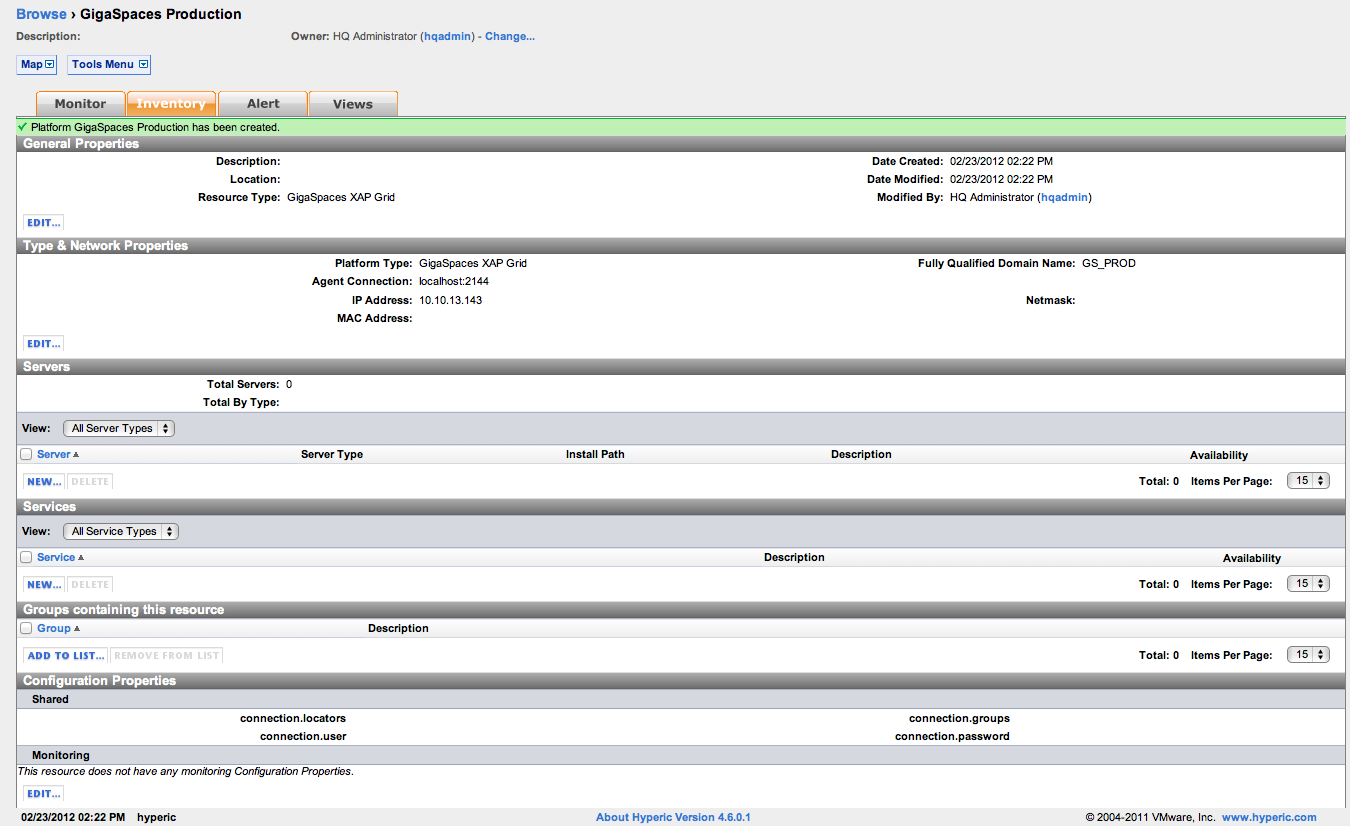
Click on the Edit button in the Configuration Properties panel.
Configure your locators, groups and monitoring user details (if GigaSpaces security is enabled).
Click on OK, the plugin should auto discover the GigaSpaces services (GSAs, GSMs, GSCs, Pus and Spaces).
Note that Hyperic Autodiscovery of services etc run daily only so if you deploy a new pu and want it to appear you should repeat the configuration step (without changing values) to trigger a new auto discovery.
_The plugin is currently delivering some very basic features and has to be improved in the future to cover more monitoring information.
Building the plugin
If you wish to enhance the plugin, fix bugs or just review the source code, you can download the source code from GigaSpaces Solutions and Patterns GitHub repository and build it yourself. Plugin package uses maven but requires a few Hyperic artifacts that are not available in public repositories. In order to build the plugin you’ll first have to add them to your repository:
- Run the following commands:
- mvn install:install-file -Dfile=$PATH_TO_AGENT_HOME_DIR/bundles/agent-4.6/lib/hq-agent-core-4.6.jar -DgroupId=org.hyperic.hq.agent -DartifactId=hq-agent-core -Dversion=4.6 -Dpackaging=jar
- mvn install:install-file -Dfile=$PATH_TO_AGENT_HOME_DIR/bundles/agent-4.6/pdk/lib/hq-pdk-4.6.jar -DgroupId=org.hyperic.hq -DartifactId=hq-pdk -Dversion=4.6 -Dpackaging=jar
- mvn install:install-file -Dfile=$PATH_TO_AGENT_HOME_DIR/bundles/agent-4.6/pdk/lib/hq-util-4.6.jar -DgroupId=org.hyperic.hq -DartifactId=hq-util -Dversion=4.6 -Dpackaging=jar
- mvn install:install-file -Dfile=$PATH_TO_AGENT_HOME_DIR/bundles/agent-4.6/pdk/lib/hq-common-4.6.jar -DgroupId=org.hyperic.hq -DartifactId=hq-common -Dversion=4.6 -Dpackaging=jar
Now you should be able to build the plugin using maven (mvn install).