Excel Space Viewer
Overview
The Excel space viewer allows you to create customized views of data for spaces running in your network, and to configure existing views. The displayed data is constantly updated in the Excel spreadsheet.
Links:
- Using the Excel Space Viewer – allows you to connect to a Space, create and customize a new and existing views
- Prerequisites – prerequisites
- Supported Office Versions – a list of the Supported Office Versions
- Installing the Excel Space Viewer – running the installing of the Excel Space Viewer
- Troubleshooting – troubleshooting
Using Excel Space Viewer
The Excel Space Viewer allows you to create views of data to a certain space class. The generated view is a tabular representation of the displayable class fields, numeric and textual types. In the view, each class field is represented by a column, and each row in this column represents an instance of the class.
Field values that are not of a numerical, textual or dates will not be displayed. This includes collections, arrays, user defined types or any other complex objects.
It is possible to create several views in the same spreadsheet. All views can display data for the same space, or for different spaces. If you are displaying data for a different space, you need to connect to that space before creating an additional view. The Space Viewer toolbar includes the following options:
- Create View – allows you to create and customize a new view
- Configure View – allows you to edit and customize existing views
- Refresh results – refreshes the view or views with updated data

Creating New View
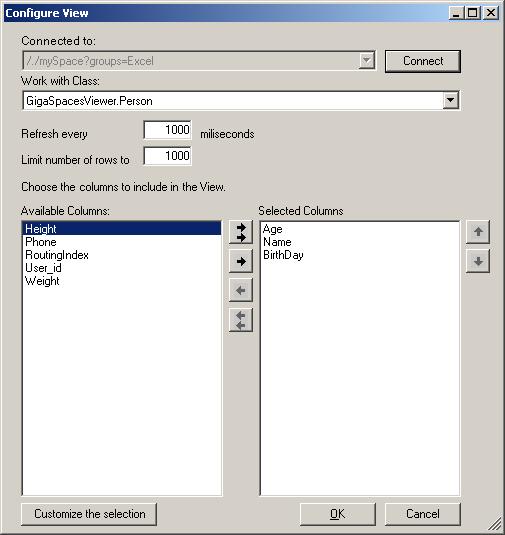
The Create View option allows you to create a view of space data inside your Excel spreadsheet, and to customize your selection according to your requirements.
- The Connected to drop-down menu displays the space URL of the space you are currently connected to.
- The Work with Class drop-down menu allows you to select which space class you would like to view.
- The Available Columns area lists all fields in this class.
- The Undisplayable Columns area lists fields that belong to this class, but can’t be displayed in Excel (usually user-defined fields).
- The Selected Columns area displays the fields you choose to display in this view. Use the arrow buttons (for example:
 ) to move columns back and forth. The buttons with two arrows (for example: ) move all of the columns from one area to the other. The up and down arrows on the right (for example: ) to move columns back and forth. The buttons with two arrows (for example: ) move all of the columns from one area to the other. The up and down arrows on the right (for example: ) allow you to organize the fields in the order in which they will appear in the final view.
- It is possible to connect to any running space in your network.
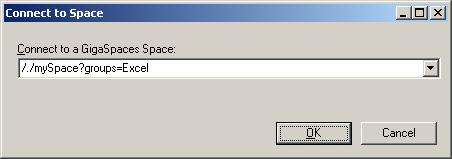
To connect to a space:
- Click the Connect button.
- In the Connect to Space dialog box, type the space URL. The general format of the space URL is:
<protocol>://<host name>:<port>/<container name>/<space name>?<properties>
- The Customize the Selection button opens the Customize the Selection window.
To create a new view:
- Click the Create View option in the Space Viewer toolbar. The Create View window is opened.
- Make sure you are connected to a space.
- Use the arrow buttons ( ) to move columns from the Available Columns area to the Selected Columns area.
- If you want to narrow your view to more specific results (by querying your class fields), click the Customize the Selection button (see Customize the Selection).
This step is optional. If you want to generate the view with all the existing entries of the selected type in the space, proceed to the next step. 1. On the left side of the Customize the Selection window, click the class field you want to query. (For example, the Age field is selected below.)
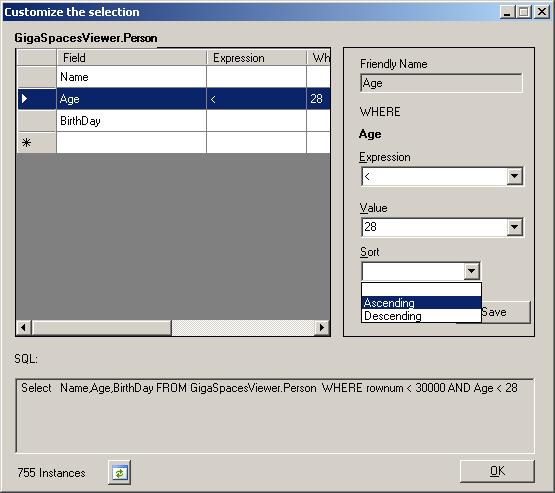
2. The selected field appears on the right, under **WHERE**. You can now select the desired expression and value, and choose to sort your results in an ascending or descending manner.
3. When you've finished selecting, press **Save**.
4. Your query syntax is shown in the **SQL** area. Under the **SQL** box, the number of instances (the query's result) is displayed.
5. Repeat steps 1-4 for any additional fields you'd like to query.
6. Click **OK**.
- In the Create View window, Click OK.
- Your selection is displayed in the spreadsheet:
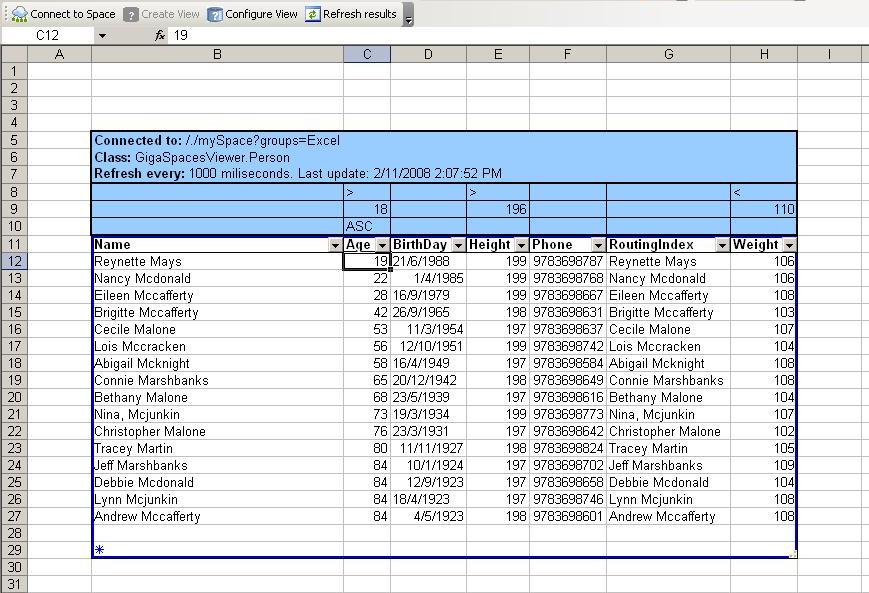
This view displays the selections you made in the Create View and Customize the Selection windows. The view is constantly refreshed (according to the last refresh rate you defined.).
You can use all Excel capabilities on this list, such as column sorting and list. However, column sorting is not saved when you update your view.
Customize the Selection
The Customize the Selection window allows you to perform queries on a certain field, and thus narrows the final view that is displayed in your workbook.
The top left pane is listing all the class fields. At the top of this list is the class name (in the example below: GigaSpacesViewer.Person). By clicking a field, the top right pane is enabled with customization options for that field.
- The WHERE statement is displayed, under which is the name of the selected field in bold.
- The Expression drop-down menu allows you to select the expression for this query (such as larger than, equals to for integer fields; and like for string fields).
- The Value drop-down menu allows you to select the value for your query.
- The Sort drop-down menu defines if this column will be displayed in an ascending or descending manner.
Pressing Save saves the query for this field.
The SQL area at the bottom displays the query syntax in SQL. After pressing Save on the right, the number of instances found as a result of this query is displayed under the SQL area (this is also the number of rows that will appear in this column). You can refresh this result using the refresh button (  ).
).
Changing Existing View
The Configure View option allows you to make changes to existing views. If you have a few views in the same spreadsheet, click anywhere in the relevant view and then click Configure View.
The Configure View window already includes your previously selected options, and you are free to change them as you like.
Installation
Prerequisites
Before you begin, make sure the following are installed:
GigaSpaces 6.5 GA. .Net product is unzipped. JSHOMEDIR is configured. For more details see Installing GigaSpaces section.
A JDK 1.5
The .NET Framework
Microsoft Office 2003
Supported Office Versions
The Excel Space Viewer has been tested with the following editions of Microsoft Office 2003:
- Microsoft Office Small Business Edition 2003
Installing the Excel Space Viewer
To install and run the Excel space viewer:
- Download the Excel Space Viewer Installation file and extract it.
Run the
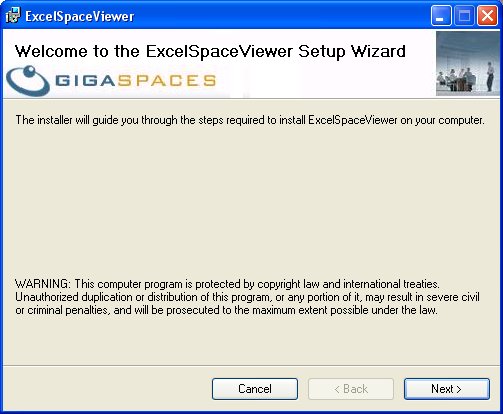
GigaSpacesViewerSetup.msifile. If the .NET Framework is not installed on your machine, the system opens a dialog asking whether you want to install it. In this case, select Yes and proceed with the installation. After you finish installing, reopen theGigaSpacesViewerSetup.msifile and continue the procedure below.The Excel Space Viewer Setup Wizard is displayed:
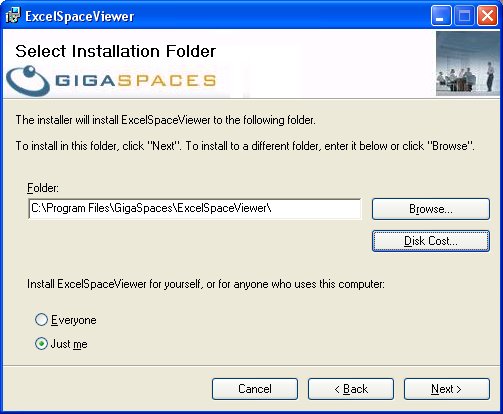
- In the Select Installation Folder window, browse to the desired installation folder. Choose whether you want the Excel Space Viewer to be used by you only, or by other users:
- In the Confirm Installation window, click Next.
- Wait for the installation to complete and click Next, then click Close.
- Open Excel.
- A new toolbar appears in the top left:

Troubleshooting
Space Viewer toolbar does not show up in Excel
Problem
The Excel Space Viewer is installed on a laptop PC. It is working OK but after a few days, the Space Viewer toolbar does not appear in Excel.
Running the installation file (GigaSpacesViewerSetup.msi) and selecting Add/Remove/Repair works fine, but the toolbar still doesn’t show up in Excel.
- Operating system – Microsoft Windows XP Professional, Version - 5.1.2600 Service Pack 2 Build 2600
- Office version – Microsoft Office Small Business Edition 2003, Office version: 11.0.8169
Solution
- Open Excel
- Click Help > About Excel > Disabled Items
- Highlight the mscorlib.dll item and click Enable