Your First Data Grid
This topic helps you get started with the GigaSpaces data grid. You will learn how to create a project that includes a client and a Space![]() Where GigaSpaces data is stored. It is the logical cache that holds data objects in memory and might also hold them in layered in tiering. Data is hosted from multiple SoRs, consolidated as a unified data model.. The client connects to the Space, or data grid, with the ability to write and read data. You will also learn how to connect your client to a different Space in order to write and read data.
Where GigaSpaces data is stored. It is the logical cache that holds data objects in memory and might also hold them in layered in tiering. Data is hosted from multiple SoRs, consolidated as a unified data model.. The client connects to the Space, or data grid, with the ability to write and read data. You will also learn how to connect your client to a different Space in order to write and read data.
For Kubernetes![]() An open-source container orchestration system for automating software deployment, scaling, and management of containerized applications., Docker images first need to be created. For more information see Creating a Docker image.
An open-source container orchestration system for automating software deployment, scaling, and management of containerized applications., Docker images first need to be created. For more information see Creating a Docker image.
Installing the GigaSpaces Product
If you haven’t done so yet, download and unzip the software package in your preferred location, and apply the license key.
For more detailed instructions, see the Downloading and Installing and Product License topics in this section.
Interactive Shell
GigaSpaces products are packaged with an interactive shell that lists the available commands when it is launched.
To start the interactive shell:
- Open a command window from the <GS_HOME>/bin folder and type gs.{sh/bat} to launch the script.
After you launch the script, run the version command to try out the shell. This command prints version information, which you can use to verify that you are running the correct version.
Project Blueprints
GigaSpaces products come packaged with a set of blueprints that can be used to create projects. These blueprints can be generated via the interactive shell. To see information about available blueprints and related commands, type the following:
blueprint- displays a list of available blueprints. Java project templating framework provided by DIH for developers, a bueprint, or class, contains a set of attributes and behaviors that define an object. list
blueprint- displays a list of available blueprint commands.
Creating a Project
When you create a project, the blueprint leads you through an interactive work flow where you define a number of options as you create your configuration. Using only the default options in the work flow creates a client application that is configured to use the Space that is generated with it.
When you first begin to generate a blueprint-based project, you can give the project a name. We skip this in the example.
To create a project:
-
Type
blueprint generate. This begins the configuration work flow. This lets you choose a blueprint and will create a project for you that you can continue to develop, build, and deploy. - A list of available blueprints is displayed. Press Enter to select the default value (1=client). You can start a demo space with 2 primaries and backup per each, using the demo cmd /gs.sh demo, then you can interact with the space in the java main client as the example in the client blueprint test.
- The next step is configuring the target path (folder name and location) for the client application files. Press Enter to select the default value (my-client in the product package bin folder).
- The client blueprint supports customizing several additional properties, but for now you should use the default values. Press Enter to skip the additional configuration.
-
The project is created, and the target path is displayed. You are prompted to open the project in your default file explorer.
Generated project from client at <GS_HOME>\bin\my-client1
Would you like to open it in file explorer? [y]:
Press Enter to view the project files.
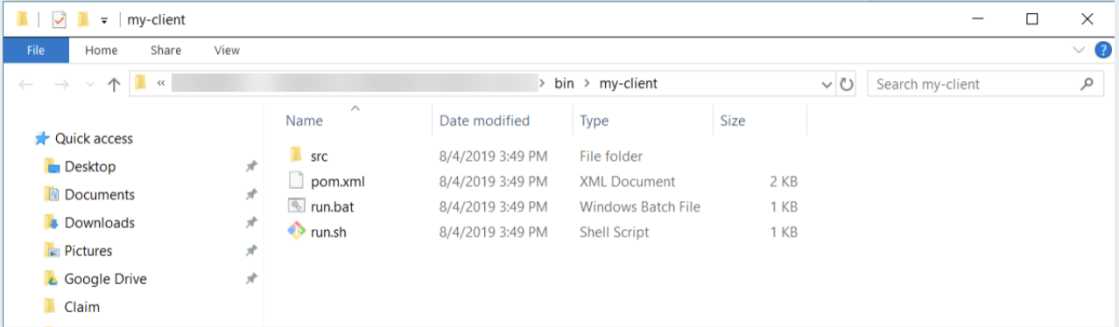
Project Structure
The project that is created by the client blueprint has the following structure:

Where:
- pom.xml - a standard Maven project descriptor that contains a single Maven dependency on
xap-openspace. - Program.java - a simple Java program with a
mainmethod that demonstrates how to connect to an existing Space or how to create an embedded Space. - employees.csv - a test resource file with sample data.
- Employee.java - a POJO Plain Old Java Object.
A regular Java object with no special restrictions other than those forced by the Java Language Specification and does not require any classpath. file that contains the employee data model.
- SpaceTestCase.java - a unit test that loads employee data from the resource file, writes the data to the Space, and performs various Space operations.
For more information about using Maven with GigaSpaces products, see Maven Artifacts.
Building and Running the Project
From the Command Line
To build the project:
-
Open a shell from the my-client folder.
-
Run the following command to build the project and run the test (as shown in the shell output). The test demonstrates how to write data to the grid, and how to read from the data grid.
mvn package
In Your Development Environment
You can open any standard Java IDE![]() Integrated Development Environment.
A software application that helps programmers develop software code efficiently. It increases developer productivity by combining capabilities such as software editing, building, testing, and packaging in an easy-to-use application. Example: DBeaver. (for example, Eclipse or IntelliJ IDEA) and import the project using the pom.xml file. After the project is imported, you can run or debug it, and experiment with changing the test to become more familiar with the Space API.
Integrated Development Environment.
A software application that helps programmers develop software code efficiently. It increases developer productivity by combining capabilities such as software editing, building, testing, and packaging in an easy-to-use application. Example: DBeaver. (for example, Eclipse or IntelliJ IDEA) and import the project using the pom.xml file. After the project is imported, you can run or debug it, and experiment with changing the test to become more familiar with the Space API.
Starting a Whole Cluster
This explains how to install and run GigaSpaces on a cluster.
Your cluster should consist of one master node and several slave nodes for the following configuration:
- Master nodes usually host the Spark master and the GigaSpaces Manager (for data grid management)
- Slave nodes host the Spark workers and data grid cluster members (Processing Unit This is the unit of packaging and deployment in the GigaSpaces Data Grid, and is essentially the main GigaSpaces service. The Processing Unit (PU) itself is typically deployed onto the Service Grid. When a Processing Unit is deployed, a Processing Unit instance is the actual runtime entity. instances)
There are several environment variables that must be set in order for your GigaSpaces cluster to function correctly. The environment variables are located in the $GS_HOME/bin/setenv-overrides.sh/bat file, and can be configured as described in the Configuration page of the Getting Started guide.
-
GS_MANAGER_SERVERS- Must be configured on each machine and is required for the master node, which starts the GigaSpaces Manager along with Apache Zookeeper Apache Zookeeper. An open-source server for highly reliable distributed coordination of cloud applications. It provides a centralized service for providing configuration information, naming, synchronization and group services over large clusters in distributed systems. The goal is to make these systems easier to manage with improved, more reliable propagation of changes. for high availability. See the the Manager page for more information. -
GS_LOOKUP_GROUPS- This property is used to discover GigaSpaces components across the network. -
GS_GSC- Set this value based on the size of the JVMs that will host the Processing Unit instances. For example, you can configure the amount of memory required as Grid Service Container.
This provides an isolated runtime for one (or more) processing unit (PU) instance and exposes its state to the GSM._OPTIONS-Xmx5g -Xms5g.
Starting a Cluster Locally
The run-agent command automatically resolves which service to run on the current host.
The resolution is based on the GS_MANAGER_SERVERS environment variable, but when undefined it will use localhost as the server IP.
$GS_HOME/bin/gs.sh host run-agent --auto
This command will run a GigaSpaces Manager, Web Management Console, Spark master, Spark worker and the Zeppelin interpreter.
REST![]() REpresentational State Transfer. Application Programming Interface
An API, or application programming interface, is a set of rules that define how applications or devices can connect to and communicate with each other. A REST API is an API that conforms to the design principles of the REST, or representational state transfer architectural style. URL - http://localhost:8090
Web Management Console - http://localhost:8099
REpresentational State Transfer. Application Programming Interface
An API, or application programming interface, is a set of rules that define how applications or devices can connect to and communicate with each other. A REST API is an API that conforms to the design principles of the REST, or representational state transfer architectural style. URL - http://localhost:8090
Web Management Console - http://localhost:8099
Deploying an Empty Space
#   topology 2,1 starts 2 primary partitions with 1 backup partition for each primary
$GS_HOME/bin/gs.sh space deploy --partitions=2 --ha space
Connecting Your Application to an Existing Space
Starting a Service Grid
A data grid in a local environment is hosted on a service grid. The service grid is comprised of one or more machines (service grid nodes) running a Grid Service Agent (or GSA![]() Grid Service Agent.
This is a process manager that can spawn and manage Service Grid processes (Operating System level processes) such as The Grid Service Manager, The Grid Service Container, and The Lookup Service. Typically, the GSA is started with the hosting machine's startup. Using the agent, you can bootstrap the entire cluster very easily, and start and stop additional GSCs, GSMs and lookup services at will.), and provides a framework to deploy and monitor applications on the data grid.
Grid Service Agent.
This is a process manager that can spawn and manage Service Grid processes (Operating System level processes) such as The Grid Service Manager, The Grid Service Container, and The Lookup Service. Typically, the GSA is started with the hosting machine's startup. Using the agent, you can bootstrap the entire cluster very easily, and start and stop additional GSCs, GSMs and lookup services at will.), and provides a framework to deploy and monitor applications on the data grid.
To start the service grid:
-
To start a service grid with 4 containers, navigate to <GS_HOME>/bin and run the following command:
<GS_HOME>/bin/gs.sh host run-agent --auto --gsc=4<GS_HOME>/bin/gs host run-agent --auto --gsc=4
In a single server environment that is meant to be accessed remotely, instead of using --auto (which starts the manager automatically using the localhost network interface) --manager is used to start a manager.
Deploying the Data Grid
After you launch a service grid, you can deploy a data grid and begin to use it.
To deploy the data grid:
-
Open a command window, navigate to <GS_HOME>/bin, and run the following command:
<GS_HOME>/bin/gs.sh space deploy --partitions=2 --ha myGrid<GS_HOME>/bin/gs space deploy --partitions=2 --ha myGridThis command deploys a data grid (aka Space) called myGrid with 2 partitions and 1 backup per partition.
Interacting with the Data Grid
After the data grid has been deployed, you can run your project again. To connect to the existing Space, change the default Space name to the name of the Space you just created.
To run the project again:
- Navigate to my-client and type the following in the command line:
./run.sh myGrid
.\run myGrid