SpaceDeck – Data Pipeline – Create New Pipeline for Batch Load
Data Pipelines allow a convenient, no-code method to pipe data from the System of Record to the GigaSpaces in-memory data grid.
A new data pipeline definition will include the definitions of the System of Record databases, tables and fields that will provide data to the pipeline. The definition also indicates the in-memory Space that will receive the pipeline data.
Additional information includes optional validation rules and automatic conversion of specified field definitions.
Refer to Batch Load for a detailed overview.
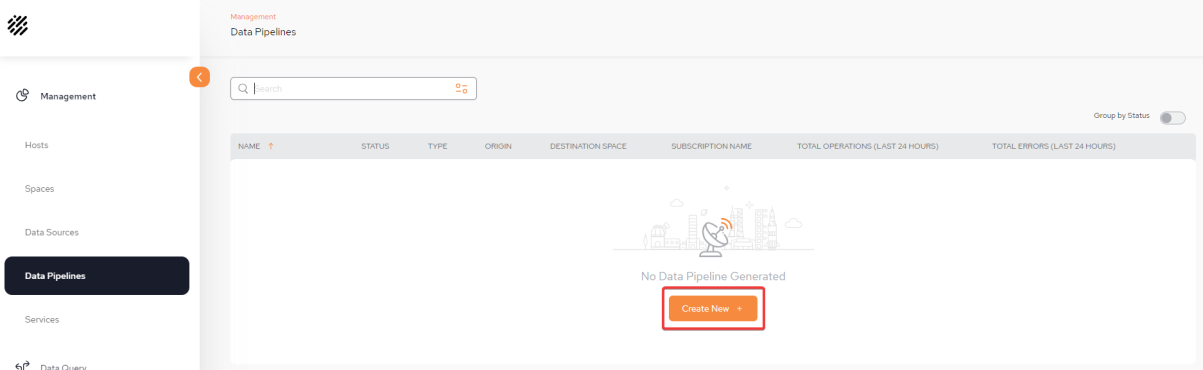
Display the Configuration screen
From the Data Pipeline![]() A series of data processing steps, including extraction, transformation, and loading (ETL), that move data from its source to a destination system. Data pipelines are essential for integrating and managing data flows. main screen, click Create New + to begin defining your first pipeline.
A series of data processing steps, including extraction, transformation, and loading (ETL), that move data from its source to a destination system. Data pipelines are essential for integrating and managing data flows. main screen, click Create New + to begin defining your first pipeline.
Basic Pipeline Information
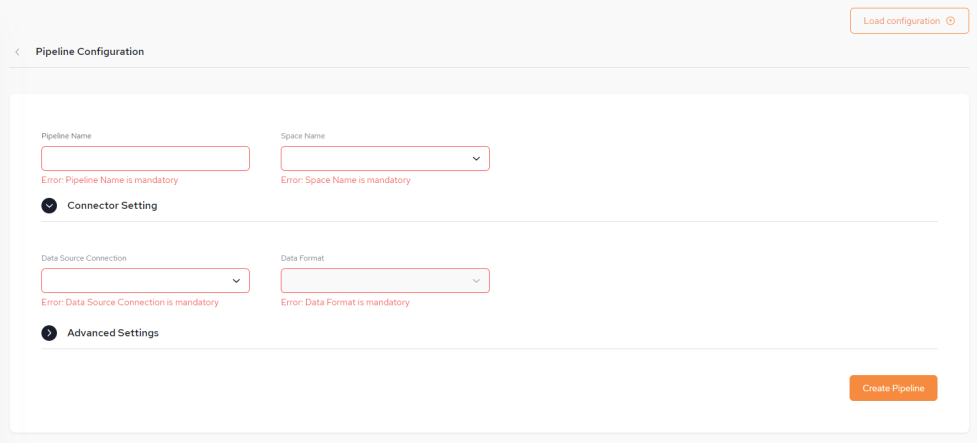
You can fill in some or all of the pipeline configuration items (shown below) from a JSON-format configuration file by clicking the Load Configuration button found at the top right side of the screen.
The configuration file may contains some or all of the required details. After the configuration details are loaded from the configuration file, they can be edited if desired, before saving .
-
Pipeline Name – The name assigned to the pipeline.
The Pipeline name is not case sensitive and has no limits for naming but must not exceed a length of 63 characters.
-
Space Name – The name of the GigaSpaces Space object that will receive the pipeline data. This is a mandatory field.
-
Connector Setting:
-
Data Source Connection – The data source from the System of Record. This is a URL and points to a database such as Oracle. This is a mandatory field.
It is possible to Create a new Data Source connection from here, if one has not already been created via the Data Sources menu. Follow the instructions from SpaceDeck – Data Sources.

-
-
Data Format - This is populated based on the Data Source Connection selected.
Create the Pipeline
Once the Pipeline configuration has been completed, click Create Pipeline in order to move to the next stage of the configuration of including tables. In our example, we are creating a Pipeline which is connected to an Oracle DB but using batch load.
Pipeline Configuration Screen
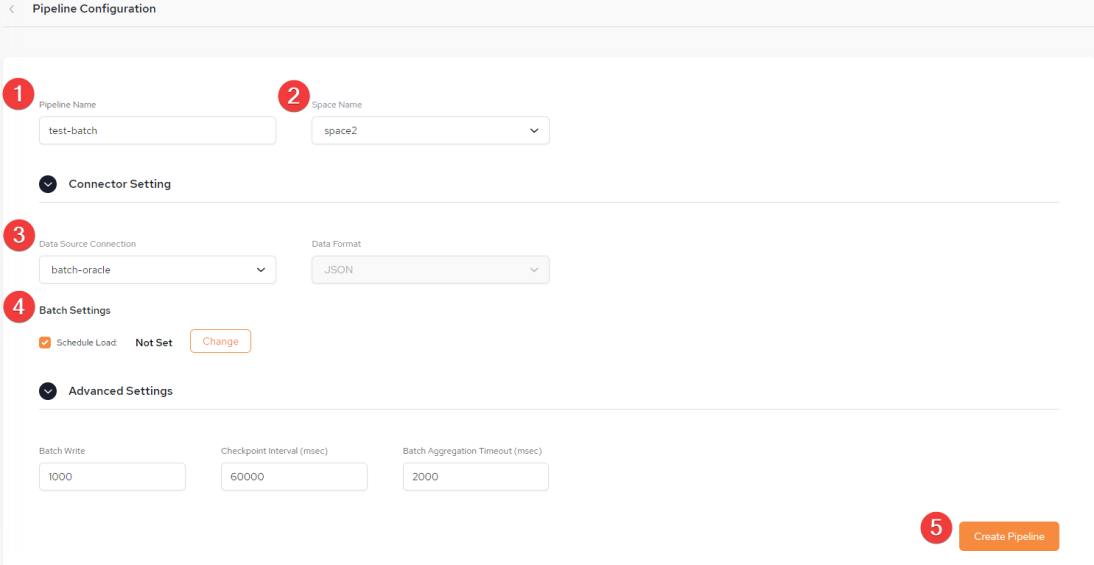
The Pipeline Configuration screen is displayed:
1: Choose a Pipeline Name. The Pipeline name is not case sensitive and has no limits for naming but must not exceed a length of 63 characters.
2: Select a Space name (previously defined). The name of the GigaSpaces Space object that will receive the pipeline data. This is a mandatory field.
3. Select Data Source Connection (previously defined) or create one here. Refer to Data Source - Batch Load.
4. Under Batch Settings, select Schedule Load, then click Change.
5: After batch schedule load has been set, click Create Pipeline.
Schedule Load
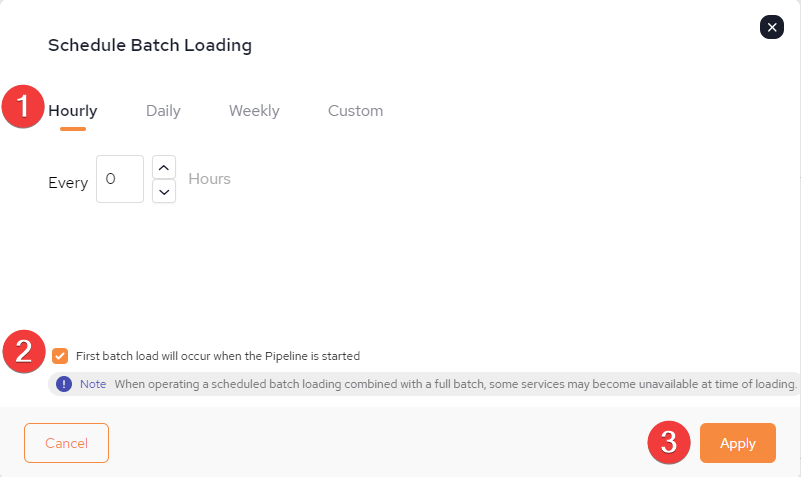
1: It is possible to schedule a Batch Load for the following: Hourly, Daily, Weekly or Custom.
2: If "First batch load will occur when the Pipeline is started" the batch load will begin when the Pipeline is started. Otherwise it will occur at the schedule batch loading time.
Care must be taken not to schedule a batch load AFTER the current time together with NOT selecting the option of "First batch load will occur when the Pipeline is started" or the data will not be loaded until the date defined, once the Pipeline has been started for the first time.
3. When all the batch loading has been scheduled, Click Apply.
Starting the Pipeline
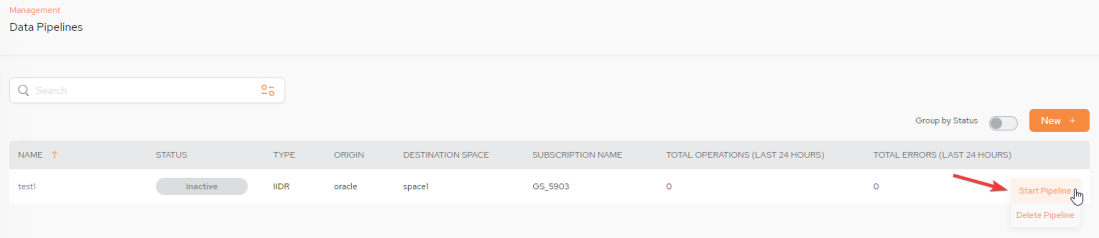
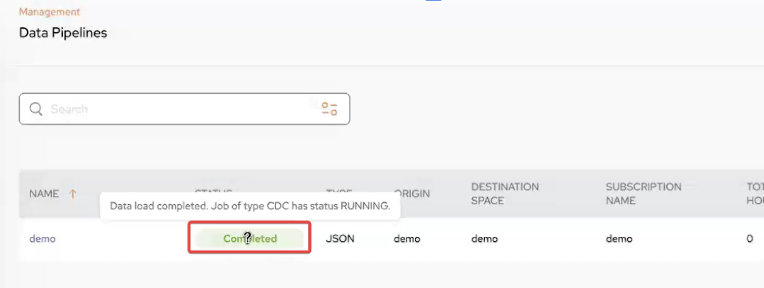
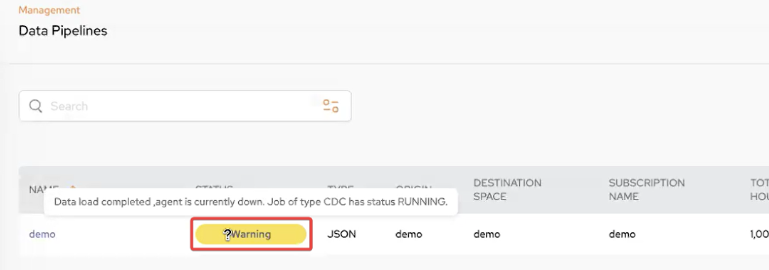
STATUS: - Besides Inactive, Running, Error and Warning there are new Statuses for batch load: Completed and Warning.
Add Tables - Materialized View
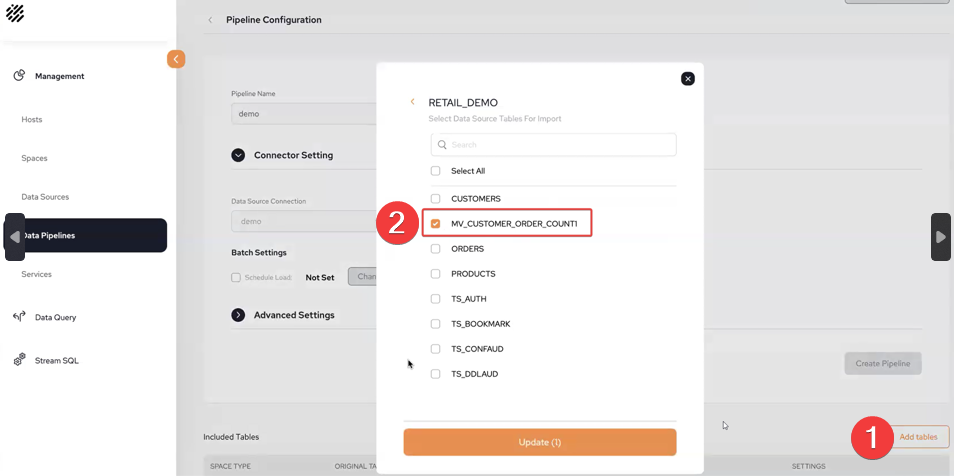
1: In the Pipeline Configuration screen, click Add Tables
2: Following is an example of selecting a materialized view table. For adding regular tables refer to Select Schema and Tables for the Pipeline section in Data Pipeline-Create New Pipeline.
Space ID Required
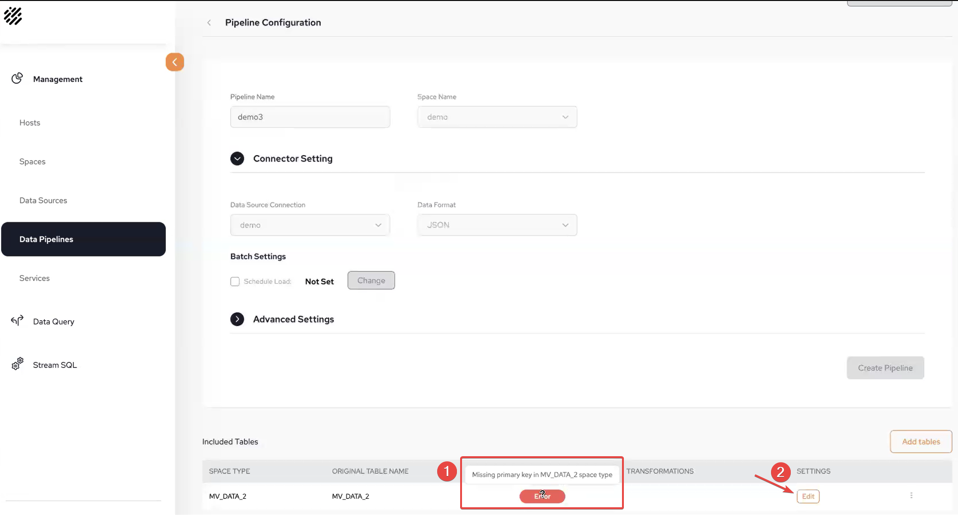
1: There will be an error when you attempt to add a materialized view without first adding a Space ID.
2: Click Edit to add a Space ID.
-
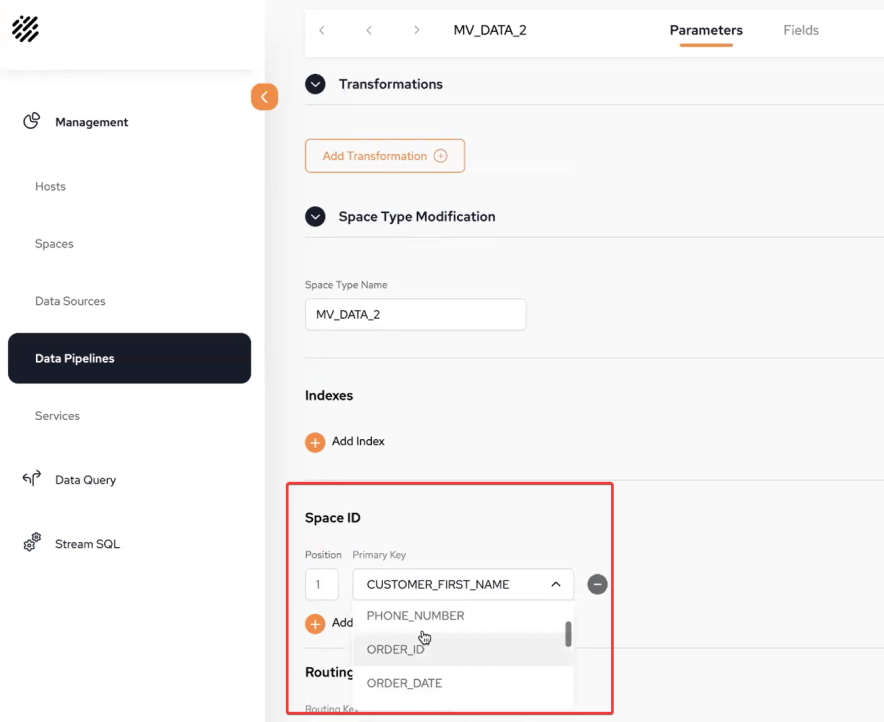
In the Space ID section, select from the drop-down the Primary Key that you wish to use.
-
Click Apply
-
On the Pipeline Configuration screen, click Save.