SpaceDeck – Administration
Access the Administration Screen
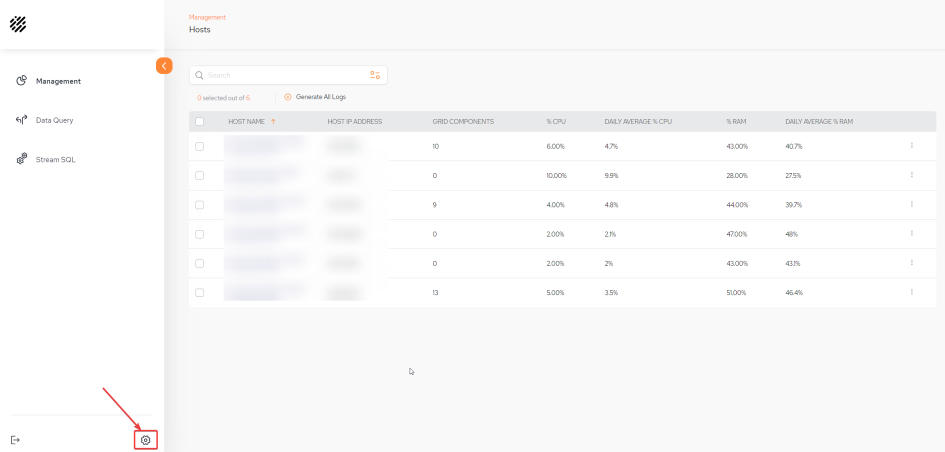
If a user role is defined as an Admin, the Administration screens can be accessed via the cog at the bottom left hand corner.
In order to create, delete or update Connection (Identify Provider) or Roles Management settings, the user should be assigned the appropriate role. These are specified below.
An explanation of all the available permissions can be found in the Security Overview page.
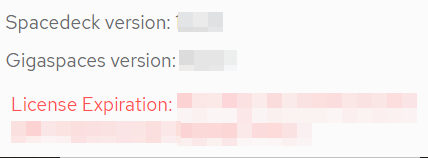
Once in the Administration menu, version and license details will be displayed at the bottom right hand corner.
The License Expiration appears in red if the date is coming up soon.
General Setup
Populate the Connection fields in order to configure SSO![]() Single sign-on (SSO) is an authentication scheme that allows a user to log in with a single ID to any of several related, yet independent, software systems. login using a predefined IDP
Single sign-on (SSO) is an authentication scheme that allows a user to log in with a single ID to any of several related, yet independent, software systems. login using a predefined IDP![]() An identity provider, or IDP, stores and manages users' digital identities. IDP and SSO can work together to authenticate users..
An identity provider, or IDP, stores and manages users' digital identities. IDP and SSO can work together to authenticate users..
For user management through the IDP, roles and groups are created and then certain roles can be assigned to the user, for example admin. Via SpaceDeck![]() GigaSpaces intuitive, streamlined user interface to set up, manage and control their environment. Using SpaceDeck, users can define the tools to bring legacy System of Record (SoR) databases into the in-memory data grid that is the core of the GigaSpaces system. roles are then created with the same name which was created in the IDP and permissions are then assigned accordingly for each role.
GigaSpaces intuitive, streamlined user interface to set up, manage and control their environment. Using SpaceDeck, users can define the tools to bring legacy System of Record (SoR) databases into the in-memory data grid that is the core of the GigaSpaces system. roles are then created with the same name which was created in the IDP and permissions are then assigned accordingly for each role.
Refer to SpaceDeck - SSO IDP Setup for an example of IDP setup through Okta
In order to be able to configure the Connection (Identify Provider) fields the user has to be assigned the specific permission of Manager Identify Providers, otherwise an error 403 (Forbidden) response will be displayed.
An explanation of all the available roles and permissions can be found on the Security Overview page.
Connection Fields
-
Provider type – The protocol the IDP supports. Currently GigaSpaces supports using any IDP that supports OpenID Connect (OIDC
 OpenID Connect (OIDC) is an open authentication protocol that works on top of the OAuth 2.0 framework. Targeted toward consumers, OIDC allows individuals to use single sign-on (SSO) to access relying party sites using OpenID Providers (OPs), such as an email provider to authenticate their identities.).
 -
Provider id – This is a generic ID that will be used as a name for the auth-config creator.
-
Redirect URIs – Upon successful sign-in, this endpoint in our server will receive the data from the IDP.
-
Issue URL – URL of the IDP issuer. For example, Okta, JumpCloud, Azure Active Directory.
-
Client Id – Unlike the Provider ID, this ID serves as a unique identifier which the IDP generates to the user so they can identify with it,
-
Client Secret – This is a secret key that is used with the Client ID in order to improve security.
-
Authorization Grant Type – Each IDP has rules regarding how roles are grouped. These rules have an arbitrary name provided by the IDP. The roles user must use this name to create the roles.
-
Scope - Azure AD can generate two versions of tokens v1.0 and v2.0 . However, using the default scope “openid” that GigaSpaces use for all other identity providers (like Okta), Azure AD will only generates a token for v1.0. As GigaSpaces require a token of v2.0, the contents of this custom Scope field is used to request that Azure AD generate a token version v2.0. See the Azure AD IDP Setup tab for more details.
Once the connection details are entered, click Apply.
Role Management
Each role that is configured will have certain privileges (permissions) assigned to it.
The roles should be configured by the company IT manager in the config map of the Kubernetes![]() An open-source container orchestration system for automating software deployment, scaling, and management of containerized applications. environment or through IDP setup.
An open-source container orchestration system for automating software deployment, scaling, and management of containerized applications. environment or through IDP setup.
Default Roles
If there is no configuration in the config map (this is not recommended), there are several default roles that are included with the installation which cannot be edited via SpaceDeck. They all appear with the label "Default" next to them:
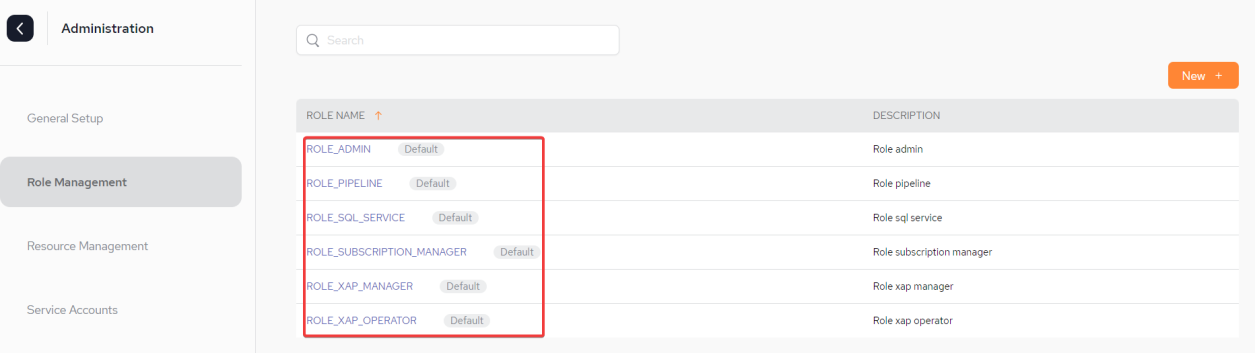
To see which privileges (permissions) are applied to a role (in this case ROLE_ADMIN), click the role name:
From the IDP side the default role of ROLE_ADMIN will not be created automatically during launch. Therefore, the admin should manually create a group (role) in the IDP with the same name as the default role name in the config map.
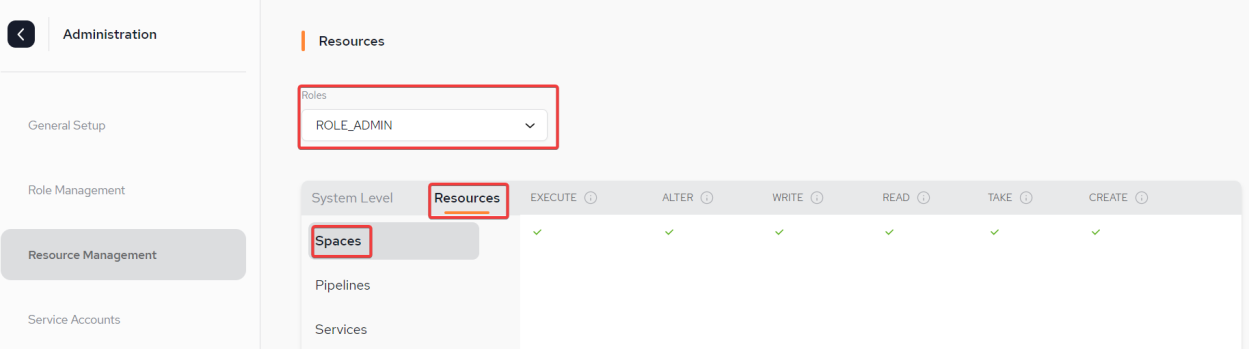
Below are two screen-shots showing the Resource Management menu which displays all the permissions applied for the default ROLE_ADMIN at Monitor System Level and at Resources Level. Note that at Resources level, permissions can be applied per Space![]() Where GigaSpaces data is stored. It is the logical cache that holds data objects in memory and might also hold them in layered in tiering. Data is hosted from multiple SoRs, consolidated as a unified data model. and Pipeline.
Where GigaSpaces data is stored. It is the logical cache that holds data objects in memory and might also hold them in layered in tiering. Data is hosted from multiple SoRs, consolidated as a unified data model. and Pipeline.
An explanation of all the available permissions for each level can be found n the Security Overview page or clicking on the "i" symbol above each type.
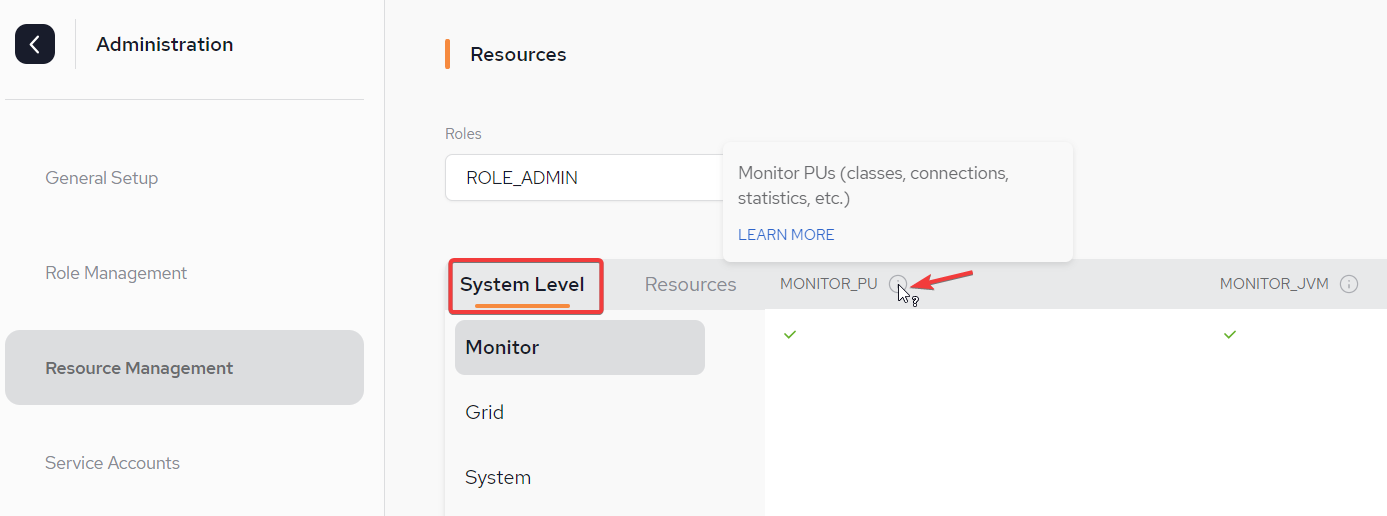
System Level - Monitor with permissions for MONITOR_PU![]() This is the unit of packaging and deployment in the GigaSpaces Data Grid, and is essentially the main GigaSpaces service. The Processing Unit (PU) itself is typically deployed onto the Service Grid. When a Processing Unit is deployed, a Processing Unit instance is the actual runtime entity. and MONITOR_JVM
This is the unit of packaging and deployment in the GigaSpaces Data Grid, and is essentially the main GigaSpaces service. The Processing Unit (PU) itself is typically deployed onto the Service Grid. When a Processing Unit is deployed, a Processing Unit instance is the actual runtime entity. and MONITOR_JVM![]() Java Virtual Machine. A virtual machine that enables a computer to run Java programs as well as programs written in other languages that are also compiled to Java bytecode.:
Java Virtual Machine. A virtual machine that enables a computer to run Java programs as well as programs written in other languages that are also compiled to Java bytecode.:
Resources Level - Pipeline with permissions for START_STOP, CREATE, EDIT and DELETE:

Creating a new Role
In order to create, delete or update the Roles Management settings, the user has to be assigned the specific permission of Manage Roles, otherwise an error 403 (Forbidden) response will be displayed in the log.
An explanation of all the available permissions can be found on the Security Overview page.
From the Role Management page, click New + to access the role setup page.
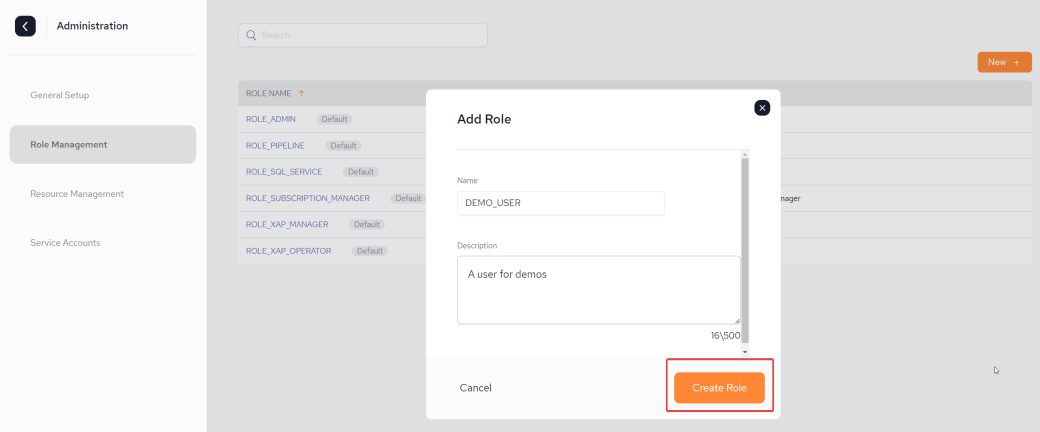
On the Add Role pop-out:
-
Provide a name for the new role. In our example it is DEMO_USER.
-
Provide a description of the role.
-
Click Create Role
Once the role is created, the Resource Management screen is displayed where permissions will be assigned for the newly created role.
The role will now also be displayed in the Role Management screen.
Resource Management: Applying Permissions for the Role
In the Resource Management menu, select your newly created role from the Roles drop-down list and apply the System and Resources level permissions.
An explanation of all the available permissions can be found on the Security Overview page.
System Level:
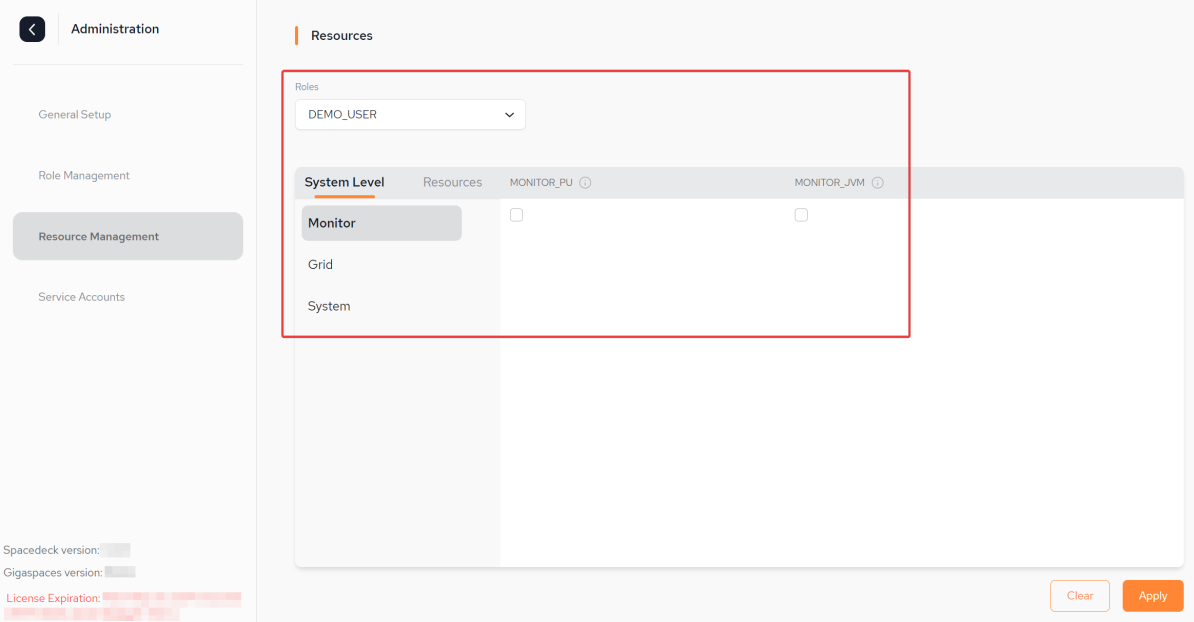
Click Apply to apply the permissions.
The permissions can be updated during run-time without the need to restart any of the components
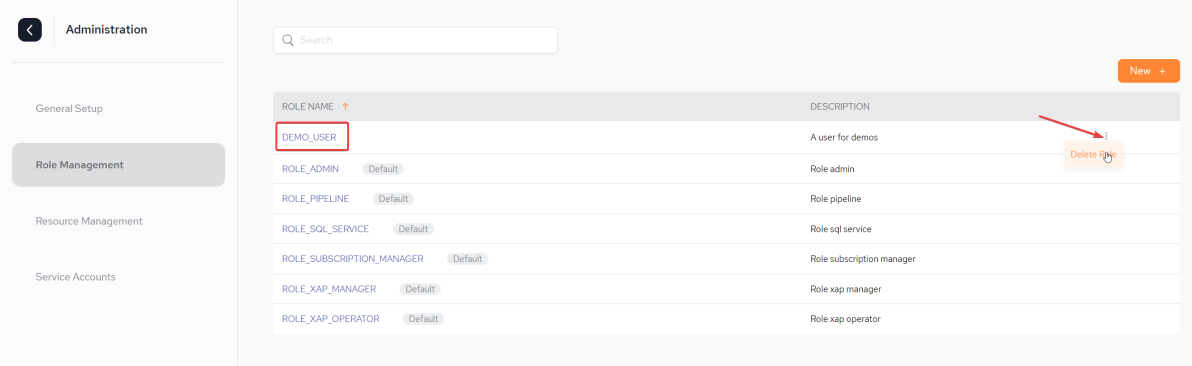
Deleting a Role
A role can simply be deleted by accessing the Roles Management page and clicking the kebab menu next to the role name and selecting.
As mentioned previously, there is no option to delete a default role.
Service Accounts
A Service Account is an account that is typically used by an application or a compute workload. It is an application that wishes to access GigaSpaces resources. This could either be a user of applications or components that wish to access GigaSpaces APIs. A service account differs to a user account in that it is associated with software that runs in our XAP Skyline![]() A highly customizable developer platform that allows building scalable HA with high throughput and ultra-low latency Java applications running on Kubernetes clusters or Smart DIH
A highly customizable developer platform that allows building scalable HA with high throughput and ultra-low latency Java applications running on Kubernetes clusters or Smart DIH![]() Smart DIH allows enterprises to develop and deploy digital services in an agile manner, without disturbing core business applications. This is achieved by creating an event-driven, highly performing, efficient and available replica of the data from multiple systems and applications, environments.
Smart DIH allows enterprises to develop and deploy digital services in an agile manner, without disturbing core business applications. This is achieved by creating an event-driven, highly performing, efficient and available replica of the data from multiple systems and applications, environments.
Refer to Service Account Privilege Management for a detailed overview.
Service Accounts Fields
-
SERVICE NAME – The name of the service followed by an indication of whether it is System or Resource level. It is not allowed to user the same service name more than once.
-
STATUS – Can either be Active or Revoked.
-
DESCRIPTION – Optional: Description of the service account.
-
CREATION DATE – Creation date and time of the service account.
-
SECRET – An application is introduced that wants to access the Space, like a PU. By default the Space is locked for read/write access. The application contains this secret (hidden) secret.
-
ROLE – The role that has been defined in the Resource Management stage.
-
New + - Click this to create a new Service Account.
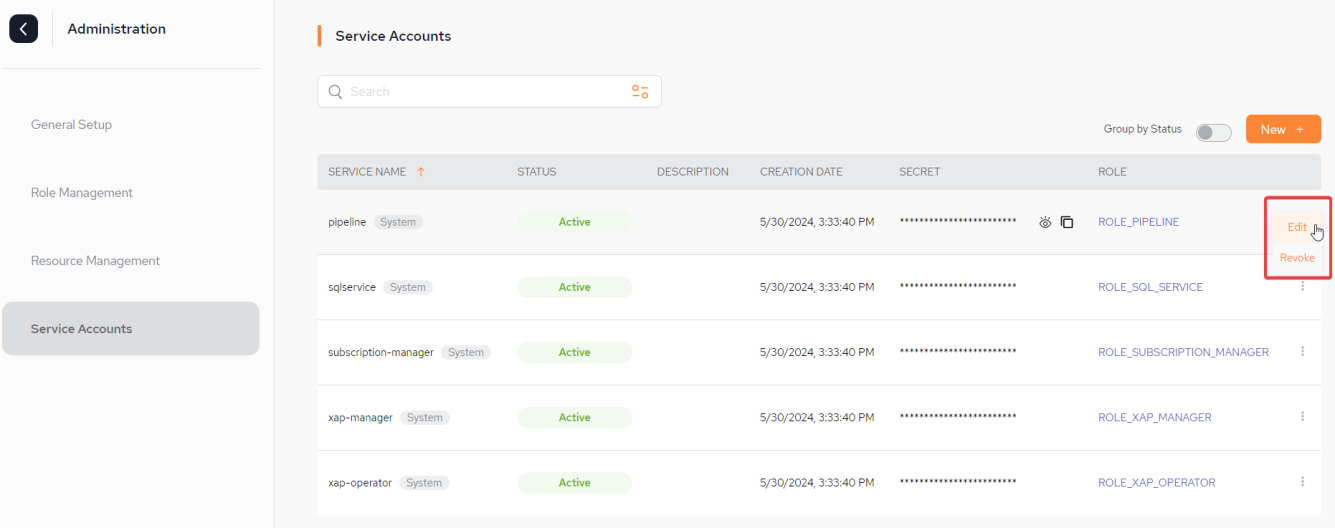
Options for each Service Account
Edit
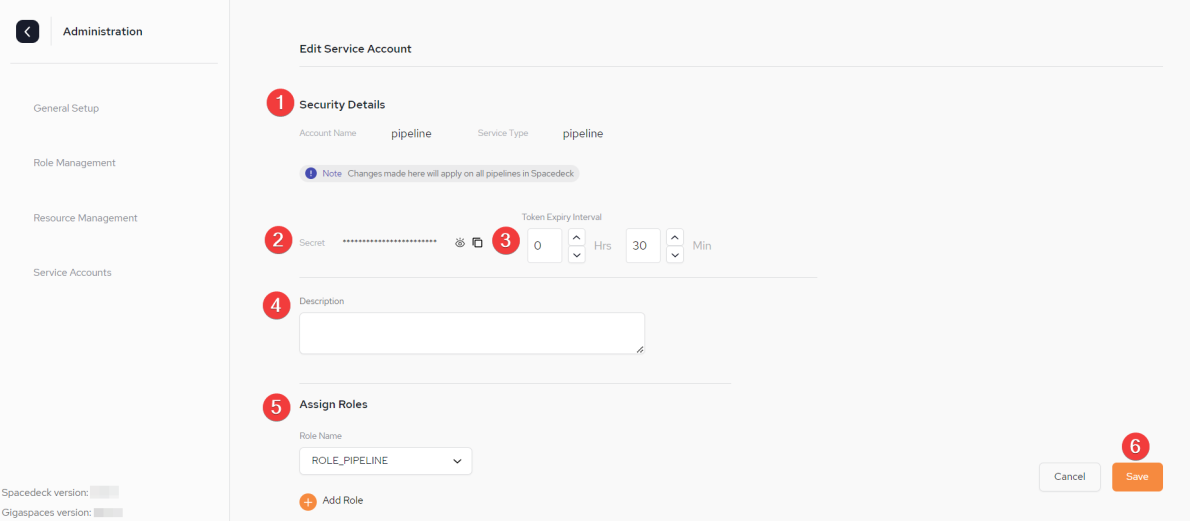
1: Details of the Service Account
2: The Secret. There is an option to both view and copy the secret. It cannot be regenerated.
3. The Token Expiry Interval is set here. The default is 30 minutes.
4. An optional description
5. The role can be updated or an additional role can be added
6. Save the changes.
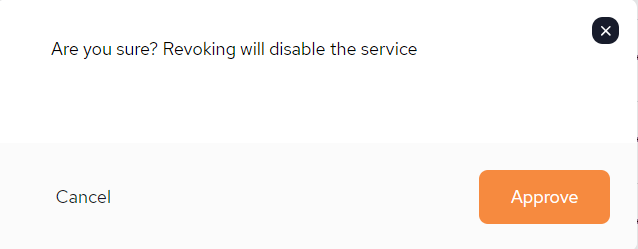
Revoke
Selecting to revoke a service, will disable that service.
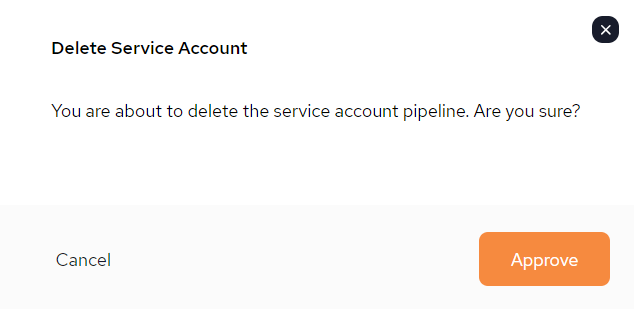
Delete
Selecting to delete the service, will delete it permanently.
Create New Service Account
To create a new Service Account, click +New on the main Service Account page.
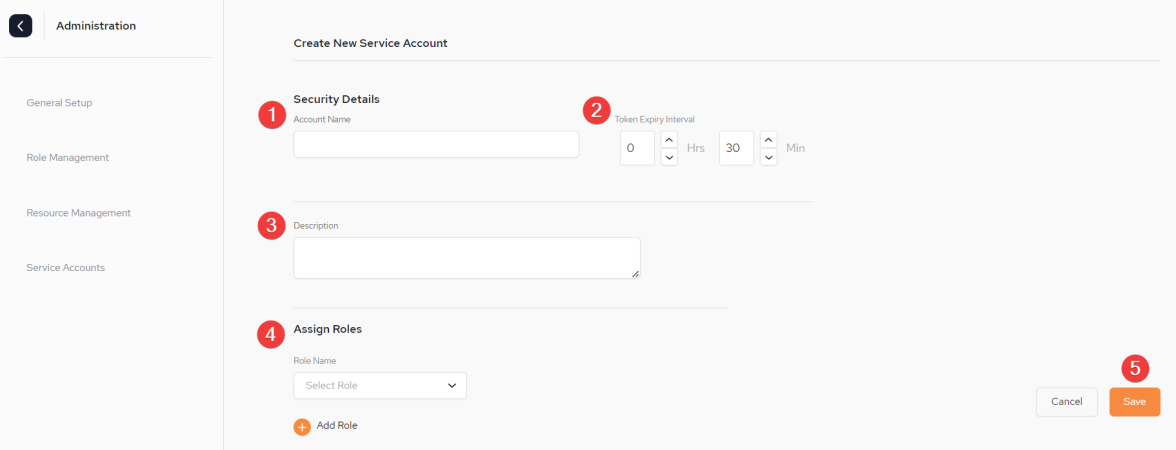
1: Account Name.
2: The Token Expiry Interval is set here. The default is 30 minutes.
3. An optional description.
4. The role/s are assigned here. Refer here for details.
5. Save
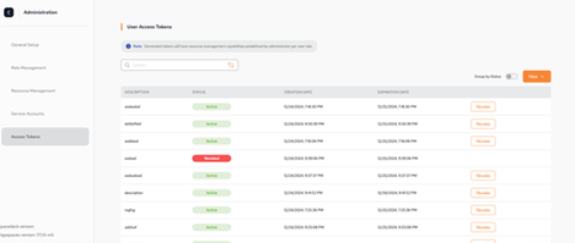
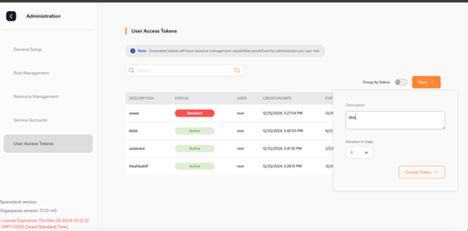
Access Tokens
The Access Tokens view allows you to manage user access tokens.
You can create new tokens, revoke active tokens, and delete expired tokens.
To create a new access token:
-
Click New. A dialog box appears.
-
Fill in a Description for the access token, and the Duration in Days for which the token should remain active.
-
Click Create Token.
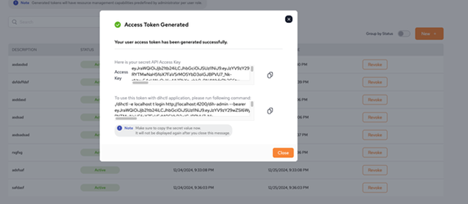
After the new token is created, a dialog box appears showing the secret API access key.
Additionally, the user is provided with a command to log in to the DIHCTL application using the new token.
The access key must be saved securely, as it will not be available again after the dialog box is closed.