SpaceDeck - SSO IDP Setup
For configuring SSO![]() Single sign-on (SSO) is an authentication scheme that allows a user to log in with a single ID to any of several related, yet independent, software systems. (Secure Sign-On) for SpaceDeck
Single sign-on (SSO) is an authentication scheme that allows a user to log in with a single ID to any of several related, yet independent, software systems. (Secure Sign-On) for SpaceDeck![]() GigaSpaces intuitive, streamlined user interface to set up, manage and control their environment. Using SpaceDeck, users can define the tools to bring legacy System of Record (SoR) databases into the in-memory data grid that is the core of the GigaSpaces system., GigaSpaces supports using any IDP
GigaSpaces intuitive, streamlined user interface to set up, manage and control their environment. Using SpaceDeck, users can define the tools to bring legacy System of Record (SoR) databases into the in-memory data grid that is the core of the GigaSpaces system., GigaSpaces supports using any IDP![]() An identity provider, or IDP, stores and manages users' digital identities. IDP and SSO can work together to authenticate users. that supports OpenID Connect (OIDC
An identity provider, or IDP, stores and manages users' digital identities. IDP and SSO can work together to authenticate users. that supports OpenID Connect (OIDC![]() OpenID Connect (OIDC) is an open authentication protocol that works on top of the OAuth 2.0 framework. Targeted toward consumers, OIDC allows individuals to use single sign-on (SSO) to access relying party sites using OpenID Providers (OPs), such as an email provider to authenticate their identities.) including Okta, Azure Active Directory, Amazon Cognito and Keycloak. We provide examples below of how to configure this using Okta
OpenID Connect (OIDC) is an open authentication protocol that works on top of the OAuth 2.0 framework. Targeted toward consumers, OIDC allows individuals to use single sign-on (SSO) to access relying party sites using OpenID Providers (OPs), such as an email provider to authenticate their identities.) including Okta, Azure Active Directory, Amazon Cognito and Keycloak. We provide examples below of how to configure this using Okta
For user management through the IDP, roles and groups are created and then certain roles can be assigned to the user, for example admin. Via Spacedeck roles are then created with the same name which was created in the IDP and permissions are then assigned accordingly for each role.
-
Create a developer account in Okta .
-
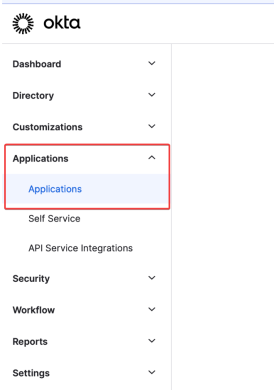
Once created, log in to the account and from the left side menu, select Applications:
-
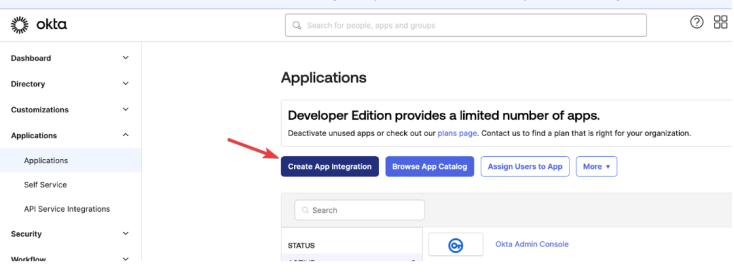
Click Create App Integration:
-
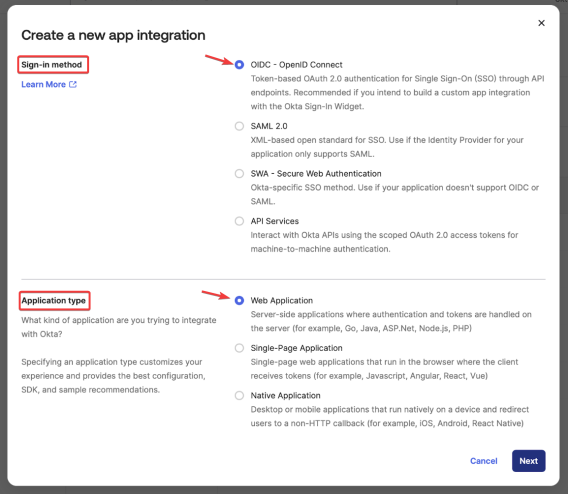
From the pop-out menu, select Sign-in method OIDC - OpenID Connect and Application type Web Application. Then click Next:
-
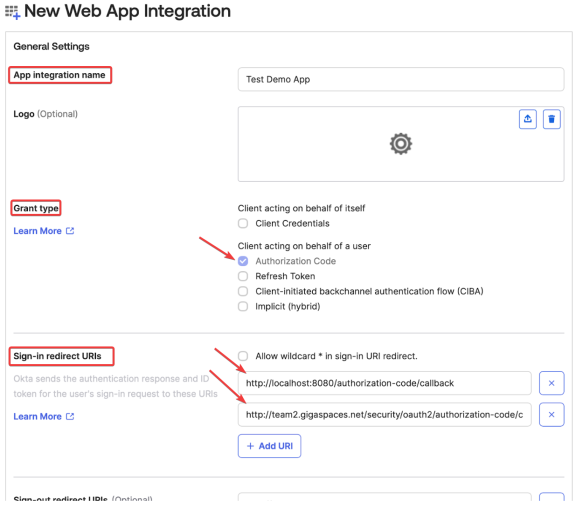
In the New Web App Integration screen:
-
Provide an App integration name. In the example below it is Test Demo App.
-
From Grant type select Authorization Code from the Client acting on behalf of a user section.
If you want to use the refresh token mechanism, Refresh Token should also be selected.
-
From Sign-in redirect URIs set up a redirect URI -> URI to security service callback.
-
-
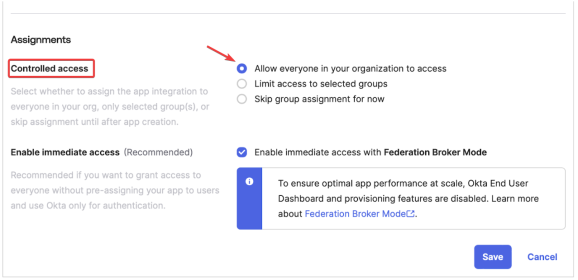
Controlled access is customizable according to each client's requirements. GigaSpaces has tested it with the following setting:
-
Click Save. Okta will provide a Client ID and Client Secret.
-
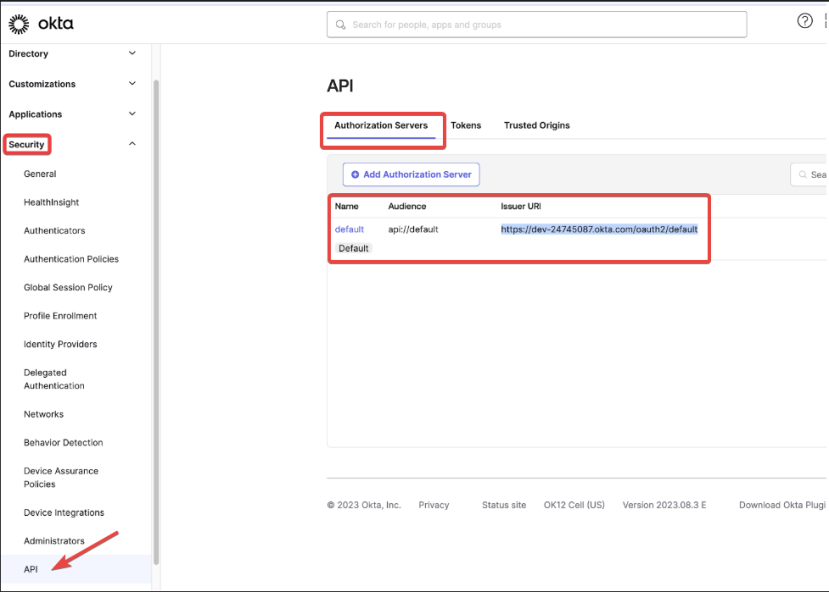
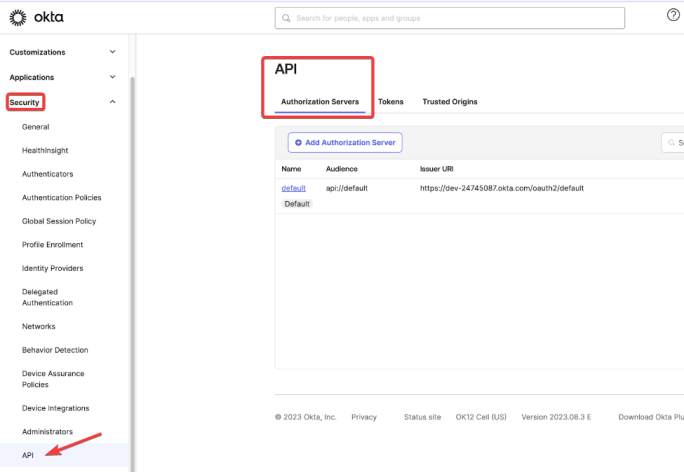
On the left side menu, select Security then API where you will find the Issuer URI that should be provided to SpaceDeck when you are setting up the IDP. Here the client has the option to customize and create a new authorization server. In this specific example, it was tested using the default:
-
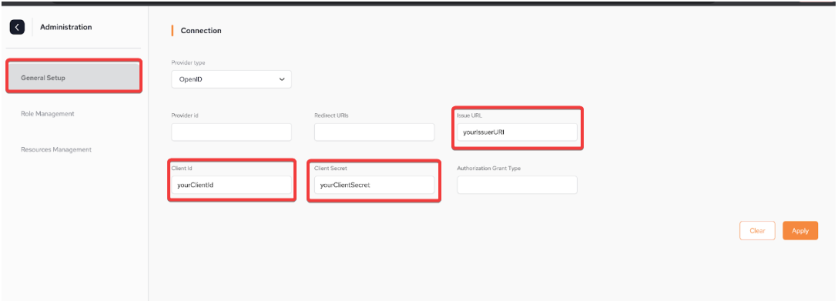
In the SpaceDeck, the Client ID, Client Secret and Issuer URI are populated as followed:
-
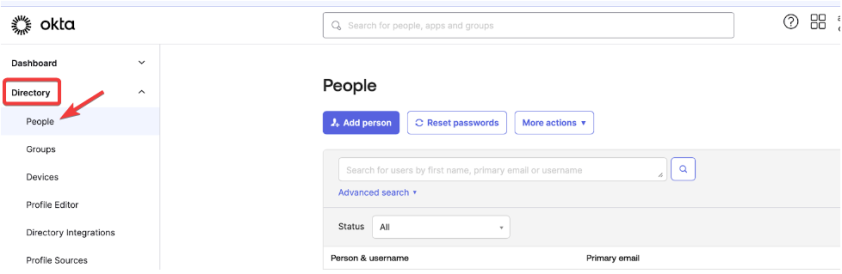
To manager users in Okta, on the left side menu, select Directory then People:
-
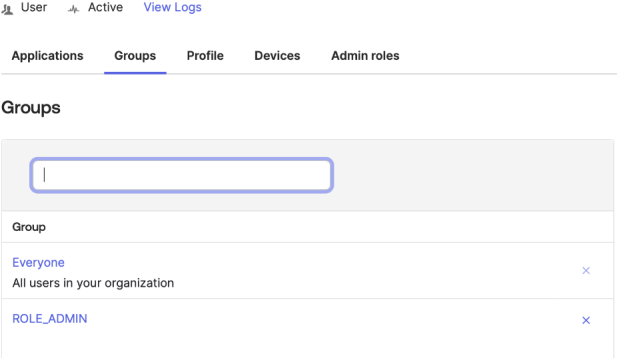
To manage groups in Okta (which are translated as roles in SpaceDeck), on the left side menu go to Directory then Groups. By default in Smart DIH
 Smart DIH allows enterprises to develop and deploy digital services in an agile manner, without disturbing core business applications. This is achieved by creating an event-driven, highly performing, efficient and available replica of the data from multiple systems and applications, the role of ROLE_ADMIN has all privileges. It is customizable and can be changed via the config map. However, to follow the default behavior and to use the ROLE_ADMIN in SMART DIH Digital Integration Hub.
An application architecture that decouples digital applications from the systems of record, and aggregates operational data into a low-latency data fabric., a ROLE_ADMIN group has to be created in OKTA and people assigned to this group. This group will contain administrators and will have all privileges. To create a group in Okta, on the left side menu, go to Directory then Groups and click Add group, supply the name ROLE_ADMIN and then click Save.
Smart DIH allows enterprises to develop and deploy digital services in an agile manner, without disturbing core business applications. This is achieved by creating an event-driven, highly performing, efficient and available replica of the data from multiple systems and applications, the role of ROLE_ADMIN has all privileges. It is customizable and can be changed via the config map. However, to follow the default behavior and to use the ROLE_ADMIN in SMART DIH Digital Integration Hub.
An application architecture that decouples digital applications from the systems of record, and aggregates operational data into a low-latency data fabric., a ROLE_ADMIN group has to be created in OKTA and people assigned to this group. This group will contain administrators and will have all privileges. To create a group in Okta, on the left side menu, go to Directory then Groups and click Add group, supply the name ROLE_ADMIN and then click Save.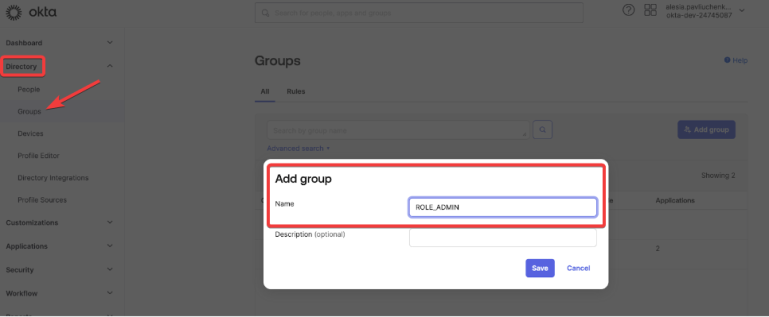
-
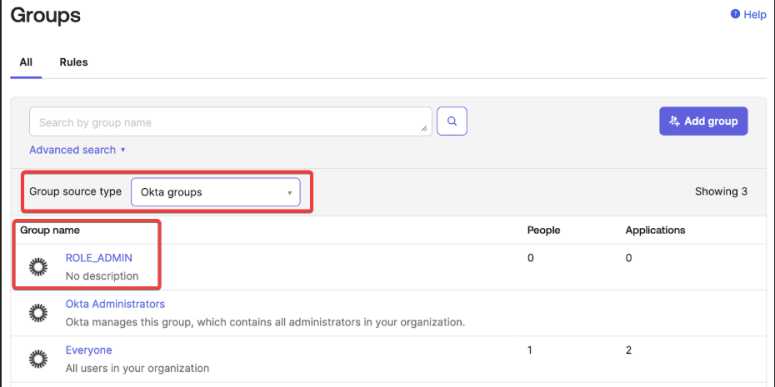
From the drop-down of Group source type, select Okta groups. The ROLE_ADMIN group will be in the list.
-
To assign users to ROLE_ADMIN (or any other created group) on the left side menu, go to Directory then People and choose users from the list of users. Click the user. To switch the users groups, type the group name and then click enter.
-
Now the access token claims have to be customized so it will have groups used in Smart DIH. To accomplish this, on the left side menu go to Security then API and on the API screen, Authorization Servers:
-
Select the server that is being used and go to the Claims tabs then Access:

-
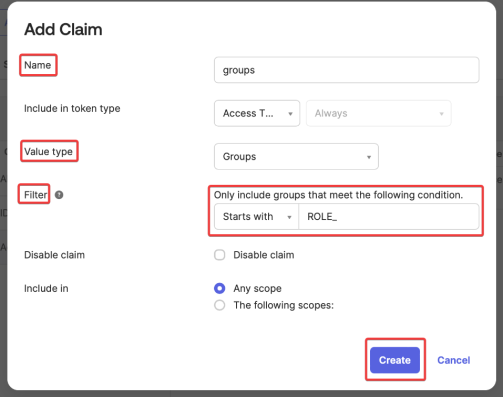
Click Add Claim and input a name for the Claim. In the Value type drop-down select Groups. For Filter, provide the filter to be applied. In this example, only groups with the ROLE_ prefix should be used. Click Create.
The name of the claim will be used in SpaceDeck in the IDP Setup, for the setting of Authorization Grant Type
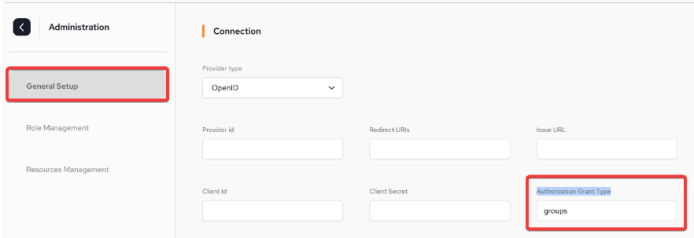
In SpaceDeck:
-
In order to bind the IDP that has been created above, the root user has to login to SpaceDeck with the correct username/password and then populate all the Connection fields in the Administration/General Setup menu.
By default, the root user has root/password credentials. This must be changed before installation using the parameter of global.password seen in step 3 of the Instructions for Smart DIH Installation using Kubernetes
An open-source container orchestration system for automating software deployment, scaling, and management of containerized applications.. -
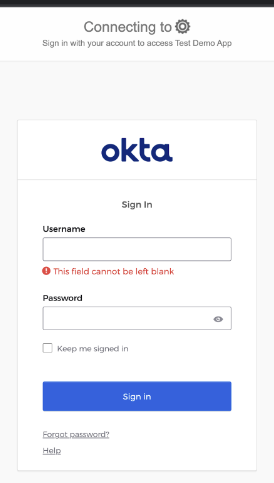
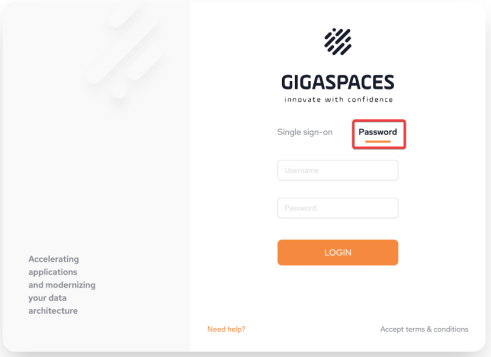
Once the IDP has been configured, users can now use SSO login to sign in securely by selecting the Single sign-on option:
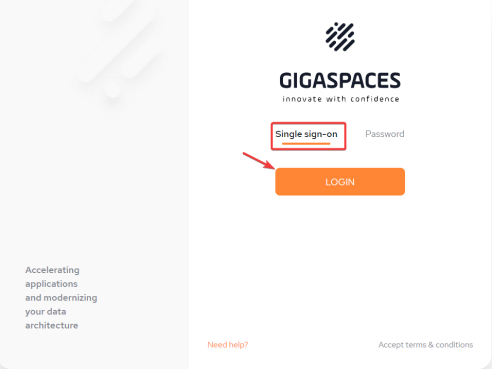
-
After clicking LOGIN, the user will be redirected to the Okta login form to provide credentials: