Writing Existing Class to Space
This example shows you how to write your own c++ class to the space (as opposed to writing a class that is generated from a XML file). The code for this example is located at <XAP Root>\cpp\examples\PocoFromExistingClass\. This path will be referred to as <Example Root> in this page.
This example can be built and run on Windows OS only. If you use Visual Studio open the solution PocoFromExistingClass.sln located in <XAP Root>\cpp\examples\PocoFromExistingClass\. It is recommended to set your solution configuration to Release and do a rebuild that will generate all related files.
It is assumed that you have read the GigaSpaces C++ Hello World example which serves as a starting point.
To write your c++ class to the space, perform the following steps:
Create a gs.xml file that contains the class definition.
For example, this is the file <Example Root>\PocoFromExistingClass.gs.xml:
<?xml version="1.0" encoding="UTF-8"?>
<!DOCTYPE gigaspaces-mapping SYSTEM "../../config/cpp.dtd">
<gigaspaces-mapping>
  <include-header file="UserMessage.h"/>
  <class name="UserMessage" persist="false" replicate="false" fifo="false" >
    <property name="id" type="int" null-value="-999" index="true"/>
    <routing  name="id"/>

    <property name="uid" type="string" null-value="" index="false"/>
    <id name="uid" auto-generate="true" />
    <property name="content" type="string" null-value="" index="false"/>
  </class>
</gigaspaces-mapping>
Note the line that informs gsxml2cpp about the file of your existing class:
<include-header file="UserMessage.h"/>
Change the user class.
An example of an original class can be found at <Example Root>\UserMessage_original.h.txt; and an example of the same class with the changes listed below can be found at <Example Root>\UserMessage.h.
Step 1. Add an include statement and namespace as shown below:
#include "IEntry.h"
using namespace OpenSpaces;
Step 2. Inherit from IEntry:
class UserMessage: public IEntry /** (GigaSpaces) need to inherit for space operations **/
Step 3. Implement the the IEntry interface (one function):
virtual const char* GetSpaceClassName() const
{
     return "UserMessage";
}
The name of the class as returned by GetSpaceClassName should match the name of the class in the gs.xml file.
1. Make sure the class has a *default constructor**.
2. Optional – initialize with null values in the constructor:
UserMessage()
{
    // (GigaSpaces) Optional - initialize with null values in the class constructor
    content = "";
    id = -999;
    uid = "";
}
Note that these 3 fields are the ones specified in our gs.xml file.
Step 4. Optional – add a smart pointer:
typedef boost::shared_ptr<UserMessage> UserMessagePtr;
Step 5. Handle the c++ serializer code generation, build the shared library (DLL) from this code, and place the library in the appropriate directory (<XAP Root>\lib\platform\native).
The following instructions show you how to do this in Visual Studio using the supplied makefile (<Example Root>/makefileSerializer.mk):
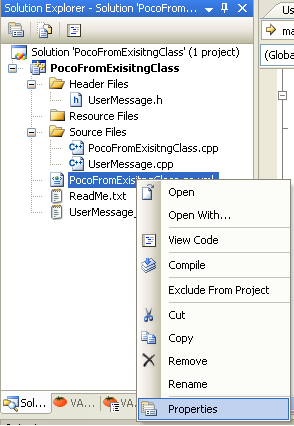
Step 6. Create a custom build for PocoFromExistingClass.gs.xml:
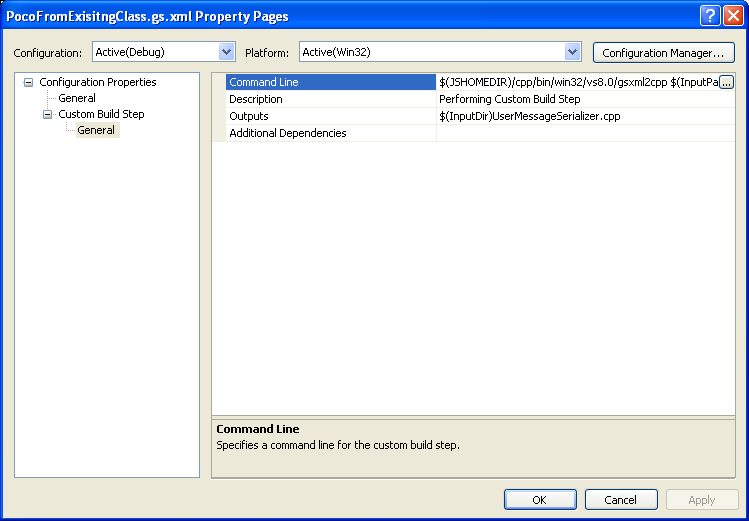
Step 7. Type the following lines in the Command Line text box:
"$(JSHOMEDIR)/cpp/bin/$(PLATFORM)\$(COMPILER)/gsxml2cpp" "$(InputPath)" NA "$(InputDir)\UserMessageSerializer.cpp" DummyHeaderFile
  nmake -f makefileSerializer.mk
In Win64 use makefileSerializer_win64.mk
The first line is responsible for c++ code generation, and the second line is responsible for build and placement.
The makefile specifies the target name for the generated serializer .cpp file and the serializer DLL. If you wish to use your own name then edit the file and change the value for PROJNAME.
Step 8. Rebuild the example.
Compiling the file PocoFromExistingClass.gs.xml causes the following:
- The file
UserMessageSerializer.cppis automatically generated in<Example Root>. - The DLL
UserMessageSerializer.dllis created and placed in<XAP Root>\lib\platform\native\.
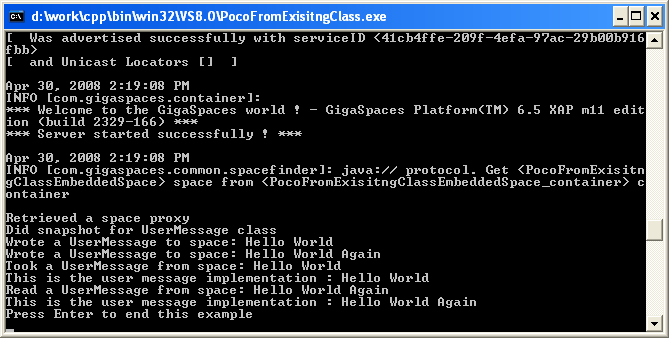
Step 9. Run the example. The output should be as follows: