SpaceDeck – Data Pipeline – Create New Pipeline
Data Pipelines allow a convenient, no-code method to pipe data from the System of Record to the GigaSpaces in-memory data grid.
A new data pipeline definition will include the definitions of the System of Record databases, tables and fields that will provide data to the pipeline. The definition also indicates the in-memory Space that will receive the pipeline data.
Additional information includes optional validation rules and automatic conversion of specified field definitions.
Display the Configuration screen
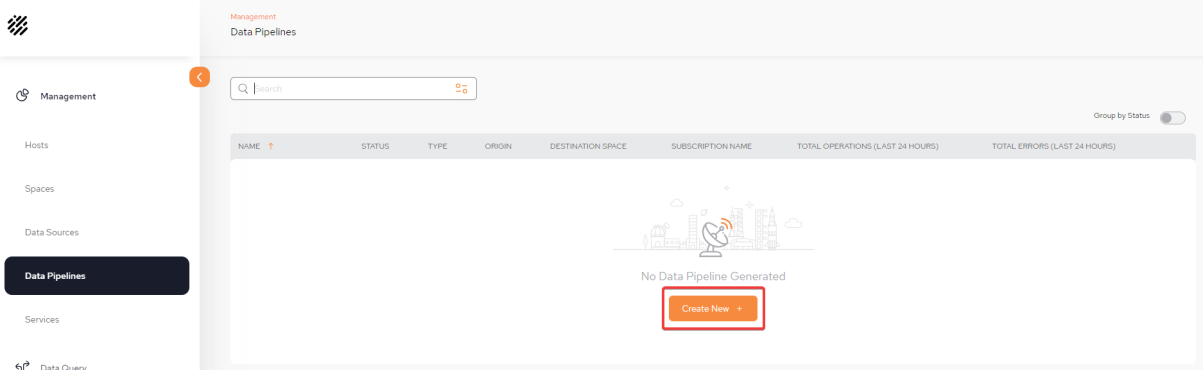
From the Data Pipeline![]() A series of data processing steps, including extraction, transformation, and loading (ETL), that move data from its source to a destination system. Data pipelines are essential for integrating and managing data flows. main screen, click Create New + to begin defining your first pipeline.
A series of data processing steps, including extraction, transformation, and loading (ETL), that move data from its source to a destination system. Data pipelines are essential for integrating and managing data flows. main screen, click Create New + to begin defining your first pipeline.
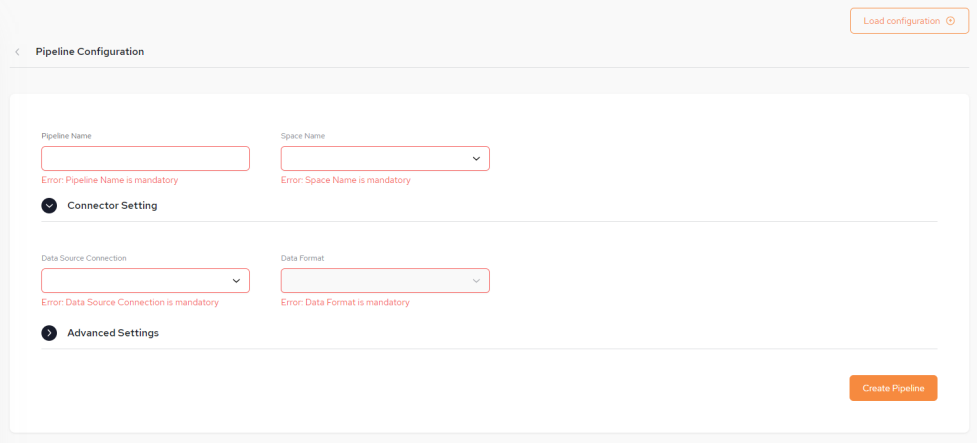
Pipeline Configuration Screen
The Pipeline Configuration screen is displayed:
Basic Pipeline Information
You can fill in some or all of the pipeline configuration items (shown below) from a JSON-format configuration file by clicking the Load Configuration button found at the top right side of the screen.
The configuration file may contains some or all of the required details. After the configuration details are loaded from the configuration file, they can be edited if desired, before saving .
-
Pipeline Name – The name assigned to the pipeline.
The Pipeline name is not case sensitive and has no limits for naming but must not exceed a length of 63 characters.
-
Space Name – The name of the GigaSpaces Space object that will receive the pipeline data. This is a mandatory field.
-
Connector Setting:
-
Data Source Connection – The data source from the System of Record. This is a URL and points to a database such as Oracle. This is a mandatory field.
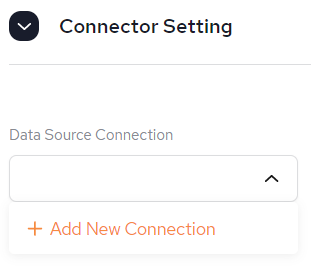
It is possible to Create a new Data Source connection from here, if one has not already been created via the Data Sources menu. Follow the instructions from SpaceDeck – Data Sources.
-
-
Data Format - This is populated based on the Data Source Connection selected.
Create the Pipeline
Once the Pipeline configuration has been completed, click Create Pipeline in order to move to the next stage of the configuration of including tables. In our example, we are creating a Pipeline which is connected to an Oracle IIDR![]() IBM Infosphere Data Replication.
This is a solution to efficiently capture and replicate data, and changes made to the data in real-time from various data sources, including mainframes, and streams them to target systems. For example, used to move data from databases to the In-Memory Data Grid. It is used for Continuous Data Capture (CDC) to keep data synchronized across environments. DB:
IBM Infosphere Data Replication.
This is a solution to efficiently capture and replicate data, and changes made to the data in real-time from various data sources, including mainframes, and streams them to target systems. For example, used to move data from databases to the In-Memory Data Grid. It is used for Continuous Data Capture (CDC) to keep data synchronized across environments. DB:

Select Schema and Tables for the Pipeline
Once the pipeline has been created (the Create Pipeline button turns gray), click Add / Remove tables to select which schema and tables to include in the pipeline.
This step has to be completed in order to have a fully functioning pipeline and be able to perform data queries or add services.

Initially, a pop-out containing a list of available schemas will be presented. Click on the schema containing the tables that you want to add.

Now you will have the option of selecting the tables that you want to import. Once selected, click Update where you will see the number of tables selected is reflected (in our example it is 3):
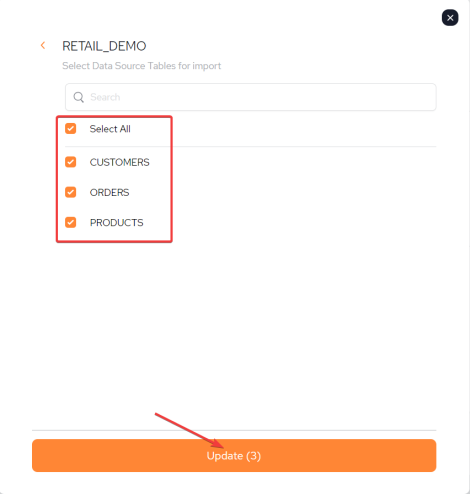
Once Update is clicked, it will take a few seconds to update.
Editing the Tables
Editing the table can only be performed during the initial setup and configuration process. The pipeline has to be deleted and configured from new in order to perform this action again. However, tables can be added and removed when the Pipeline is running.
From the Included Tables area of the screen, click Edit
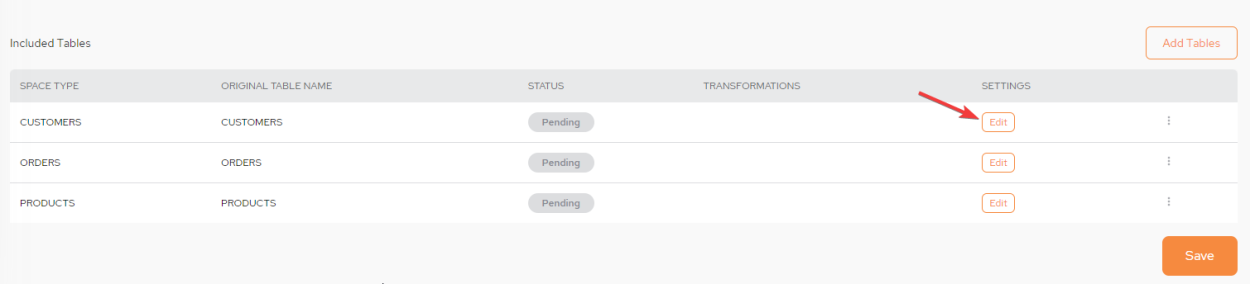
STATUS: The possible statuses are PENDING, ERROR and ACTIVE
Navigating the Configuration screen - Parameters Tab
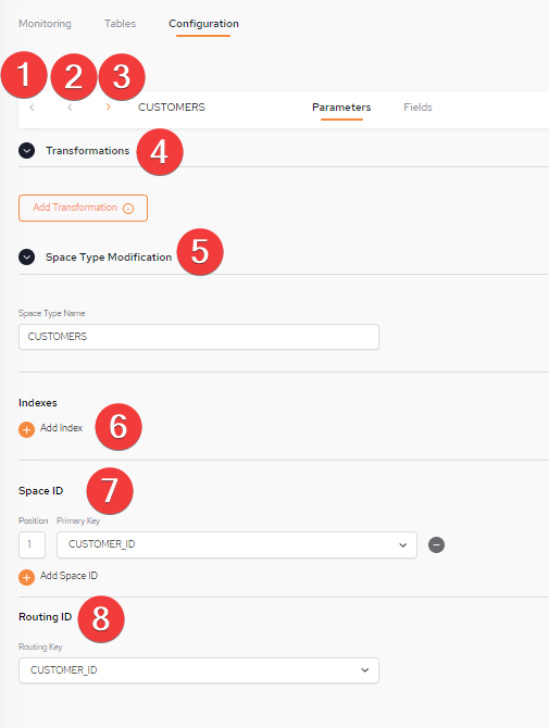
1: Return to Data Pipelines screen
2: Go to previous Space Type entry
3. Go to next Space Type entry
4. Click to set up Transformations (refer to Configuring Transformations for detailed instructions). This is relevant for both CDC![]() Change Data Capture. A technology that identifies and captures changes made to data in a database, enabling real-time data integration and synchronization between systems.
Primarily used for data that is frequently updated, such as user transactions. (IIDR) and Batch Load data sources.
Change Data Capture. A technology that identifies and captures changes made to data in a database, enabling real-time data integration and synchronization between systems.
Primarily used for data that is frequently updated, such as user transactions. (IIDR) and Batch Load data sources.
5. Name of the table. Can be changed here.
6. The Indexes area contains the following fields and options:
Both EQUAL, ORDERED and EQUAL AND ORDERED index types are supported. For more information refer to the Space Index page.
-
Index Name – Supply an index name. This can be anything.
-
Properties – Select the columns to be part of this index
7 The Space ID area contains the following fields and options:
For more information refer to the Space Object ID page.
When using Batch Load with a materialized view, it is mandatory to use a Space ID
-
Position – In the case of a compound key (multiple keys in the same key), the position of every field in a key needs to be identified (first column, second column, etc.). For a single column, it should always be 1 (default).
-
Primary Key - Serves as a unique identifier in a table (space type). The default index will be EQUAL if no index is added.
8: The Routing![]() The mechanism that is in charge of routing the objects into and out of the corresponding partitions. The routing is based on a designated attribute inside the objects that are written to the Space, called the Routing Index. ID area contains the following fields and options:
The mechanism that is in charge of routing the objects into and out of the corresponding partitions. The routing is based on a designated attribute inside the objects that are written to the Space, called the Routing Index. ID area contains the following fields and options:
For more information refer to the Data Partitioning: Routing In Partitioned Spaces page.
-
Routing ID – Select a column in order to change the routing key.
It is possible to change the name of the Space Type to be different to that of the table name.
Once the Pipeline is running, the Index, Space ID and Routing ID information can be found in the Spaces menu.
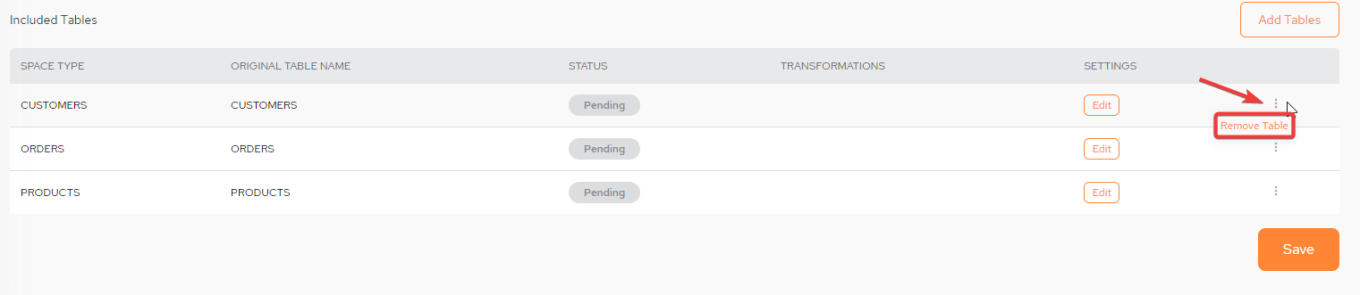
Add/Remove Table
It is possible to update tables by either adding or removing them once the pipeline has been started. As mentioned above, editing can only be performed during the initial setup and configuration process. The pipeline has to be deleted and configured from new in order to edit them again.
Navigating the Configuration screen - Fields Tab
In the Fields tab of this screen, the Field (column) names are initially the names of the fields from the database table that are included in the data pipeline. These can be edited to provide different property names (field names) in the GigaSpaces object type (table), or to include or exclude it.
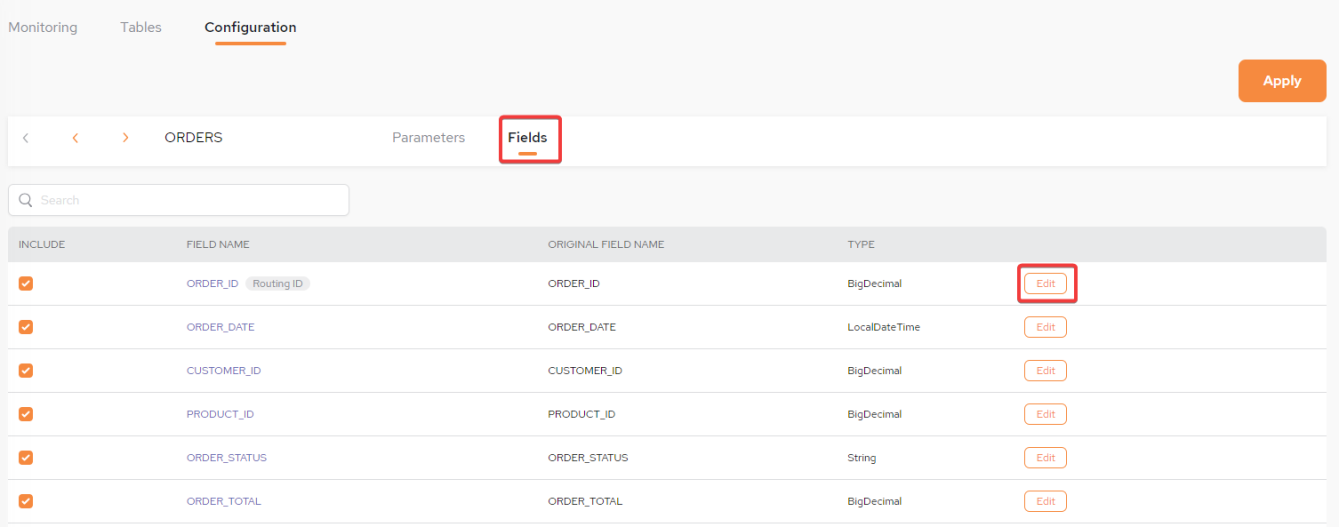
The Fields tab contains the following fields and options:
-
FIELD NAME – Initially, the names of the fields from the database table, that are included in the data pipeline. These can be edited to provide different property names (column names) in the GigaSpaces object type (table).
-
ORIGINAL FIELD NAME – If this field name is edited, this column shows the original name.
-
Type - The type of class used for the field, e.g., BigDecimal.
Editing the Field Name:
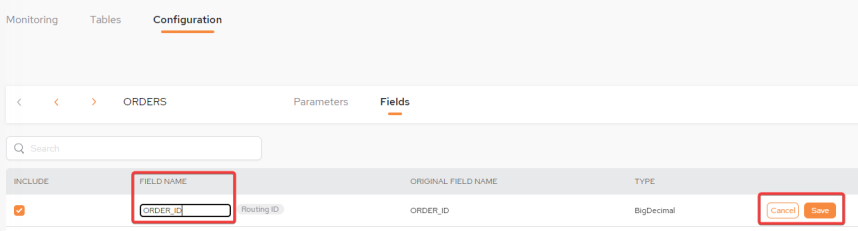
Click Edit and enter the new Field Name, then click Save.
Save Configuration
Once the setup has been completed, return to the main Data Pipelines screen and click Save.
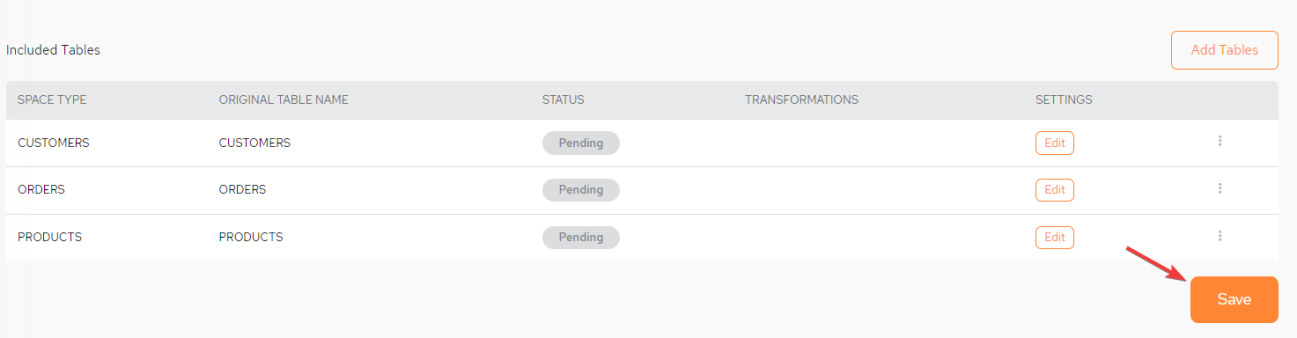
In order to be able to edit the tables once they have been saved, they have to be removed and added again.
Start the Pipeline
Once the pipeline has been saved, you are returned to the Data Pipeline Status screen. The status will be Inactive.
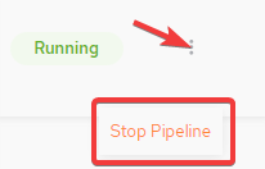
In order to start the Pipeline, click Start Pipeline from the kebab menu (vertical three-dot menu) on the far right:
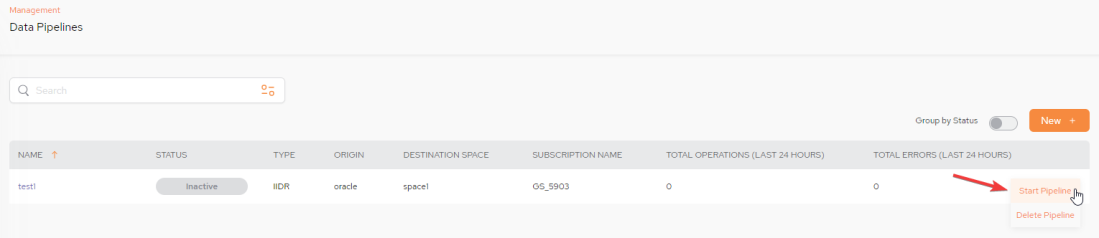
STATUS - Possible statuses are: Inactive, Running, Error and Warning.
Alternatively, select the Pipeline name and from the very top of the screen, click Start Pipeline from the kebab menu (vertical three-dot menu) on the far right:

A Parameters to apply pop-up will now be displayed:
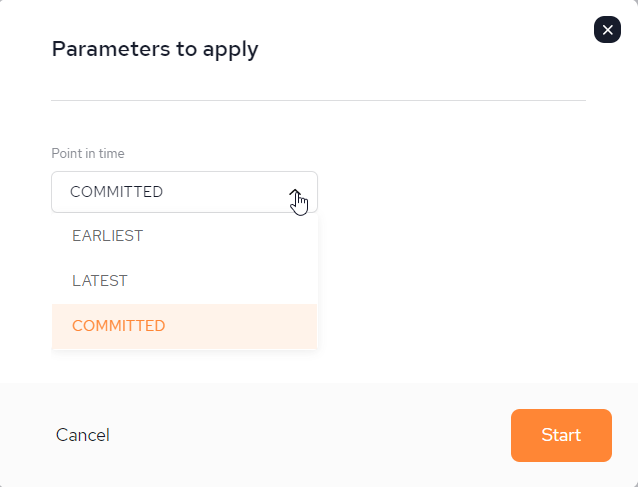
Point in time options:
-
EARLIEST - Start a pipeline from the beginning, means whatever is available for consumption in our queue , start processing from the beginning.
-
LATEST - Start a pipeline from now , start consuming and processing data from a current message regardless last stored checkpoint.
-
COMMITTED - Start a pipeline from the last successful processed message (kind of a checkpoint).
Once the pipeline has been started, it cannot be edited. To make changes it is necessary to delete the pipeline (from the main data Pipeline screen) and build it again.
After you have added the tables and saved the pipeline, save the changes and press Start to start the pipeline.
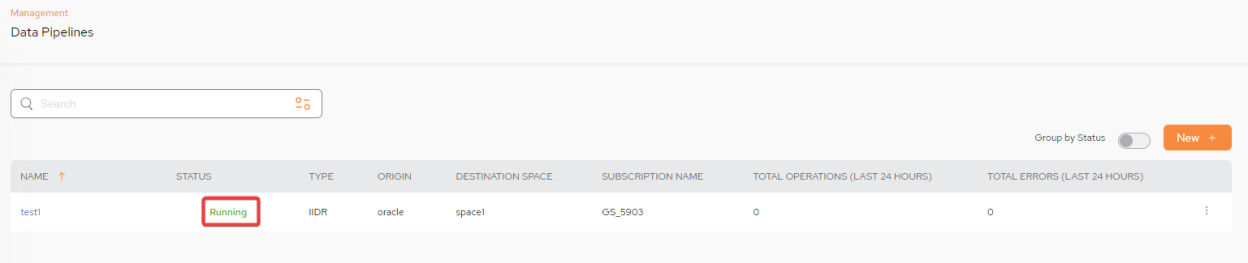
The pipeline will show as Started in the Data Pipeline Status screen and Active in the Spaces screen.
Once the pipeline has been started, the Status will be displayed as Running:
Deleting a Pipeline
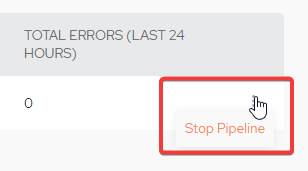
Delete the Pipeline from a Running status by clicking Stop Pipeline from the main screen after clicking the kebab menu (vertical three-dot menu) on the far right:
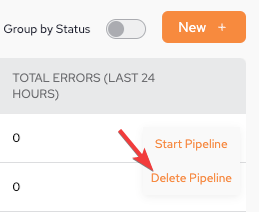
Then, once the Pipeline is in Inactive status, click Delete Pipeline.
Alternatively, click on the Pipeline name and from the top of the next menu perform and after clicking the kebab menu (vertical three-dot menu) on the far right, click Delete Pipeline:
If you have not started the Pipeline yet (status = Inactive), you will have the option to Start or Delete the Pipeline:
If you decide to delete a pipeline the following confirmation pop-up screen will be displayed before the action can be completed:
Once Approve has been clicked, the pipeline is deleted immediately and cannot be restored.