Integrating GigaSpaces with Tableau Desktop on Windows
This is supported by JDBC![]() Java DataBase Connectivity.
This is an application programming interface (API) for the Java programming language, which defines how a client may access a database. V3
Java DataBase Connectivity.
This is an application programming interface (API) for the Java programming language, which defines how a client may access a database. V3
This topic describes how to integrate Tableau Desktop with GigaSpaces using the GigaSpaces ODBC![]() Microsoft Open DataBase Connectivity.
This interface is a C programming language interface that makes it possible for applications to access data from a variety of database management systems (DBMSs). ODBC is a low-level, high-performance interface that is designed specifically for relational data stores. connector to retrieve data for visualization and business intelligence needs.
Microsoft Open DataBase Connectivity.
This interface is a C programming language interface that makes it possible for applications to access data from a variety of database management systems (DBMSs). ODBC is a low-level, high-performance interface that is designed specifically for relational data stores. connector to retrieve data for visualization and business intelligence needs.
Prerequisites
Run Gigaspaces, deploy Space![]() Where GigaSpaces data is stored. It is the logical cache that holds data objects in memory and might also hold them in layered in tiering. Data is hosted from multiple SoRs, consolidated as a unified data model. and deploy data gateway.
Where GigaSpaces data is stored. It is the logical cache that holds data objects in memory and might also hold them in layered in tiering. Data is hosted from multiple SoRs, consolidated as a unified data model. and deploy data gateway.
Steps to Installation
1. Download and Install Tableau Desktop
Install Tableau using this link.
2. Create an ODBC Connection to Tableau Using Data Gateway
-
Install ODBC Driver for PostgreSQL to be used by Tableau.
-
Open Tableau desktop.
-
In the left panel where the title is "To a Server", choose "More..." and select "Other Databases (ODBC).
-
In the dialog, choose "Driver" and then choose “PostgreSQL Unicode(x64)”
-
Click Connect
-
The PostgreSQL Connection dialog box will appear as follows:
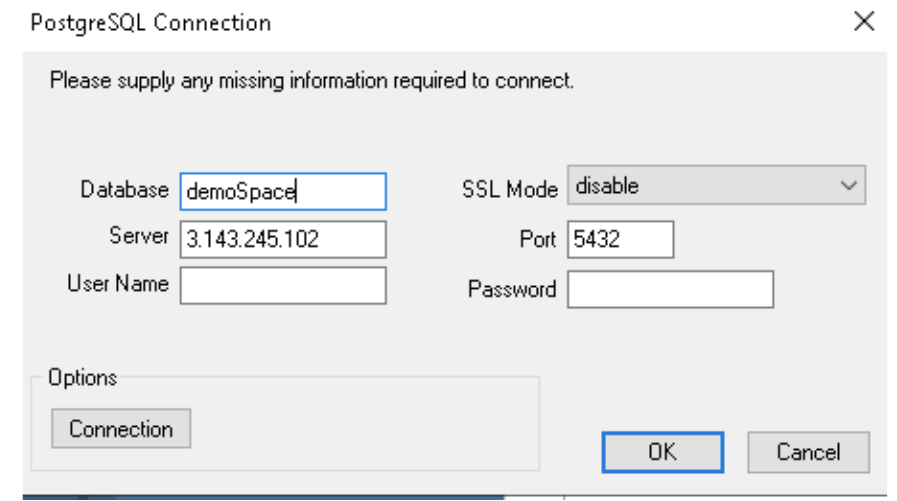
In the Connection dialog shown above, type the following:
Database: <space-name> for example: mySpace
Server: <gateway-endpoint-address> for example: localhost. In Kubernetes![]() An open-source container orchestration system for automating software deployment, scaling, and management of containerized applications., it will be the LoadBalancer endpoint
An open-source container orchestration system for automating software deployment, scaling, and management of containerized applications., it will be the LoadBalancer endpoint
Port: <data-gateway-bind-port> default: 5432
Choose SSL Mode: disable
Click OK
Click Sign In
To see your schema on the left panel where the title is "Schema", look for the plus ("+") icon. Enter schema name as “public”, then click on the plus icon.
Perform the same steps shown above to add tables.
3. Set Up the Tableau Server
Select an AWS Instance Type and Size for Tableau Server using this link.
Download and Install Tableau Server using this link.
Initialize Tableau Server:
-
Use this link to begin initialization.
-
Use this link to check status after initialization.
-
Use this link to log in to the Tableau server manager web interface, using these credentials:
-
username: <ec2-instance-username> (e.g. Administrator)
-
password: password: <ec2-instance-password> (getting from connect)
-
Sign in to Table server from Table Desktop:
-
Go to Tableau desktop
-
From Menu click Server and enter the Tableau server dns name:
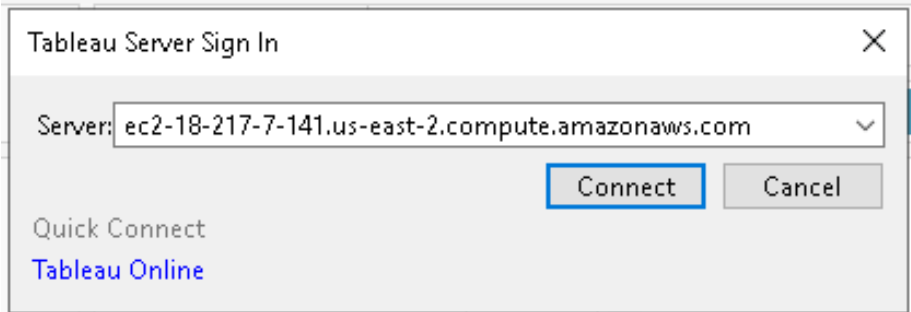
It will redirect you to the web browser and ask for username and password (that you created as a part of Tableau server installation steps).
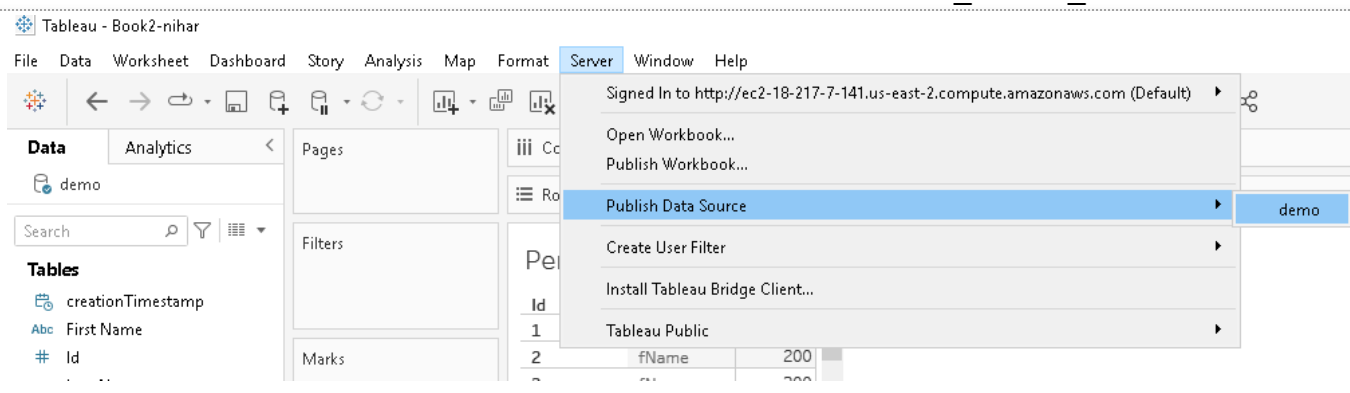
4. Publish Data Source
-
Go to Tableau desktop.
-
From Menu click on server -> Publish Data Source -> <data_source_name>
-
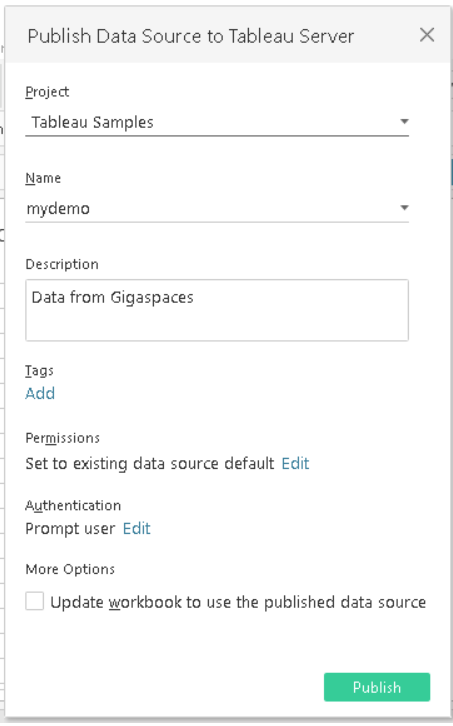
Enter name and description for this data source.
-
Also select project location on server (this will help you search it on Tableau Server):
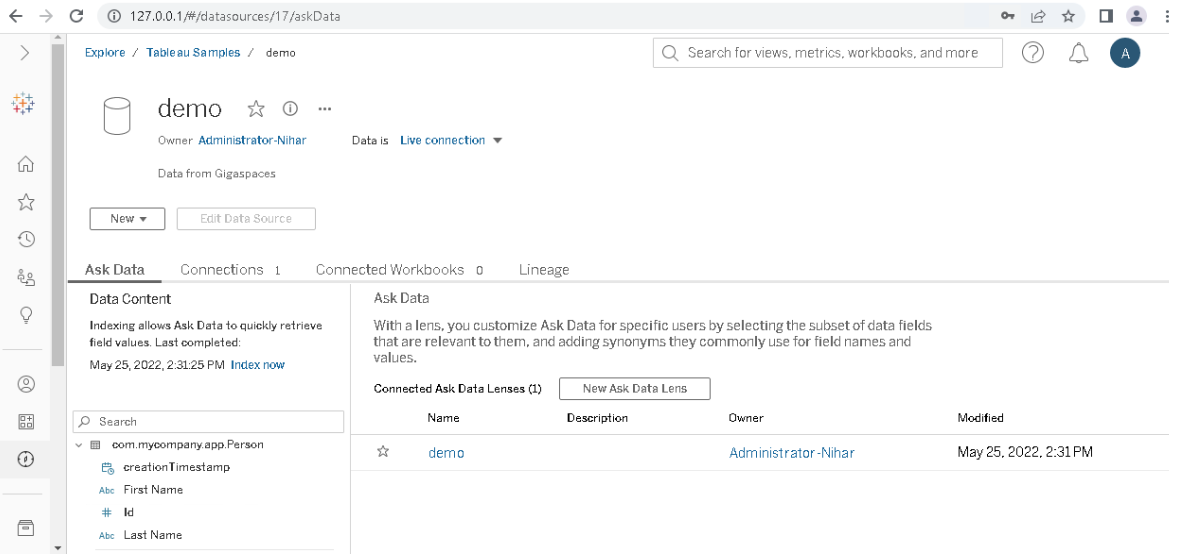
5. Verify Data Source on Tableau Server
-
Open Tableau web interface:
-
https://127.0.0.1:8850/
-
username: <ec2-instance-username> (e.g Administrator)
-
password: <ec2-instance-password> (getting from connect)
-
-
Go to Explore and go inside the project directory that you chose when publishing the data source from Tableau Desktop (e.g. Tableau Samples):
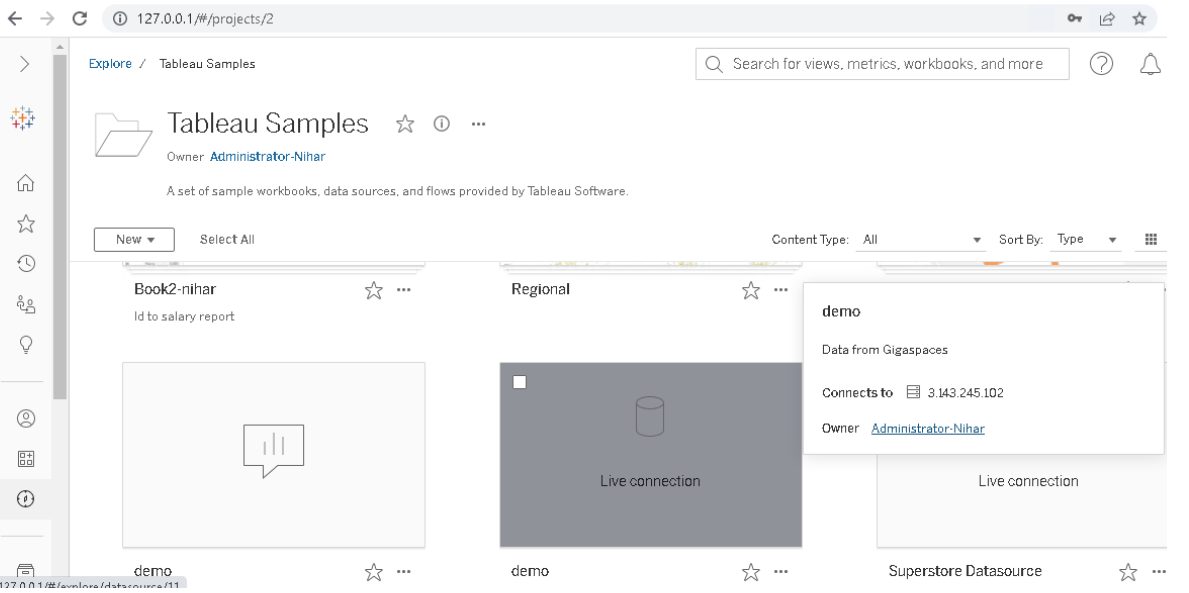
When you click on Demo it will open and fetch schema from the data source (Gigaspaces).
-
Once you see Data in “Live Connection” mode then it confirmed that Tableserver made a successful connection to Gigaspaces data source:
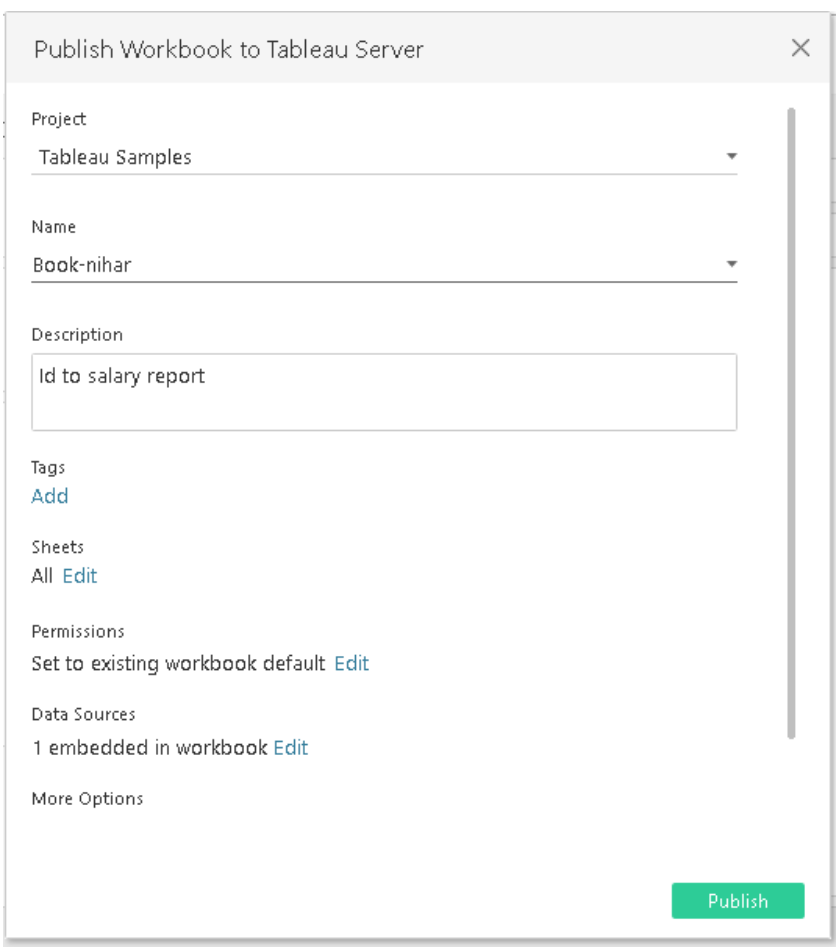
6. Publish Workbook From Tableau Desktop to Tableau Server
-
Go to Tableau desktop.
-
From Menu click on server -> Publish Workbook.
-
Enter name and description for this data source.
-
Also select project location on server (this will help you search it on Tableau Server):
7. Verify Workbook on Tableau Server
-
Log in to Tableau server.
-
Go to explore and search workbook in selected project directory.
-
Click to display records from the workbook:
