XAP Integration WebSphere Dynamic Cache
| Author | XAP Version | Last Updated | Reference | Download |
|---|---|---|---|---|
| Allen Terleto | 9.7 | September 2014 |
Introduction
IBM provides an embedded cache called Dynamic Cache (DynaCache) as a feature of their WebSphere Application Server. By utilizing a caching-strategy applications can bypass the latency-costs of processing web services, business logic, data access, network & IO overhead, etc. DynaCache is the underlying caching strategy for many of the WebSphere-based family of products such as:
• WebSphere Commerce Server
• WebSphere Portal Server
• WebSphere Enterprise Service Bus
• Business Process Manager
• WebSphere Application Server
WebSphere allows administrators to configure the Dynamic Cache Service to use GigaSpace’s XAP IMDG as its alternative Cache Provider instead of the default DynaCache. GigaSpaces XAP enhances WebSphere’s caching strategy by providing:
• Elastic Scalability
• High availability
• Transactional Support
• Event Processing
• Persistency
• Filtering
• Big Data Integration
• Security
• Enhanced Monitoring Capabilities
• Distributed and Centralized System of Record
• HTTP Session Sharing (across various Web Containers)
• Replication across multiple Data Centers
• Other XAP Features…
GigaSpace’s XAP features increase the capabilities of WebSphere’s DynaCache beyond the limitations of the default dynamic cache engine and data replication service. While DynaCache can only provide caching across replicated and synchronized WebSphere application servers, GigaSpaces XAP provides a truly distributed and remote caching architecture. WebSphere administrators no longer need to worry about data loss due to cluster failures, redeployments and upgrades. Additionally, scaling the Data Cache Tier will no longer be a function of adding additional WebSphere Application Server instances.
If you are currently using DynaCache, you can simply use the administrative console or wsadmin commands to replace WebSphere’s default cache provider with GigaSpace’s XAP. You do not have to make any changes to the code interacting with the default dynamic cache or caching data model. In the Demo: Step-By-Step Walkthrough section we will show how to switch to GigaSpace’s XAP IMDG in just a few configuration changes.
Please read the GigaSpaces XAP Integration with IBM Dynamic Cache document for a detailed walk through and additional introduction information.
Demo Requirements
The following technology is required to run this demo
An Application Server from the WebSphere Family
• WebSphere Application Server 7+
• WebSphere Enterprise Service Bus
• IBM Integration Bus
• IBM WebSphere Process Server
An IBM IDE
• Rational Application Developer
• IBM Integration Designer
GigaSpaces Software
• GigaSpaces XAP Premium Edition 9+
• GigaSpacesDynaCacheIntegration.jar
• GigaDynaCacheTestWeb.war
Run Demo with Dynamic Cache as WebSphere Caching Provider
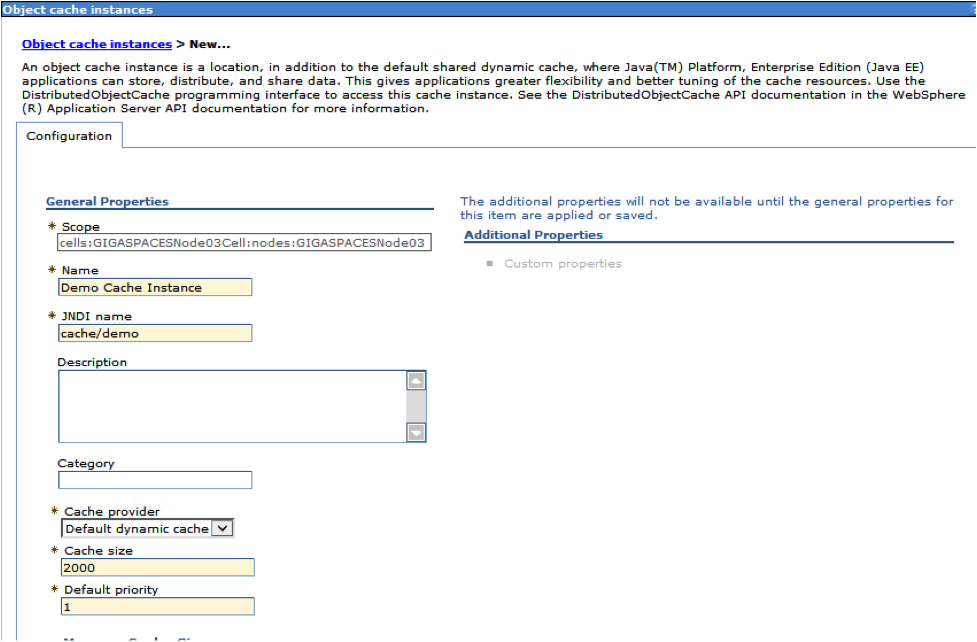
Step 1: Enter the name and JNDI specified below
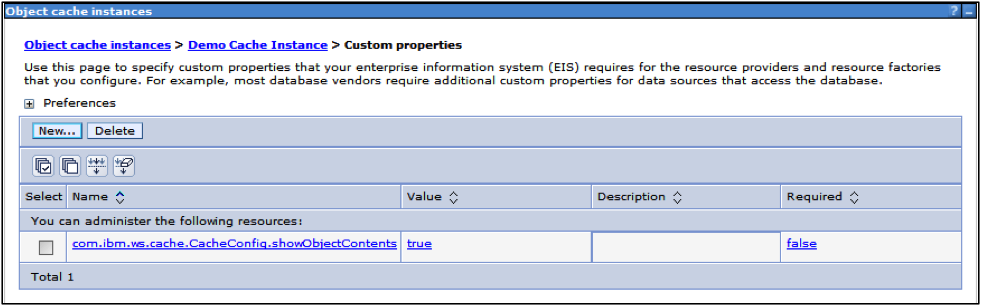
Step 2: Add new property “com.ibm.ws.cache.CacheConfig.showObjectContents=true”
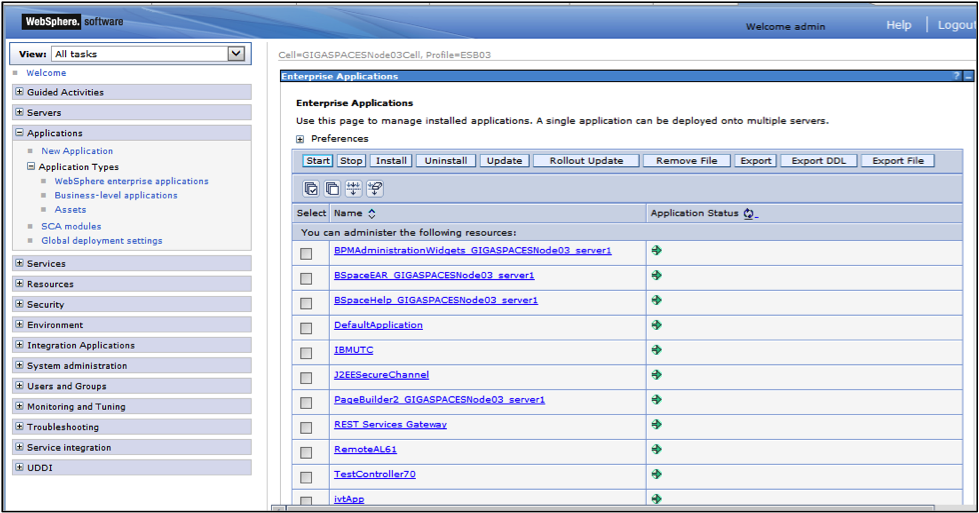
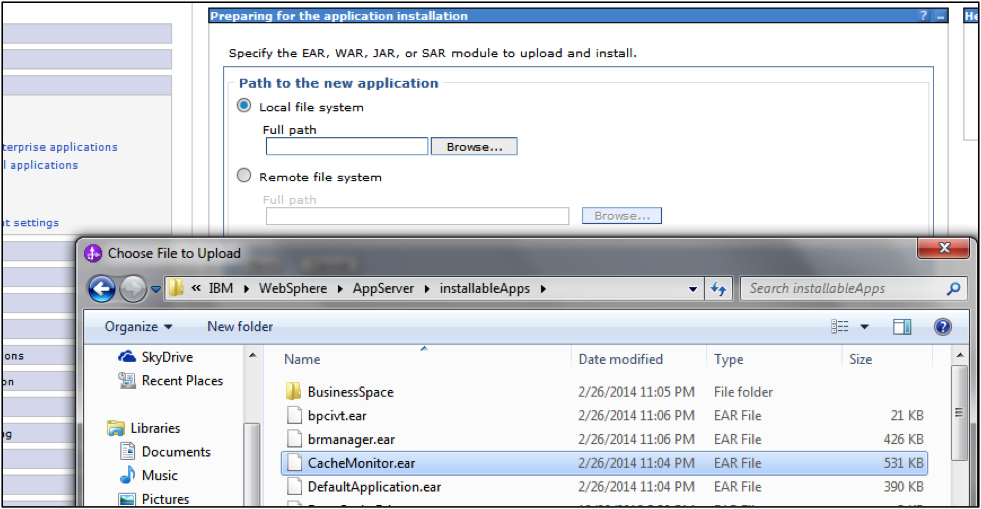
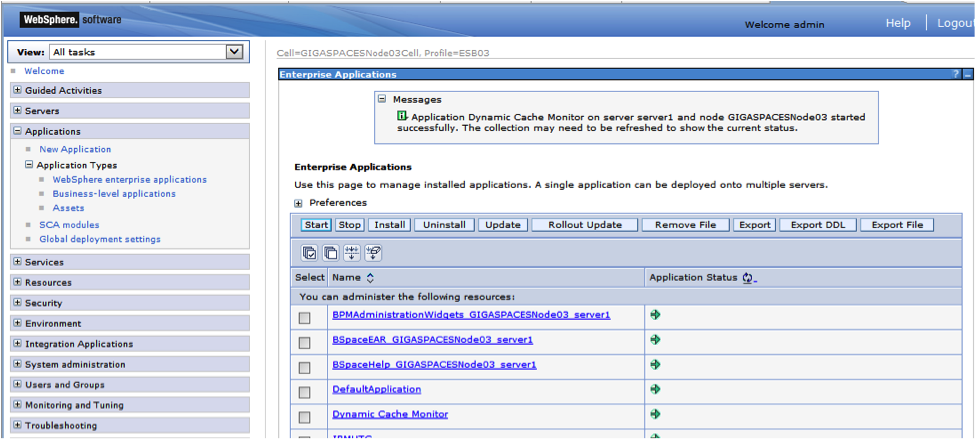
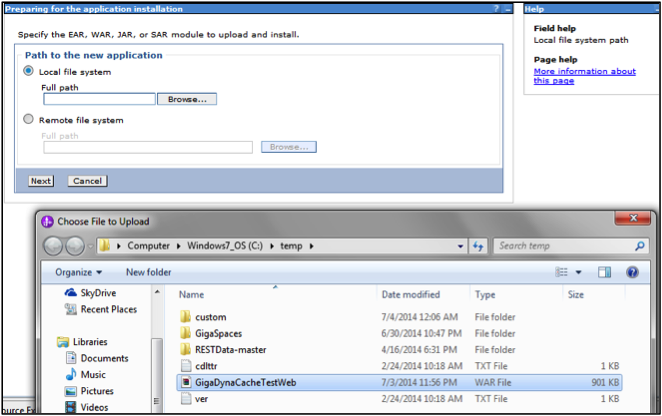
Step 1: Expand “Applications” -> “Application Types” and Click on “Websphere enterprise applications”. On the “Enterprise Applications” screen, click the “Install” button
Step 2: Browse into your Websphere installation /AppServer/installableApps, Click on CacheMonitor.ear
Step 3: Download IBM Extended Cache Monitor from IBM’s offical site. Extract the contents of cachemonitor7_package into any temp directory or onto your desktop

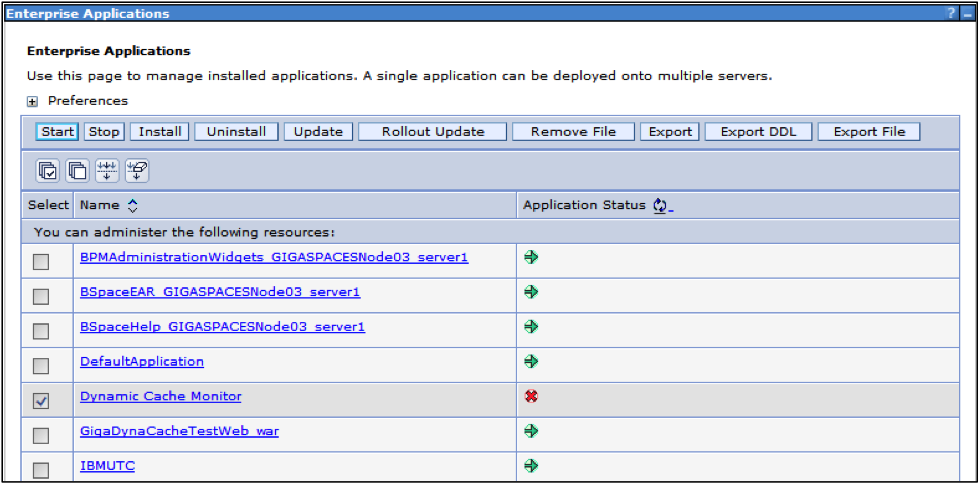
Step 4: In your admin console, click the checkbox near “Dynamic Cache Monitor” and Click “Update”
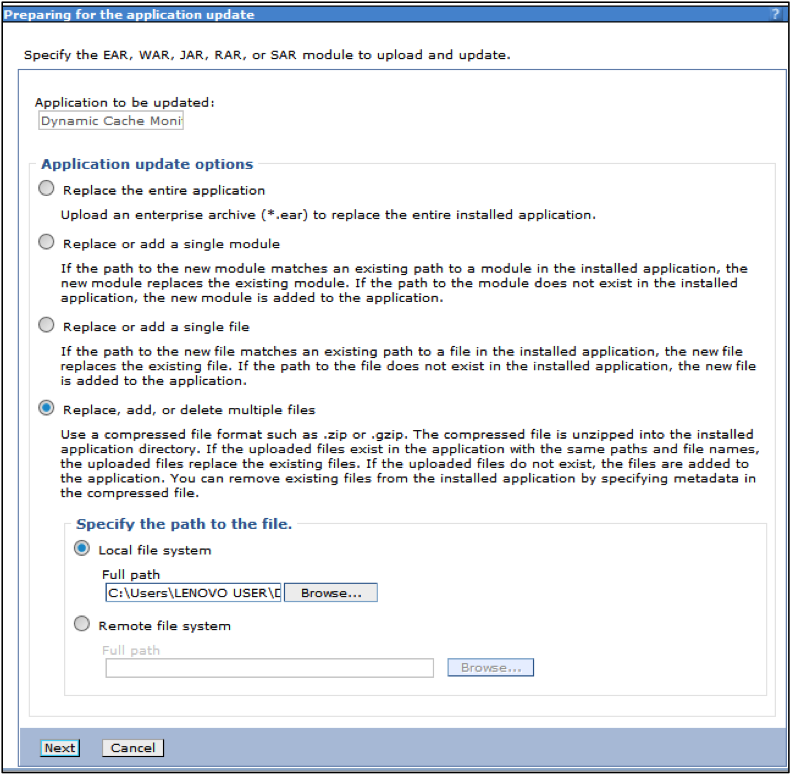
Step 5: Choose “Replace, add, or delete multiple files” and browse for “cachemonitor7_update.zip”
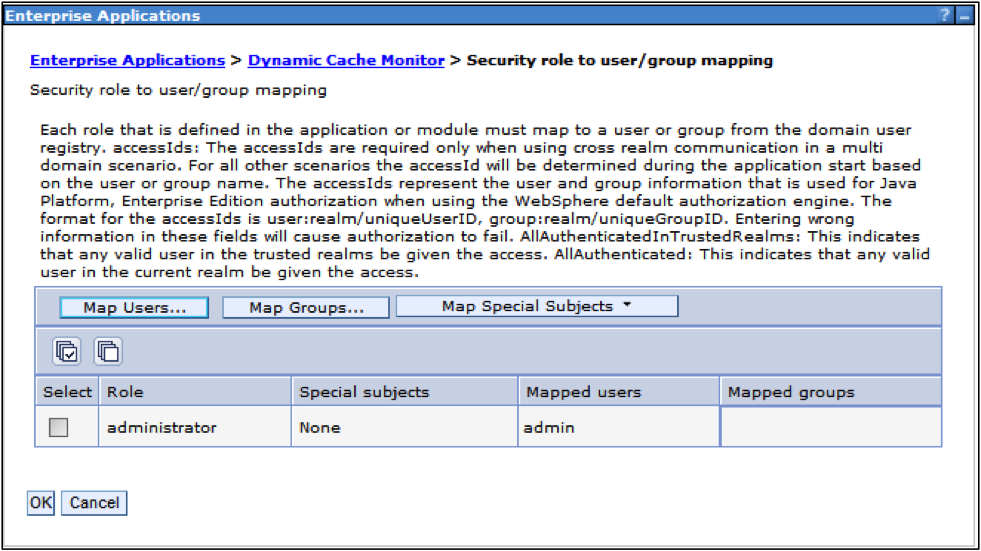
Step 1: In the “Enterprise Applications” screen, click on the link named “Dynamic Cache Monitor”. Click Search. Find your User ID in the Available List, click on it and then click on the Right arrow
Step 2: Open an Internet Browser and go to http://localhost:9082/cachemonitor
Enter your User ID and Password then Click OK.
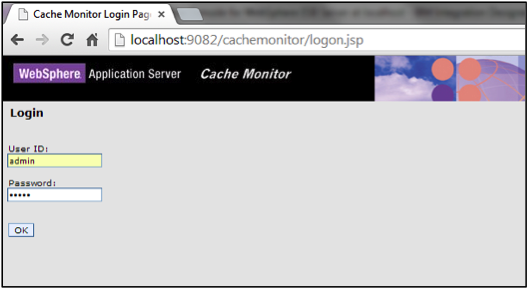
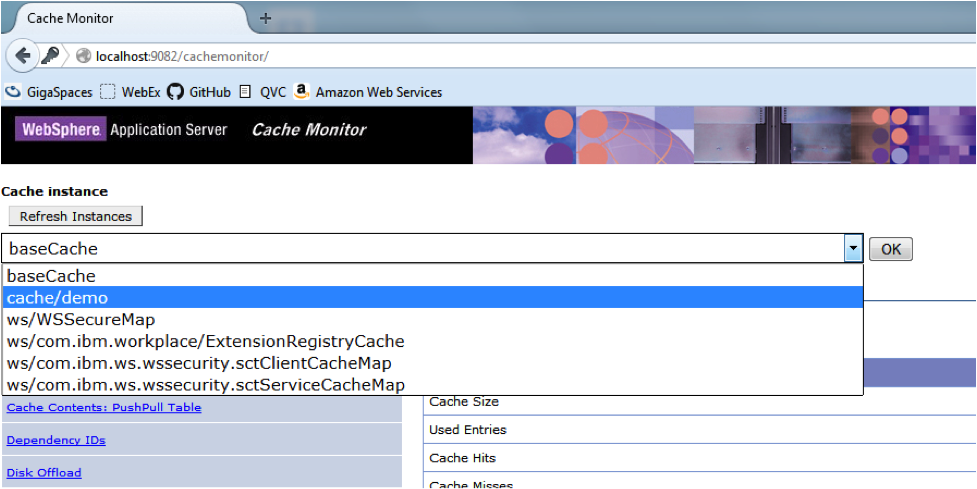
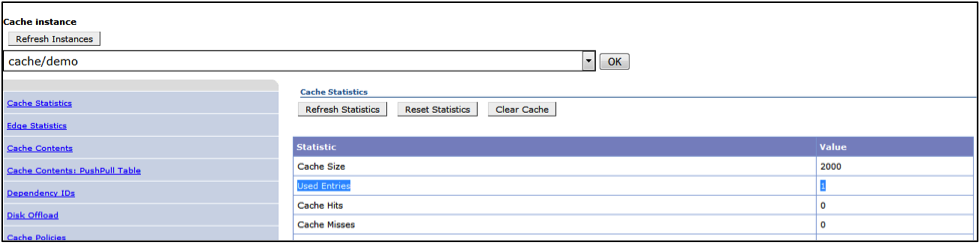
Step 3: Find the Object Cache you created earlier “cache/demo” and Click OK.
Step 1: Expand “Applications” -> “Application Types” and Click on “Websphere enterprise applications”. On the “Enterprise Applications” screen, click the “Install” button
Step 2: Browse for the “GigaDynaCacheTestWeb.war” in your local directory and Click “Next”. Continue to Click “Next” until the summary page. Then click “Finish” and “Save”
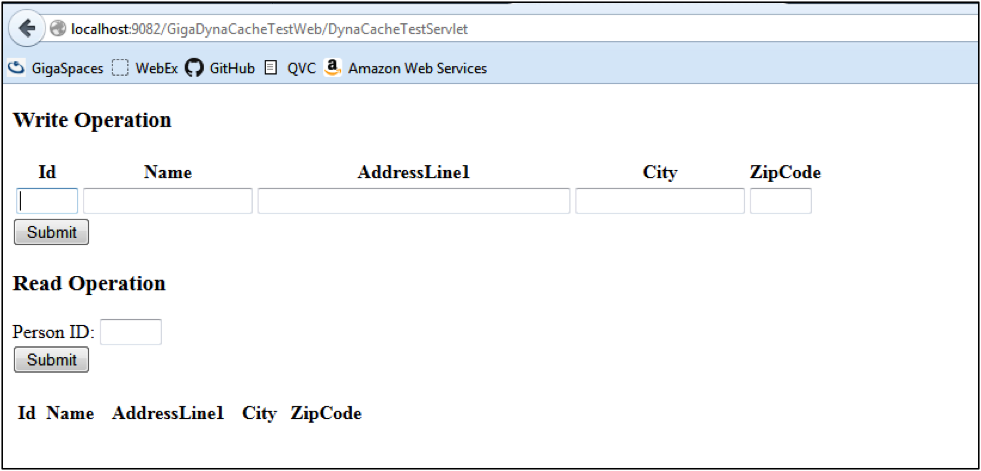
Step 1: Open an Internet Browser and go to http://localhost:9082/GigaDynaCacheTestWeb/DynaCacheTestServlet

Step 2: Go back to the Cache Monitor Page and click “Refresh Statistics”
Run Demo with GigaSpaces’ XAP as WebSphere Caching Provider
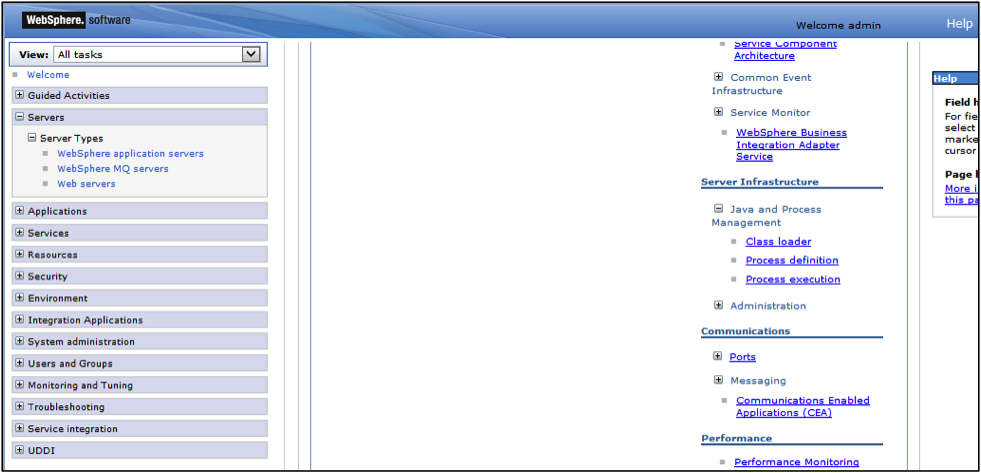
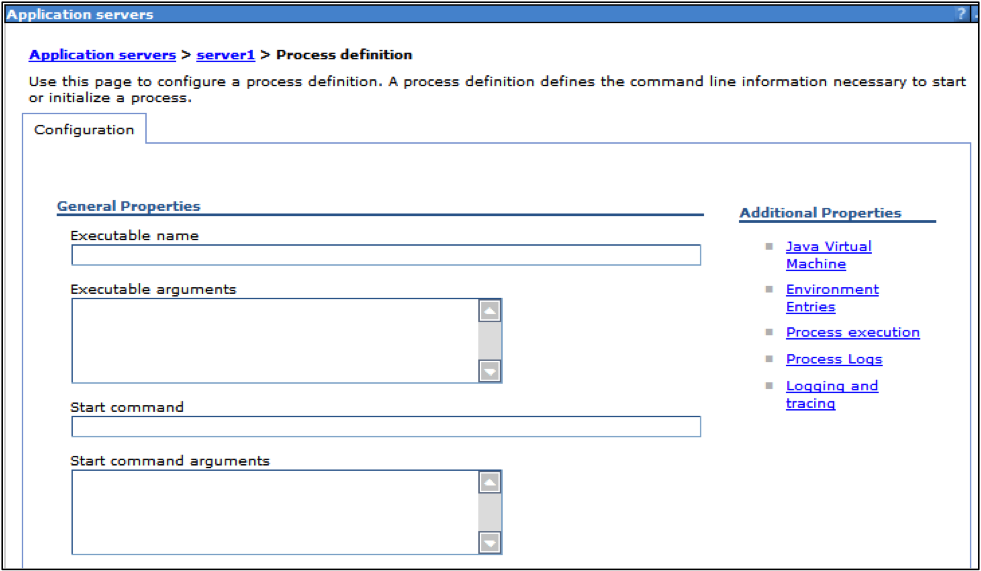
Step 1: Scroll down to find the Server Infrastructure Section. Expand “Java and Process Management”. Then click on “Process definition”
Step 2: Click on “Java Virtual Machine”
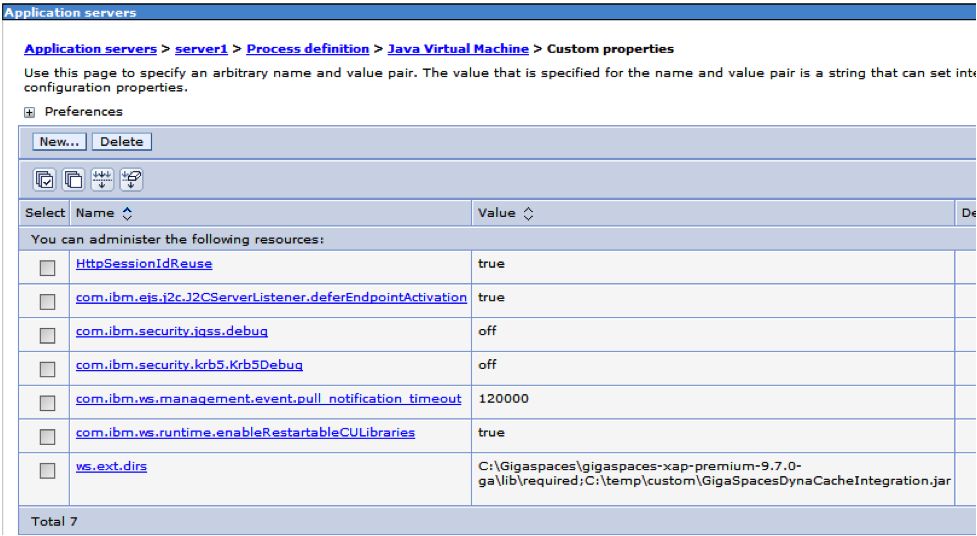
Step 3: Add a new custom properties pointing to the directory with the XAP jars “ws.ext.dirs= C:\Gigaspaces\gigaspaces-xap-premium-9.7.0-ga\lib\required;C:\temp\custom\GigaSpacesDynaCacheIntegration.jar”
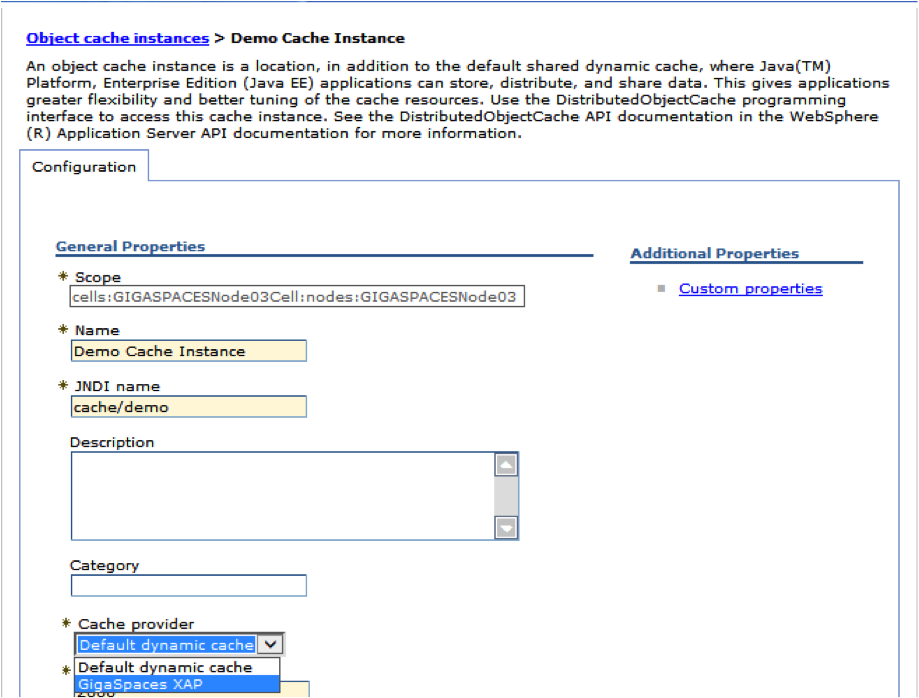
Step 1: Choose “GigaSpaces XAP” from the dropdown choices of “Cache provider”. Click “OK” and “Save”
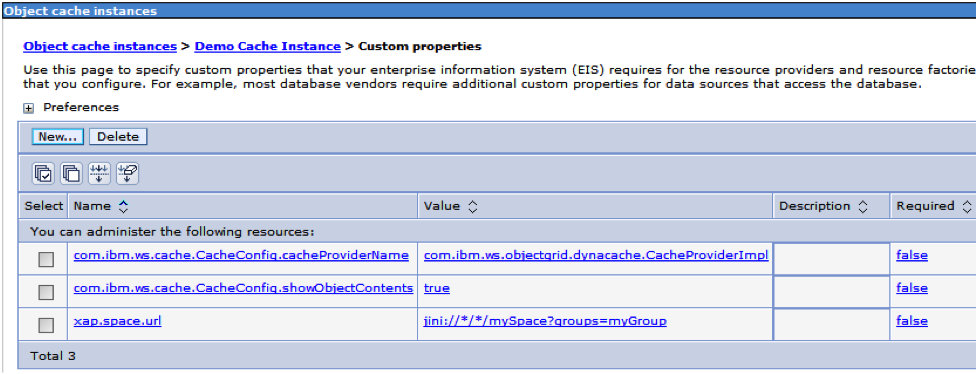
Step 2: Click on custom properties and add the following:
• com.ibm.ws.cache.CacheConfig.cacheProviderName=com.ibm.ws.objectgrid.dynacache.CacheProviderImpl
• xap.space.url=jini:////mySpace?groups=myGroup
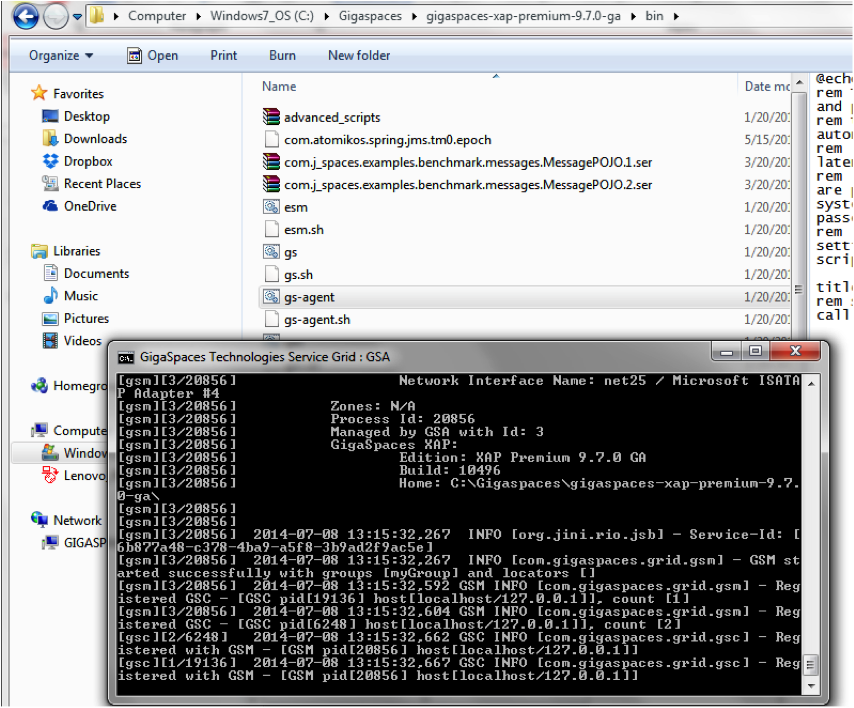
Step 1: Run gs-agent from your XAP bin directory
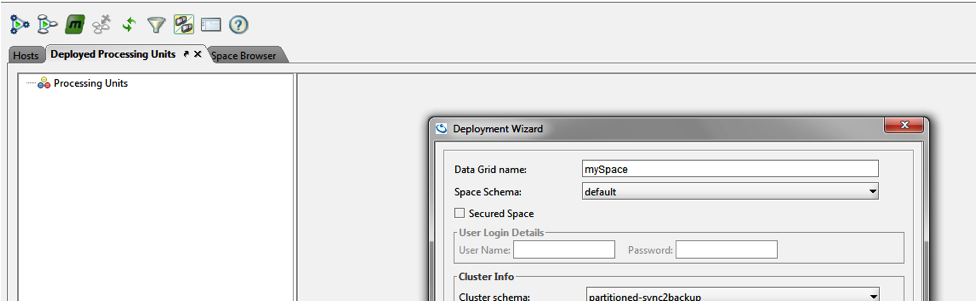
Step 2: Run gs-ui from the same directory

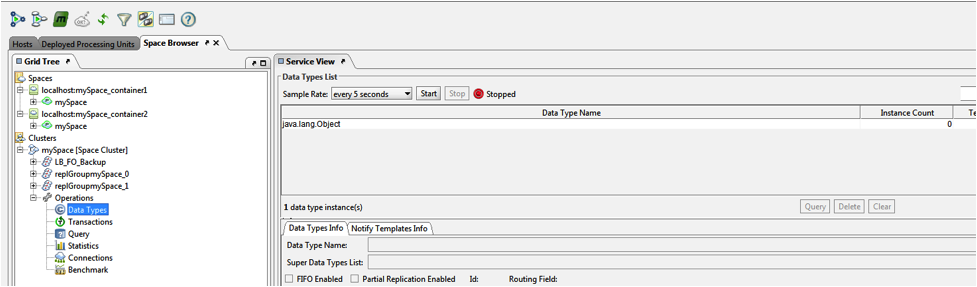
Step 3: Deploy a new Data Grid called “mySpace” with any SLA
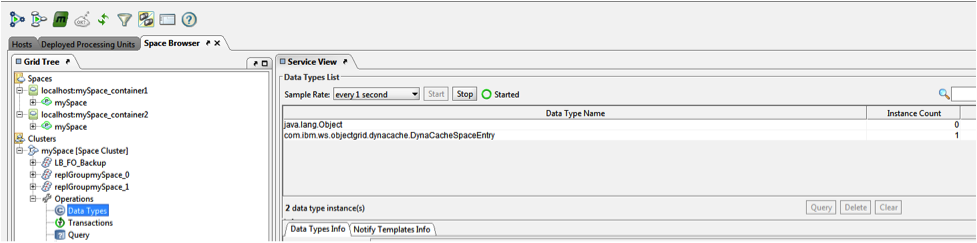
Step 4: Confirm that there are no entries in the cache using the “Space Browser” tab
Step 1: Open an Internet Browser and go to http://localhost:9082/GigaDynaCacheTestWeb/DynaCacheTestServlet
Step 2: Check the gs-ui to confirm that a new entry is in the Space